Lexmark X7350 User's Guide - Page 55
Setting up Quick Dial buttons and Speed Dial numbers
 |
View all Lexmark X7350 manuals
Add to My Manuals
Save this manual to your list of manuals |
Page 55 highlights
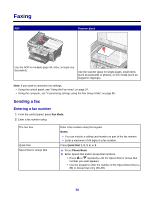
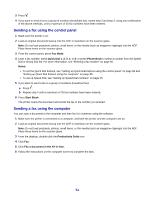
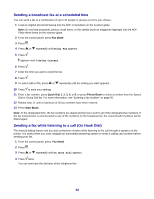
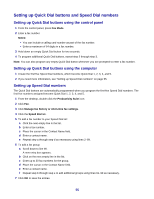
Setting up Quick Dial buttons and Speed Dial numbers Setting up Quick Dial buttons using the control panel 1 From the control panel, press Fax Mode. 2 Enter a fax number. Notes: • You can include a calling card number as part of the fax number. • Enter a maximum of 64 digits in a fax number. 3 Hold down an empty Quick Dial button for two seconds. 4 To program additional Quick Dial buttons, repeat step 2 through step 3. Note: You can also program any empty Quick Dial button whenever you are prompted to enter a fax number. Setting up Quick Dial buttons using the computer 1 Create the first five Speed Dial numbers, which become Quick Dial 1, 2, 3, 4, and 5. 2 If you need more information, see "Setting up Speed Dial numbers" on page 55. Setting up Speed Dial numbers The Quick Dial buttons are automatically programmed when you program the first five Speed Dial numbers. The first five numbers assigned become Quick Dial 1, 2, 3, 4, and 5. 1 From the desktop, double-click the Productivity Suite icon. 2 Click Fax. 3 Click Manage fax history or All-In-One fax settings. 4 Click the Speed Dial tab. 5 To add a fax number to your Speed Dial list: a Click the next empty line in the list. b Enter a fax number. c Place the cursor in the Contact Name field. d Enter a contact name. e Repeat step a through step d as necessary using lines 2-89. 6 To add a fax group: a Scroll down to line 90. A new entry box appears. b Click on the next empty line in the list. c Enter up to 30 fax numbers for the group. d Place the cursor in the Contact Name field. e Enter a contact name. f Repeat step b through step e to add additional groups using lines 91-99 as necessary. 7 Click OK to save the entries. 55
-
 1
1 -
2
-
3
-
4
-
5
-
6
-
7
-
8
-
9
-
10
-
11
-
12
-
13
-
14
-
15
-
16
-
17
-
18
-
19
-
20
-
21
-
22
-
23
-
24
-
25
-
26
-
27
-
28
-
29
-
30
-
31
-
32
-
33
-
34
-
35
-
36
-
37
-
38
-
39
-
40
-
41
-
42
-
43
-
44
-
45
-
46
-
47
-
48
-
49
-
 50
50 -
 51
51 -
 52
52 -
 53
53 -
 54
54 -
 55
55 -
 56
56 -
 57
57 -
 58
58 -
 59
59 -
 60
60 -
61
-
62
-
63
-
64
-
65
-
66
-
67
-
68
-
69
-
70
-
71
-
72
-
73
-
74
-
75
-
76
-
77
-
78
-
79
-
80
-
81
-
82
-
83
-
84
-
85
-
86
-
87
-
88
-
89
-
90
-
91
-
92
-
93
-
94
-
95
-
96
-
97
-
98
-
99
-
100
-
101
-
102
-
103
-
104
-
105
-
106
-
107
-
108
-
109
-
110
-
111
-
112
 |
 |
