Lexmark Z65n User's Guide (1.06 MB) - Page 11
Configuring a network printer (Windows
 |
View all Lexmark Z65n manuals
Add to My Manuals
Save this manual to your list of manuals |
Page 11 highlights
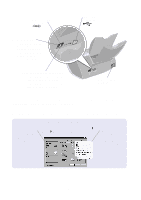
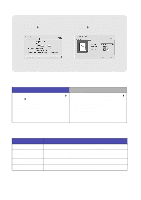
Configuring a network printer (Windows) The printer software supports automatic network printer configuration in Universal Plug and Play (UPnP) and Internet Connection Sharing (ICS) network environments using TCP/IP. UPnP network environments provide automatic private IP addresses in the 169.254.x.x range. ICS network environments provide automatic private IP addresses in the 192.168.x.x range. 1 Read and follow the "Network printing checklist" on page 5. 2 Insert the printer software CD into one of the network computers. 3 When the Lexmark printer software installation screen appears, click Install Now. If you see: This happened: Now: A screen prompting you to align the cartridges The printer software automatically found and configured your printer on your network. Go to step 4 on page 8 to continue the printer software installation. More than one Lexmark Z65n listed on the Printer Installation screen The printer software found more than one Lexmark Z65n printer on your network. 1 Select your printer port from the list. You will need to know the MAC address to select the correct printer port. For help, see "Finding the MAC address of your printer" on page 6. 2 Click Next. 3 Go to step 4 on page 8 to continue the printer software installation. To install other listed printers, see "Installing additional listed printers" on page 10. Search Results: No Printer Attached screen The printer software could not find your network printer. See "Manually configuring the network printer" on page 8. 7
-
 1
1 -
2
-
3
-
4
-
5
-
 6
6 -
 7
7 -
 8
8 -
 9
9 -
 10
10 -
 11
11 -
 12
12 -
 13
13 -
 14
14 -
 15
15 -
 16
16 -
17
-
18
-
19
-
20
-
21
-
22
-
23
-
24
-
25
-
26
-
27
-
28
-
29
-
30
-
31
-
32
-
33
-
34
-
35
-
36
-
37
-
38
-
39
-
40
-
41
-
42
-
43
-
44
-
45
-
46
-
47
-
48
-
49
-
50
-
51
-
52
 |
 |
