Lexmark Z65n User's Guide (1.06 MB) - Page 25
Connecting other computers on the same subnet to the printer, network computer
 |
View all Lexmark Z65n manuals
Add to My Manuals
Save this manual to your list of manuals |
Page 25 highlights
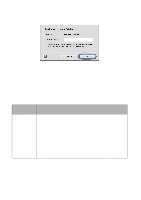
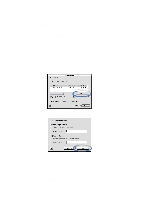
4 From the Printer Selection screen, select the remote printer from the list. 5 Click Select to continue the printer software installation. 6 Follow the steps for your operating system: Mac OS 8.6 to 9.2 Mac OS X version 10.0.3 to 10.1 When the printer software prompts you, follow the directions on the screen to install and align the cartridges. 1 From the Printer Selection screen, click Open Print Center. The Printer List appears. 2 If your printer is listed, continue with step 3. If your printer is not listed, click Add Printer, and then select Lexmark Inkjet Networking from the pop-up menu. Select your printer from the list, and then click Add. 3 Click the red close button. 4 From the Printer Selection screen, click Continue. 5 Follow the directions on the screen to install and align the cartridges. 7 From the Printer Setup is Complete screen, click Test Page to print a test page on the network printer. 8 Click Finished to complete the printer software installation. Connecting other computers on the same subnet to the printer 1 Make sure you have successfully completed the steps in "Configuring a network printer (Macintosh)" on page 14 or "Manually configuring a single unconfigured printer" on page 17 to set up your printer on the first network computer. 2 Complete the following set of steps for each network computer you want to print to your printer. a Insert the printer software CD into the CD-ROM drive of one of the network computers. If you are using Mac OS X version 10.0.3 to 10.1, double-click the installer icon when the CD contents are displayed. 21
-
 1
1 -
2
-
3
-
4
-
5
-
6
-
7
-
8
-
9
-
10
-
11
-
12
-
13
-
14
-
15
-
16
-
17
-
18
-
19
-
 20
20 -
 21
21 -
 22
22 -
 23
23 -
 24
24 -
 25
25 -
 26
26 -
 27
27 -
 28
28 -
 29
29 -
 30
30 -
31
-
32
-
33
-
34
-
35
-
36
-
37
-
38
-
39
-
40
-
41
-
42
-
43
-
44
-
45
-
46
-
47
-
48
-
49
-
50
-
51
-
52
 |
 |
