Lexmark Z65n User's Guide (1.06 MB) - Page 18
Configuring a network printer (Macintosh - mac os
 |
View all Lexmark Z65n manuals
Add to My Manuals
Save this manual to your list of manuals |
Page 18 highlights
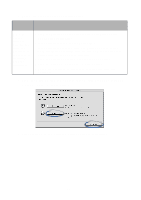
Configuring a network printer (Macintosh) TCP/IP must be active and running on all the network computers you want to print to the network printer. In Macintosh network environments using TCP/IP, the printer software supports automatic assignment of private IP addresses in the following ranges: • 169.254.0.0 through 169.254.255.255 • 192.168.0.0 through 192.168.255.255 • 10.0.0.0 through 10.255.255.255 • 172.16.0.0 through 172.31.255.255 1 Read and follow the "Network printing checklist" on page 5. 2 Insert the printer software CD into the CD-ROM drive of one of the network computers. If you are using Mac OS X version 10.0.3 to 10.1, double-click the Installer icon when the CD contents are displayed. 3 When the Lexmark printer software installation screen appears, click Install and Agree. If you see: This happened: Now: When adding a single printer: Cartridges Changed screen (Mac OS 8.6 to 9.2) or Printer Selection screen (Mac OS X) The printer software automatically found and configured your printer on your network. Go to step 4 on page 16 to continue the printer software installation. New Network Printer Found screen The printer software found one new printer but could not automatically configure it. See "Manually configuring a single unconfigured printer" on page 17. 14
-
 1
1 -
2
-
3
-
4
-
5
-
6
-
7
-
8
-
9
-
10
-
11
-
12
-
 13
13 -
 14
14 -
 15
15 -
 16
16 -
 17
17 -
 18
18 -
 19
19 -
 20
20 -
 21
21 -
 22
22 -
 23
23 -
24
-
25
-
26
-
27
-
28
-
29
-
30
-
31
-
32
-
33
-
34
-
35
-
36
-
37
-
38
-
39
-
40
-
41
-
42
-
43
-
44
-
45
-
46
-
47
-
48
-
49
-
50
-
51
-
52
 |
 |
