Lexmark Z65n User's Guide (1.06 MB) - Page 28
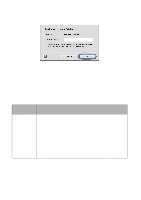
Make sure the paper tray 1 button is selected., and print your document. - z65 windows 7
 |
View all Lexmark Z65n manuals
Add to My Manuals
Save this manual to your list of manuals |
Page 28 highlights
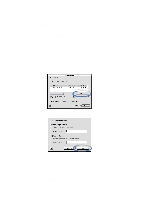
- Make sure you do not push the paper too far into the printer. For example, A4 and letter size paper should extend beyond the top of paper tray 1. 3 Make sure the paper tray 1 button is selected. Paper tray 1 button 4 Follow the steps for your operating system to open the printer software and print your document. Windows Mac OS 8.6 to 9.2 Mac OS X version 10.0.3 to 10.1 1 With your document open, click File Print Properties or Preferences. 2 From the Quality/Speed tab, select a print quality. 3 Make sure Paper Source is set to Printer Setting or Tray 1 (Front). Note: Some software applications may override your paper tray selection. 4 From the Paper Setup tab, make sure the Paper Type is set to Automatic (if you want the paper type to be detected automatically) or to the paper type for your document. 5 Click OK. 6 Click OK or Print. 1 With your document open, click File Print. 2 Make sure Paper Source is set to Printer Setting or Tray 1 (Front). 1 With your document open, click File Print. 2 From the Printer pop-up menu, choose Lexmark Z65. Note: Some software 3 From the pop-up applications may override menu, choose Quality your paper tray selection. & Media. 3 From the pop-up menu, choose Paper Type/ Quality. 4 Select a print quality. 5 Make sure the Paper Type is set to Automatic (if you want the paper type to be detected automatically) or to the paper type for your document. 6 Click Print. 4 Select a print quality. 5 From the Tray 1 (Front) pop-up menu, select Automatic (if you want the paper type to be detected automatically) or the paper type for your document. Note: Some software applications may override your paper tray selection. 6 Click Print. 24
-
 1
1 -
2
-
3
-
4
-
5
-
6
-
7
-
8
-
9
-
10
-
11
-
12
-
13
-
14
-
15
-
16
-
17
-
18
-
19
-
20
-
21
-
22
-
 23
23 -
 24
24 -
 25
25 -
 26
26 -
 27
27 -
 28
28 -
 29
29 -
 30
30 -
 31
31 -
 32
32 -
 33
33 -
34
-
35
-
36
-
37
-
38
-
39
-
40
-
41
-
42
-
43
-
44
-
45
-
46
-
47
-
48
-
49
-
50
-
51
-
52
 |
 |
