Lexmark Z82 SmarThru 2 Guide (2.4 MB)
Lexmark Z82 Manual
 |
View all Lexmark Z82 manuals
Add to My Manuals
Save this manual to your list of manuals |
Lexmark Z82 manual content summary:
- Lexmark Z82 | SmarThru 2 Guide (2.4 MB) - Page 1
Samsung SmarThru 2 Guide - Lexmark Z82 | SmarThru 2 Guide (2.4 MB) - Page 2
to install, and use the machine. This Guide also provides information to maintain and troubleshoot your machine. • This SmarThru 2 Guide provides • Windows, Windows 95, Windows 98, Windows NT are trademarks of Microsoft corporation. • Other names and trademarks mentioned in this manual are - Lexmark Z82 | SmarThru 2 Guide (2.4 MB) - Page 3
2.18 Scanning to OCR Scanning for Automatic Text Recognition 2.21 Configuring Automatic Text Recognition 2.24 3 SmarThru 2 Working with Image Manager O verview 3.1 Opening the Image Manager Window 3.2 Using Programs Bar in the Image Manager 3.4 Image Manager Toolbar Overview 3.6 Editing Images - Lexmark Z82 | SmarThru 2 Guide (2.4 MB) - Page 4
Opening the SmarThru Configuration Dialog Box ---------- 3.51 Configuring the Fax Gate 3.53 Configuring the Internet Gate 3.54 Configuring Service 3.55 4 Using AnyPage Lite OCR Application O verview 4.1 Running AnyPage Lite 4.2 How To Recognize a Text or Table 4.3 AnyPage Lite Window Overview - Lexmark Z82 | SmarThru 2 Guide (2.4 MB) - Page 5
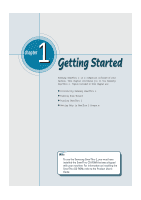
Samsung SmarThru 2 N Running Scan Wizard N Running SmarThru 2 N Getting Help in SmarThru 2 Progra m Note To use the Samsung SmarThru 2, you must have installed the SmarThru CD-ROM that was shipped with your machine. For information on installing the SmarThru CD-ROM, refer to the Product User's Guide - Lexmark Z82 | SmarThru 2 Guide (2.4 MB) - Page 6
printer, scanner and copier in a single machine with a footprint smaller than most single function desktop printers. It concentrates all document processing in a single workplace. Samsung SmarThru cover page. Extensive image support makes it convenient and pane on the Mailbox window, you can view - Lexmark Z82 | SmarThru 2 Guide (2.4 MB) - Page 7
of the supported format into the Image Manager window to import images from Windows Explorer or annotations, etc. Scan Manager supports scanner operations. ¥ You can SmarThru Mailbox. ¥ You can also recognize a scanned document and save the text in a file with the help of the supplied OCR software - Lexmark Z82 | SmarThru 2 Guide (2.4 MB) - Page 8
Scan Wizard After you have installed the Samsung SmarThru 2, you will find the Scan Wizard icon and the SmarThru 2 icon on the desktop window. Scan Wizard is an easy-to-use, convenient tool to manage your scan needs. To run the Scan Wizard: ¥ From the desktop window, double-click the Scan Wizard - Lexmark Z82 | SmarThru 2 Guide (2.4 MB) - Page 9
window gives you access to the following features: lets you scan documents and images quickly and easily. For details, see page 2.4. Scan lets you use your scanner and printer 2.21. launches Samsung SmarThru 2 program to manage your mails, fax documents and images. SmarThru For details, see page - Lexmark Z82 | SmarThru 2 Guide (2.4 MB) - Page 10
the taskbar at the bottom right corner of the desktop window, right-click on the SmarThru mail engine icon and select Mailbox from the pop-up menu. ¥ In the Scan Wizard window, click SmarThru. SmarThru Mail Engine icon. The SmarThru Mail Engine runs in the background to check incoming and outgoing - Lexmark Z82 | SmarThru 2 Guide (2.4 MB) - Page 11
the Mailbox icon on the Samsung SmarThru 2 window. For further information on the Mailbox window, see page 3.19. To open the Image Manager window: Click the Image Manager icon on the Samsung SmarThru 2 window. For further information on the Image Manager window, see page 3.1. 1.6 Getting Started - Lexmark Z82 | SmarThru 2 Guide (2.4 MB) - Page 12
Getting Help in the SmarThru 2 Program Samsung SmarThru contains a detailed on-line help document. If you encounter problems while using SmarThru, please consult the on-line help. SmarThru Help is accessible from all windows and dialog boxes using the SmarThru program. Click Help on the menu bar or - Lexmark Z82 | SmarThru 2 Guide (2.4 MB) - Page 13
N O verview N Loading Documents for Scanning N Scanning a Document with the Scan Manager N Features of the Scan Manager Window N Selecting Scan Manager Options N Samsung TWAIN for Scan Window Copying N Copying a Document Scanning to PC Fax N Scan a document and then send it by PC Fax Scanning to - Lexmark Z82 | SmarThru 2 Guide (2.4 MB) - Page 14
image into computer-usable information that digitizes the image. Scanners and digital cameras are devices that have the technology to otherwise manipulated on your computer. With Scan Manager in the supplied Samsung SmarThru 2 program, you can scan images directly into the image editing application - Lexmark Z82 | SmarThru 2 Guide (2.4 MB) - Page 15
, please refer to its User s Guide. For Flat-bed type: Place your documents on the scanner bed and close the scanner top cover. For Automatic Document Feeder (ADF) type: Load documents, as many as your machine can hold, into the feeding slot. Following instructions especially show how to place - Lexmark Z82 | SmarThru 2 Guide (2.4 MB) - Page 16
3. Slide the document guide lightly against the side of the documents. 4. Insert the documents into the ADF until it stops. The document is ready for scanning. The machine automatically feeds the pages one by one from the bottom of the stack. Scan Wizard 2.3 - Lexmark Z82 | SmarThru 2 Guide (2.4 MB) - Page 17
image. To scan a document with Scan Manager, use the following steps: 1. Load a document as described in User s Guide. 2. To run Scan Wizard, double-click on the Scan Wizard icon on the desktop window. For further information, refer to Running Scan Wizard on page 1.3. 3. When the Scan Wizard - Lexmark Z82 | SmarThru 2 Guide (2.4 MB) - Page 18
4. Choose the scan settings and then click Scan. For more information on the scan settings, refer to Features of the Scan Manager Window on page 2.6. Choose appropriate scan settings. 5. A progress bar informs you of the scan progress. When the scan is complete, the scanned image is briefly - Lexmark Z82 | SmarThru 2 Guide (2.4 MB) - Page 19
6. The Scan Manager window closes automatically and Samsung SmarThru automatically launches the Image Manager. The scanned image is saved in the Incoming folder of the Image Manager with a system-assigned name. For information on - Lexmark Z82 | SmarThru 2 Guide (2.4 MB) - Page 20
dimensions manually. You may also change the scan area using the mouse: drag one of the marquee handles (small black squares) displays the name of the currently selected scanner. Scan: Click this button to start to bring up the Image Adjust window to adjust image brightness and contrast. Defaults: - Lexmark Z82 | SmarThru 2 Guide (2.4 MB) - Page 21
instead of the Samsung Scan Manager to scan an image. Also, if you have another scanner driver installed on your computer, you can select the desired driver. 1. Open the Image Manager window. For details, see page 1.5. 2. Select Scan Options from the File menu. Note: You can access the Scan Options - Lexmark Z82 | SmarThru 2 Guide (2.4 MB) - Page 22
for Scan Window Brief descriptions for the controls of the Samsung TWAIN for Scan window are provided below. Settings Tabs: Each tab (Basic, I m a g e quality, Filters, and the A b o u t tab) contains settings to adjust the scan image. Preview area Use help for further details on SmarThru. Scan - Lexmark Z82 | SmarThru 2 Guide (2.4 MB) - Page 23
, please refer to its User s Guide. For Flat-bed type: Place your documents on the scanner bed and close the scanner top cover. For Automatic Document Feeder (ADF) type: Load documents, as many as your machine can hold, into the feeding slot. Following instructions especially show an example of ADF - Lexmark Z82 | SmarThru 2 Guide (2.4 MB) - Page 24
and select Copy. For information on opening the Scan Wizard window, see page 1.3. 3. Adjust scan settings when the Samsung Copy Manager window opens.. Selects the size of the image being copied. Check this box if you want the scanned image to be saved into the I n c o m i n g folder of - Lexmark Z82 | SmarThru 2 Guide (2.4 MB) - Page 25
the Copy tab on the top of the Samsung Copy Manager window. Description: Choose to print image descriptions above or below images, area: This area shows image(s) that will be printed. Brings up the standard printer setup dialog box. Click this button to return all settings to their default values - Lexmark Z82 | SmarThru 2 Guide (2.4 MB) - Page 26
Paper drop-down list box. Multiple Page per Side If your scanner supports successive scanning of multiple images, you may use this option to print on each page. 5. To configure your printer, click Printer Setup on this window to bring up a standard printer setup dialog box. 6. Press Copy to start - Lexmark Z82 | SmarThru 2 Guide (2.4 MB) - Page 27
installed the SmarThru program. You can change or configure it later by selecting SmarThru Configuration from the Tools menu in the Samsung SmarThru Mailbox window. For details, see page 3.53. Scanning a Document and then Sending it by PC Fax The Scan Wizard window contains the Scan to FAX service - Lexmark Z82 | SmarThru 2 Guide (2.4 MB) - Page 28
3. The Samsung Scan Manager for Fax window opens. Select the scan settings if necessary. For more information on the scan settings, see page 2.7. Choose scan settings. Preview area If you check the - Lexmark Z82 | SmarThru 2 Guide (2.4 MB) - Page 29
Book, and then click Next. ¥ To enter a contact manually, fill the Fax No field. Then click after the fax book, click in front of the field. Then select the desired contact from the Peek Address window. ¥ To remove a contact from the Recipients list, select the desired contact in the Recipient - Lexmark Z82 | SmarThru 2 Guide (2.4 MB) - Page 30
see page 3.29. To start sending immediately, click S e n d. Note: The messages are automatically saved in the Outgoing folder of the Samsung SmarThru 2 Mailbox. In the Mailbox window, if you open the Outgoing folder, you will see a copy of the message and the message status; Sent, Queued for sending - Lexmark Z82 | SmarThru 2 Guide (2.4 MB) - Page 31
the Internet gate. Configuring the Internet gate was started when you first installed the SmarThru program. Change or configure later by selecting SmarThru Configuration from the Tools menu in the Samsung SmarThru Mailbox window. For details, see page 3.54. Scanning a Document and then Sending it by - Lexmark Z82 | SmarThru 2 Guide (2.4 MB) - Page 32
and select Scan to E-mail. To open the Scan Wizard window, double-click the Scan Wizard icon on the desktop window. For further details, see page 1.3. 3. The Samsung Scan Manager for E-mail window opens. Select the scan settings if necessary. For more information on the scan settings, see page - Lexmark Z82 | SmarThru 2 Guide (2.4 MB) - Page 33
find the scanned document is attached as an image file format to the mail. 5. Fill in each field. For details on the controls of this window, see page 3.38. 6. When you are ready to send, click . The message is automatically saved in the Outgoing folder of the Mailbox-Samsung - Lexmark Z82 | SmarThru 2 Guide (2.4 MB) - Page 34
. See page 2.24. To scan a document to an OCR program: 1. Load a document as described in User s Guide. 2. Open the Scan Wizard window, and select Scan to OCR. To open the Scan Wizard window, double-click the Scan Wizard icon on the desktop window. For further details, see page 1.3. Scan Wizard 2.21 - Lexmark Z82 | SmarThru 2 Guide (2.4 MB) - Page 35
3. The Samsung Scan Manager for OCR window opens. Select the scan settings if necessary. For more . If you selected the Save to Image Manager checkbox, the Image Manager window opens and you see the saved image in the window. 5. The system asks you to specify the file name and the destination - Lexmark Z82 | SmarThru 2 Guide (2.4 MB) - Page 36
at once, see page 4.3. • If you want to recognize a table which does not have horizontal or vertical lines, you will need to analyze the table manually before the recognition begins to achieve good recognition results. See page 4.7. Scan Wizard 2.23 - Lexmark Z82 | SmarThru 2 Guide (2.4 MB) - Page 37
configure several parameters of automatic text recognition in the Automatic Recognition Configuration window. To bring up the Automatic Recognition Configuration window, take the following steps: 1. Open the Scan Wizard window. For details, see page 1.3. 2. Right-click on the title bar. 3. Select - Lexmark Z82 | SmarThru 2 Guide (2.4 MB) - Page 38
set the path to the base folder using the Base Folder edit field. You can also click Browse... to point the folder using the browse window. If you select Always Ask, you will be prompted for the file name each time the program needs to save a new file. 5. When you have - Lexmark Z82 | SmarThru 2 Guide (2.4 MB) - Page 39
3chapter The Samsung SmarThru 2 contains the Image Manager which stores, edits, and manages images and the Mailbox which stores fax and e- W orking with Image Manager N Image Viewer N Mailbox N W orking with Fax Messages N W orking with E-mail Messages N Using Address Book N SmarThru Configuration - Lexmark Z82 | SmarThru 2 Guide (2.4 MB) - Page 40
for images by descriptions, dates, etc. ¥ Perform basic editing of images such as copying and pasting parts of an image, rotating, cropping, resampling, etc. ¥ Adjust parameters of an image such as external programs using the Programs bar. ¥ Import, export, scan, and print images. SmarThru 2 3.1 - Lexmark Z82 | SmarThru 2 Guide (2.4 MB) - Page 41
. To open the Image Manager window manually, follow this procedure: 1. Open the Samsung SmarThru 2 window and click the Image Manager icon on the left edge of the window. To open the Samsung SmarThru 2 window, double-click the SmarThru 2 icon on the desktop window. For further details, see page - Lexmark Z82 | SmarThru 2 Guide (2.4 MB) - Page 42
to save the changes. To save the image without quitting the editing mode, click on the toolbar or select Save from the File menu. button SmarThru 2 3.3 - Lexmark Z82 | SmarThru 2 Guide (2.4 MB) - Page 43
Programs bar is located at the bottom part of the Samsung Image Manager window. The Programs bar is a powerful supports five types of buttons. They are described below. Drag an image to this button or select an image and click this SmarThru button to send the image by e-mail using Samsung SmarThru - Lexmark Z82 | SmarThru 2 Guide (2.4 MB) - Page 44
be exported according to the default export settings. Select Default Export Parameters... from the File menu to access the default settings in the Image Manager window. 5. When you are done, click O K. Your Programs bar will be updated accordingly. For further details, see the on-line help - Lexmark Z82 | SmarThru 2 Guide (2.4 MB) - Page 45
Import menu. For details, see page 3.15. Click this button to cut selected part from a selected image and place its contents on the clipboard. The page will New Message.. menu. This button opens the New Fax window that is used for sending a fax from the SmarThru system. Similar to the Tools ➝ N e w - Lexmark Z82 | SmarThru 2 Guide (2.4 MB) - Page 46
used to zoom in the current image. Similar to View ➝ Z o o m In menu. Is used to zoom out the current image. Similar to View ➝ Z o o m Out menu. SmarThru 2 3.7 - Lexmark Z82 | SmarThru 2 Guide (2.4 MB) - Page 47
the image is viewed. To change the size of the image, perform Resizing or Resampling. Erasing Parts of an Image To erase a part of an image, choose the tool from the toolbox. You can change the size of the . For further details on transforming images, use the on-line help. 3.8 SmarThru 2 - Lexmark Z82 | SmarThru 2 Guide (2.4 MB) - Page 48
in the preview area. Halftone: Makes the image look like simulated grayscales using different combinations of 1-bit black and white pixels. Because this image type is only 1-bit, the file size is smaller than For further details on changing colour modes, use the on-line help. SmarThru 2 3.9 - Lexmark Z82 | SmarThru 2 Guide (2.4 MB) - Page 49
drag. You can cut, copy, and paste regions using the Edit menu. For further details on working with regions, use the on-line help. 3.10 SmarThru 2 - Lexmark Z82 | SmarThru 2 Guide (2.4 MB) - Page 50
size is adjusted automatically according to the entered text. To emphasize parts of the image. This object does not cover the image content double-click on the annotation. You will see a tabbed window with the annotation properties. You can find details for creating annotations. SmarThru 2 3.11 - Lexmark Z82 | SmarThru 2 Guide (2.4 MB) - Page 51
effects. Most effects have several parameters that can be changed. You can see the result of changing parameters in the preview area of the Effect window. For further details on applying effects, use the on-line help. Working with Images In Browse Mode Printing Images To print images from the Browse - Lexmark Z82 | SmarThru 2 Guide (2.4 MB) - Page 52
image and press the Delete key, or select Delete from the Edit menu, or drag the image onto the Shredder button in the Programs bar. SmarThru 2 3.13 - Lexmark Z82 | SmarThru 2 Guide (2.4 MB) - Page 53
page, drag it by thumbnail image. If you want an operation to be performed with all pages, drag the multi-page image by title. 3.14 SmarThru 2 - Lexmark Z82 | SmarThru 2 Guide (2.4 MB) - Page 54
select Export... from the pop-up menu. The Export window appears prompting a file name for exporting. Samsung Image Manager supports a number of file formats. Select the appropriate file from the Image Manager window into another application on the Programs bar. See page 3.4. SmarThru 2 3.15 - Lexmark Z82 | SmarThru 2 Guide (2.4 MB) - Page 55
for establishing these associations. The dialog box appears when you first bring up the Image Manager-Samsung SmarThru 2 window. To bring up this dialog box manually, take the following steps: 1. Run SmarThru 2 and open the Image Manager-Samsung SmarThru 2 window. For details, see page 3.2. 3.16 - Lexmark Z82 | SmarThru 2 Guide (2.4 MB) - Page 56
select the filetypes that are not registered to any application. Click Unselect All to uncheck all file types. 5. When complete, click OK to perform associating. SmarThru 2 3.17 - Lexmark Z82 | SmarThru 2 Guide (2.4 MB) - Page 57
with the Image Viewer, you ll find the appearance of the image file as below which is associated with the Image Viewer on the desktop window. Double-click the image to view it. For further details on the Image Viewer, use the on-line help. 3.18 - Lexmark Z82 | SmarThru 2 Guide (2.4 MB) - Page 58
Overview Mailbox is a messaging center that supports message sending, receiving and storing in SmarThru. Once you send and receive a PC electronic faxes. Address Book A convenient place to store contact information. SmarThru Address Book stores both e-mail and fax addresses. Address Book can - Lexmark Z82 | SmarThru 2 Guide (2.4 MB) - Page 59
Features of the Mailbox Window To open the Mailbox window, run SmarThru 2 and click the Mailbox icon on the left (or click the View menu, and then select Mailbox from the Switch to). Click here to bring up this Mailbox window. Message List Folder Tree Quick Preview Folder Tree The Folder Tree - Lexmark Z82 | SmarThru 2 Guide (2.4 MB) - Page 60
in the incoming message. Forward message to a new address. Deliver the mail manually. Send the outgoing mail. Print the selected message. Delete the selected message. Open the SmarThru Configuration window. Open the Address Book window to add contact information to your Address Book. Open the Find - Lexmark Z82 | SmarThru 2 Guide (2.4 MB) - Page 61
file, or edit the fax with the Fax Viewer. ¥ With the Fax Cover Editor, you can create a cover page for your fax message. The Samsung SmarThru system provides pre-defined cover pages. You can edit the pages with the Fax Cover Editor for your own needs. Note: To manage fax messages - Lexmark Z82 | SmarThru 2 Guide (2.4 MB) - Page 62
select N e w, then Fax. ¥ From any application, print to the Samsung SmarThru Fax printer that is available from the list of printers. For details, see page 3.31. 1. Run the SmarThru 2 and open the Mailbox-Samsung SmarThru 2 window. For details, see page 1.5. 2. Click on the toolbar, or click the - Lexmark Z82 | SmarThru 2 Guide (2.4 MB) - Page 63
manually, fill the Fax No field. Click after the fax number description. The address will appear in the Recipient list. ¥ To select a contact from the address book, click Fax No. in front of the field. Select the desired contact from the Peek Address window number description. 3.24 SmarThru 2 - Lexmark Z82 | SmarThru 2 Guide (2.4 MB) - Page 64
5. Select the appropriate fax options, and then click Next. The General Options window appears in the Advanced mode only. Specifies when a message should be sent by the SmarThru system. To specify message priority, click appropriate button. 6. Select the cover page, if you want, and then click Next. - Lexmark Z82 | SmarThru 2 Guide (2.4 MB) - Page 65
7. Select appropriate fax options, and then click Next. This Fax Options window appears in the Advanced mode only. You can select the following options: 3.26 SmarThru 2 Use options defined for recipients Use the Fax message options from the Address Book. In this case different settings for - Lexmark Z82 | SmarThru 2 Guide (2.4 MB) - Page 66
options are used in a new fax message. 8. Enter the subject in the Subject field and your message in the Note field, and then click Next. SmarThru 2 3.27 - Lexmark Z82 | SmarThru 2 Guide (2.4 MB) - Page 67
9. In the Attach Files window, you can attach files to your fax message. If you want to include . To preview the fax before sending, click Preview. The Preview-Fax Viewer window opens. For information on the Preview-Fax Viewer window, see page 3.29. To send immediately, click S e n d. 3.28 SmarThru 2 - Lexmark Z82 | SmarThru 2 Guide (2.4 MB) - Page 68
colour inversion and zoom. N-UP view Every fax message in the SmarThru system is an image that uses a special internal format (.fax extension). These images can only be viewed using the SmarThru Fax Viewer. ¥ To use N-UP view, click the View menu, - Lexmark Z82 | SmarThru 2 Guide (2.4 MB) - Page 69
Invert colors Inverts fax colour. Black becomes white and white becomes black. To invert fax colour, click the Effects be viewed only by means of the SmarThru Fax Viewer feature. You can: ¥ View faxes in SmarThru *.fax or TIFF file formats. ¥ Save faxes in a SmarThru *.fax or TIFF file formats. ¥ - Lexmark Z82 | SmarThru 2 Guide (2.4 MB) - Page 70
and send a PC fax from any Windows application that supports printing. 1. Open the Windows application. Create and save the document. 2. From the File menu, select Print. 3. In the Print dialog box, select Samsung SmarThru Fax as the current printer in the Printer list, and then click O K. Select - Lexmark Z82 | SmarThru 2 Guide (2.4 MB) - Page 71
system, you cannot use your machine as a printer or scanner. Receiving Faxes on the SmarThru System When an incoming ring sounds, right-click the fax engine icon in the right corner of the taskbar on the desktop window, and select Answer now from the pop-up list. Fax engine icon The fax engine - Lexmark Z82 | SmarThru 2 Guide (2.4 MB) - Page 72
2. In the SmarThru Configuration window, select Fax Gate, and click Options. 3. The Fax Gate configuration dialog box appears. Click M o d e m s. 4. Select the Auto answer fax is received the unit will receive the fax according to the receiving mode set through the fax machine. SmarThru 2 3.33 - Lexmark Z82 | SmarThru 2 Guide (2.4 MB) - Page 73
Fax Message 1. When a new fax message comes in, the notification window appears. Opens the latest message. Closes this notification window. Opens the SmarThru 2 2. Click icon to view the message in a separate window. Incoming faxes are automatically stored in the Incoming folder of the Mailbox - Lexmark Z82 | SmarThru 2 Guide (2.4 MB) - Page 74
option when creating a fax message. To open the Fax Cover Page Editor manually follow these steps: 1. In the Mailbox-Samsung SmarThru 2 window, click the Message menu and select N e w, then E-mail/Fax. 2. When New Message window opens, click the Options menu, and select Fax. 3. In Fax dialog box - Lexmark Z82 | SmarThru 2 Guide (2.4 MB) - Page 75
5. The Fax Cover Page Editor window opens. To Edit or Create a Fax Cover Page There are two kinds of pages in the Fax Cover Page Editor: First Page and page. ¥ Click button on the toolbar to select the first page or to select the second page. ¥ Click to swap page contents. 3.36 SmarThru 2 - Lexmark Z82 | SmarThru 2 Guide (2.4 MB) - Page 76
object. Customize the object s properties as needed. For further details on the fax cover page editor objects, and options, refer to the on-line help. SmarThru 2 3.37 - Lexmark Z82 | SmarThru 2 Guide (2.4 MB) - Page 77
For sending and receiving e-mail on your SmarThru system, you must enable Internet Gate Service and configure your Internet account. See page 3.54. Creating and Sending E-mail Messages 1. Run the SmarThru 2 and open the Mailbox-Samsung SmarThru 2 window. For details, see page 1.5. 2. Click button - Lexmark Z82 | SmarThru 2 Guide (2.4 MB) - Page 78
corresponding toolbar option in the View menu. • To expand the text pane so it occupies whole Message Form window area, press Ctrl+E or click View menu and then click Text Only. • To Restore the text pane message is automatically saved in the Outgoing folder of the Mailbox. SmarThru 2 3.39 - Lexmark Z82 | SmarThru 2 Guide (2.4 MB) - Page 79
box appears. To resolve the address, click O K. Click here to save the address in the Address Book. 10. The mail sends to the destinations(s). 3.40 SmarThru 2 - Lexmark Z82 | SmarThru 2 Guide (2.4 MB) - Page 80
New Message Toolbars The New Message window contains the following toolbars: New Message Toolbars: Main Reply to all recipients. Send Print S ave Cut Paste a predefined style. Decrease text indent ( m ove text left). Set background sound. Re m ove background sound if any. SmarThru 2 3.41 - Lexmark Z82 | SmarThru 2 Guide (2.4 MB) - Page 81
incoming e-mails at regular intervals specified at the Internet Gate configuration. 1. To deliver messages manually before (or between) the system automatic delivery session, open the Mailbox-Samsung SmarThru 2 window, and then: ¥ Click on the toolbar. ¥ Click the Delivery menu and then click Send - Lexmark Z82 | SmarThru 2 Guide (2.4 MB) - Page 82
system receives your message, the message is stored in the Incoming folder of the SmarThru system Mailbox. To read incoming messages: 1. Run the SmarThru 2 and open the Mailbox-Samsung SmarThru 2 window. 2. To read incoming messages, select the Incoming folder. number of newly arrived messages - Lexmark Z82 | SmarThru 2 Guide (2.4 MB) - Page 83
the message in the preview pane, click the message in the message list. To view the message in a separate window, double-click the message in the message list. 4. The incoming mail message form consists of ¥ Toolbar ¥ double-click on the file, or right-click and then select O p e n. 3.44 SmarThru 2 - Lexmark Z82 | SmarThru 2 Guide (2.4 MB) - Page 84
specific message is therefore difficult. To retrieve messages easily, bring up the Find Message dialog box. To find messages: 1. In the Mailbox-Samsung SmarThru window, click click the Tools menu and then select Search.... on the toolbar, or Click it to find a message. 2. Select the folder that - Lexmark Z82 | SmarThru 2 Guide (2.4 MB) - Page 85
Address Book. ¥ Import names from your other address books You can import your personal address books from old versions of SmarThru, numerous popular e-mail programs including Microsoft Outlook Express, Eudora Light, Netscape Messenger, and any progra m that exports comma-separated values (CSV - Lexmark Z82 | SmarThru 2 Guide (2.4 MB) - Page 86
when you send e-mail or fax. To open the address book: ¥ In the Mailbox-Samsung SmarThru 2, click button on the toolbar or click the Tools menu and then select Address Book.... ¥ In the message form window which opens when you write an e-mail message, click button on the toolbar, or click the - Lexmark Z82 | SmarThru 2 Guide (2.4 MB) - Page 87
do the following: 1. Open the Address Book window. For details, see page 3.47. Click to content to another location. When Select Target window opens, select the desired location and click a contact location. 3. Click Add person. The Person Properties window opens. You can also click A d d N e w - Lexmark Z82 | SmarThru 2 Guide (2.4 MB) - Page 88
in address resolution. • You can leave the address blank. However, SmarThru 2 cannot send the message to the contact. Contact is also or fax address to an existing person 1. Select the desired person in the Address Book window. 2. Click Add internet... or Add fax.... Or, in the Edit menu, click - Lexmark Z82 | SmarThru 2 Guide (2.4 MB) - Page 89
To create a Group object: 1. Select the desired group location in the Address Book window. 2. Click Add group. You can see the new group under the selected location. Or, in the Edit menu, click A d d aliases and groups. For further details, click Help and refer to the on-line help. 3.50 SmarThru 2 - Lexmark Z82 | SmarThru 2 Guide (2.4 MB) - Page 90
Gate to suit your requirements in the SmarThru Configuration dialog box. To open the SmarThru Configuration dialog box: 1. Run SmarThru 2 and open the Mailbox-Samsung SmarThru 2 window. For details, see page 1.5. 2. From the Tools menu, select SmarThru Configuration. To access this menu from the - Lexmark Z82 | SmarThru 2 Guide (2.4 MB) - Page 91
SmarThru Configuration window appears. Select the option to configure, and then click Options. To customize the following items in the SmarThru of events. System Options To customize Samsung SmarThru system properties. Service To turn on/off SmarThru service such as Internet or Fax Gates. Fax - Lexmark Z82 | SmarThru 2 Guide (2.4 MB) - Page 92
Configuring the Fax Gate The Fax Gate can be configured to send and receive messages via your system fax modem. When SmarThru was first installed, you were promoted to configure the Fax Gate. If you did not configure the Fax Gate or you want to make changes, take the following - Lexmark Z82 | SmarThru 2 Guide (2.4 MB) - Page 93
the Internet Gate for internet mail exchange, you must define your connection type and configure at least one internet account. When you first installed the SmarThru 2 program on your computer, you were prompted to configure the Internet Gate. If you did not configure the Internet Gate, or you want - Lexmark Z82 | SmarThru 2 Guide (2.4 MB) - Page 94
3.51. 2. The SmarThru Services dialog box appears. 3. To activate a particular service, select the desired service from the Services list and check Enable or double-click the desired service in the Services list. To turn off a particular service, select the desired service from the Services list and - Lexmark Z82 | SmarThru 2 Guide (2.4 MB) - Page 95
4chapter This chapter briefly describes the main features of AnyPage Lite. For more information and step-by-step instructions, refer to the on-line help. N O verview N Running AnyPage Lite N How To Recognize a Text or Table N AnyPage Lite Window Overview - Lexmark Z82 | SmarThru 2 Guide (2.4 MB) - Page 96
Recognition (OCR) program. It converts a scanned text image into digitized text. AnyPage Lite can be used after the Samsung SmarThru program has been installed. AnyPage Lite system performs the following operations to recognize text: 1. Open a scanned image of a document. AnyPage Lite can load - Lexmark Z82 | SmarThru 2 Guide (2.4 MB) - Page 97
system. Refer to Scanning to OCR on page 2.21. If you place an image onto the OCR button, SmarThru runs AnyPage Lite and loads the image file in the AnyPage Lite window. When the AnyPage window opens, click button on the toolbar to open and read the file with AnyPage Lite. 4.2 Using AnyPage - Lexmark Z82 | SmarThru 2 Guide (2.4 MB) - Page 98
export the scanned image saved in the Image Manager to change the file format: From the File menu in the Image Manager window, select Export Image. Choose the file format supported by the A nyPage Lite system. Select the location to save the file and specify the extension of the file. For details - Lexmark Z82 | SmarThru 2 Guide (2.4 MB) - Page 99
3. You will see the main window of AnyPage Lite and the Tip dialogue. This dialogue box contains useful information. To Lite loads the file(s), then the image of the document(s) appears in the Image window. For the AnyPage Lite Window Overview, see page 4.10. Click here to open a file. Image - Lexmark Z82 | SmarThru 2 Guide (2.4 MB) - Page 100
the open page (or selected pages or all pages depending on the button mode.). During recognition, AnyPage Lite highlights the recognized part in the Image window. The system may display a warning message (for example; Resolution is too low). This kind of messages helps you check parameters, and - Lexmark Z82 | SmarThru 2 Guide (2.4 MB) - Page 101
to change font, size, and type style. See page 4.14 for details. Zoom window If you click in the Text window, the Zo o m window highlights the zoom image of the letter on which the cursor is placed. Text window 9. To check spelling click the button on the toolbar. The Checking Results dialogue - Lexmark Z82 | SmarThru 2 Guide (2.4 MB) - Page 102
image locating texts, pictures, and tables, and then recognizes the texts and tables. The recognized results will be displayed in the Text window. To Analyze Manually, then Start Recognize AnyPage Lite can analyze pages with a compound text or table layout. If the table to recognize does not have - Lexmark Z82 | SmarThru 2 Guide (2.4 MB) - Page 103
too small, increase the scale by rightclicking in the Image window, or select Scale and the necessary value from the pop-up menu. 2. To mark out blocks on the image manually, click button on the toolbar, and then draw a block with the mouse. To draw a block, place the mouse pointer in the - Lexmark Z82 | SmarThru 2 Guide (2.4 MB) - Page 104
lines in the block. For more information on the Tools toolbar, see page 4.13. Tools toolbar contains buttons used for editing blocks in the Image window. You can also merge or divide table cells by selecting Merge table cells and Divide table cells from the Edit menu. 5. When adding or deleting - Lexmark Z82 | SmarThru 2 Guide (2.4 MB) - Page 105
images that will be added to the current batch. Zoom window If you click in the Image window or Text window, the selected position in the Image window will be displayed in the Zoom window at an increased scale. The rectangle in the Zoom window marks the letter on which the cursor is placed in the - Lexmark Z82 | SmarThru 2 Guide (2.4 MB) - Page 106
Open&Read Analyzes the image and marks blocks on the page in the Image window.* Read ¡ Mark Blocks on Open Page* Recognizes the open image.* Read page is selected in the Batch window, the buttons process the selected images. You can change the mode of button manually. Click the arrow on the right - Lexmark Z82 | SmarThru 2 Guide (2.4 MB) - Page 107
toolbar are used to work with an image and are available only when the Image window is active. Button Function Menu equivalent Creates a new batch. File ¡ N e by 90 Image ¡ Rotate degrees. Counter-clockwise Re m oves small black dots from the image. Image ¡ Clean Image Changes the text and - Lexmark Z82 | SmarThru 2 Guide (2.4 MB) - Page 108
to work with blocks and are available only when the Image window is active. Button Function Menu equivalent Allows you to create The area of the block is reduced. Image ¡ Choose a Tool ¡ Cut Block Parts Allows you to move a selected block. Click inside the block and drag wherever necessary - Lexmark Z82 | SmarThru 2 Guide (2.4 MB) - Page 109
to edit the recognized text shown in the Text window and are available only when the Text window is active. Button Function Menu equivalent Allows you to carriage return, paragraph break, etc.) Allows you to find a word, a part of Edit ¡ Find a word, or several words. Positions the cursor at - Lexmark Z82 | SmarThru 2 Guide (2.4 MB) - Page 110
The buttons on this toolbar allow you to run the corresponding SmarThru service. Button Function Menu equivalent Allows you to send the texts of the selected Tools pages to New Message Form. ¡ New Message (e-mail application of SmarThru). Allows you to send the texts of the selected Tools - Lexmark Z82 | SmarThru 2 Guide (2.4 MB) - Page 111
check spell, for e-mail 3.40 configure internet gate 3.54 fax gate 3.53 service 3.55 copy 2.10 copy manager 2.10 copy settings 2.12, 2.13 D fax gate, configure 3.53 fax preview 2.17 find 3.13, 3.45 H help see smarthru help I image manager run 3.1 toolbar 3.6 image, browse 3.12 image, find 3.13 image - Lexmark Z82 | SmarThru 2 Guide (2.4 MB) - Page 112
21 toolbar 3.21 multi-page image 3.14 O OCR application run 4.2 toolbar 4.11 window 4.10 P pc fax browse 3.29 create 3.23, 3.31 cover page 3.25 options OCR 2.21 pc fax 2.14 scan manager 2.4 scan wizard 1.3, chapter 2 service, configure 3.55 smarthru2, run 1.5 smarthru2 help 1.7 SMTP/POP3 e-mail 1.1 - Lexmark Z82 | SmarThru 2 Guide (2.4 MB) - Page 113
ELECTRONICS Visit us at: Home http://www.samsungprinter.com P/N: JB68-00380A Rev. 2.00
-
 1
1 -
 2
2 -
 3
3 -
 4
4 -
 5
5 -
 6
6 -
 7
7 -
8
-
9
-
10
-
11
-
12
-
13
-
14
-
15
-
16
-
17
-
18
-
19
-
20
-
21
-
22
-
23
-
24
-
25
-
26
-
27
-
28
-
29
-
30
-
31
-
32
-
33
-
34
-
35
-
36
-
37
-
38
-
39
-
40
-
41
-
42
-
43
-
44
-
45
-
46
-
47
-
48
-
49
-
50
-
51
-
52
-
53
-
54
-
55
-
56
-
57
-
58
-
59
-
60
-
61
-
62
-
63
-
64
-
65
-
66
-
67
-
68
-
69
-
70
-
71
-
72
-
73
-
74
-
75
-
76
-
77
-
78
-
79
-
80
-
81
-
82
-
83
-
84
-
85
-
86
-
87
-
88
-
89
-
90
-
91
-
92
-
93
-
94
-
95
-
96
-
97
-
98
-
99
-
100
-
101
-
102
-
103
-
104
-
105
-
106
-
107
-
108
-
109
-
110
-
111
-
112
-
113
 |
 |
Samsung SmarThru 2
Guide