Linksys WRT330N User Guide - Page 28
The SETUP Tab - ADVANCED ROUTING, Dynamic Routing - dropping connection
 |
UPC - 745883578498
View all Linksys WRT330N manuals
Add to My Manuals
Save this manual to your list of manuals |
Page 28 highlights
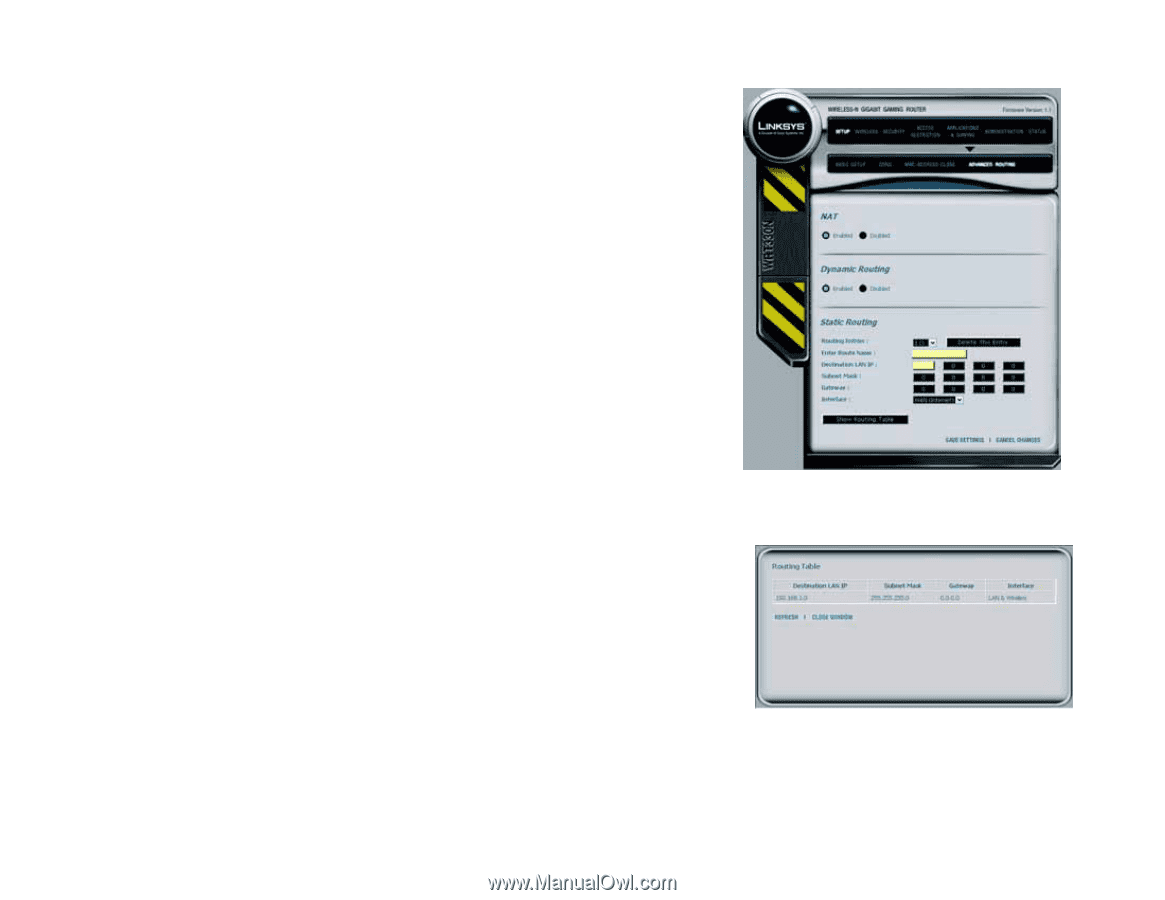
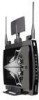
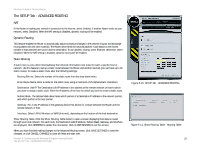
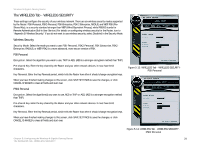
Wireless-N Gigabit Gaming Router The SETUP Tab - ADVANCED ROUTING NAT If this Router is hosting your network's connection to the Internet, select Enabled. If another Router exists on your network, select Disabled. When the NAT setting is disabled, dynamic routing will be enabled. Dynamic Routing This feature enables the Router to automatically adjust to physical changes in the network's layout and exchange routing tables with the other router(s). The Router determines the network packets' route based on the fewest number of hops between the source and the destination. To use dynamic routing, select Enabled. Otherwise, select Disabled. When the NAT setting is disabled, dynamic routing will be enabled. Static Routing A static route is a pre-determined pathway that network information must travel to reach a specific host or network. Use this feature to set up a static route between the Router and another network (you can have up to 20 static routes). To create a static route, alter the following settings: Routing Entries. Select the number of the static route from the drop-down menu. Enter Route Name. Enter a name for the static route, using a maximum of 25 alphanumeric characters. Destination LAN IP. The Destination LAN IP Address is the address of the remote network or host to which you want to assign a static route. Enter the IP address of the host for which you wish to create a static route. Subnet Mask. The Subnet Mask determines which portion of a Destination IP address is the network portion, and which portion is the host portion. Gateway. This is the IP address of the gateway device that allows for contact between the Router and the remote network or host. Interface. Select LAN & Wireless or WAN (Internet), depending on the location of the final destination. Show Routing Table. Click the Show Routing Table button to open a screen displaying how data is routed through your local network. For each route, the Destination LAN IP address, Subnet Mask, Gateway, and Interface are displayed. Click REFRESH to update the information. Click CLOSE WINDOW to exit this screen. When you have finished making changes to the Advanced Routing screen, click SAVE SETTINGS to save the changes, or click CANCEL CHANGES to clear all fields and start over. Chapter 5: Configuring the Wireless-N Gigabit Gaming Router The SETUP Tab - ADVANCED ROUTING Figure 5-10: SETUP Tab - ADVANCED ROUTING Figure 5-11: Show Routing Table - Routing Table 22
-
 1
1 -
2
-
3
-
4
-
5
-
6
-
7
-
8
-
9
-
10
-
11
-
12
-
13
-
14
-
15
-
16
-
17
-
18
-
19
-
20
-
21
-
22
-
 23
23 -
 24
24 -
 25
25 -
 26
26 -
 27
27 -
 28
28 -
 29
29 -
 30
30 -
 31
31 -
 32
32 -
 33
33 -
34
-
35
-
36
-
37
-
38
-
39
-
40
-
41
-
42
-
43
-
44
-
45
-
46
-
47
-
48
-
49
-
50
-
51
-
52
-
53
-
54
-
55
-
56
-
57
-
58
-
59
-
60
-
61
-
62
-
63
-
64
-
65
-
66
-
67
-
68
-
69
-
70
-
71
-
72
-
73
-
74
-
75
-
76
-
77
-
78
-
79
-
80
-
81
-
82
-
83
-
84
-
85
-
86
-
87
-
88
-
89
-
90
-
91
-
92
 |
 |