MSI MPG Z490 GAMING PLUS User Manual - Page 29
M2_1~2: M.2 Slots (Key M), Important, Video Demonstration
 |
View all MSI MPG Z490 GAMING PLUS manuals
Add to My Manuals
Save this manual to your list of manuals |
Page 29 highlights
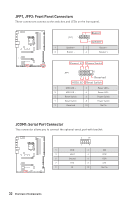
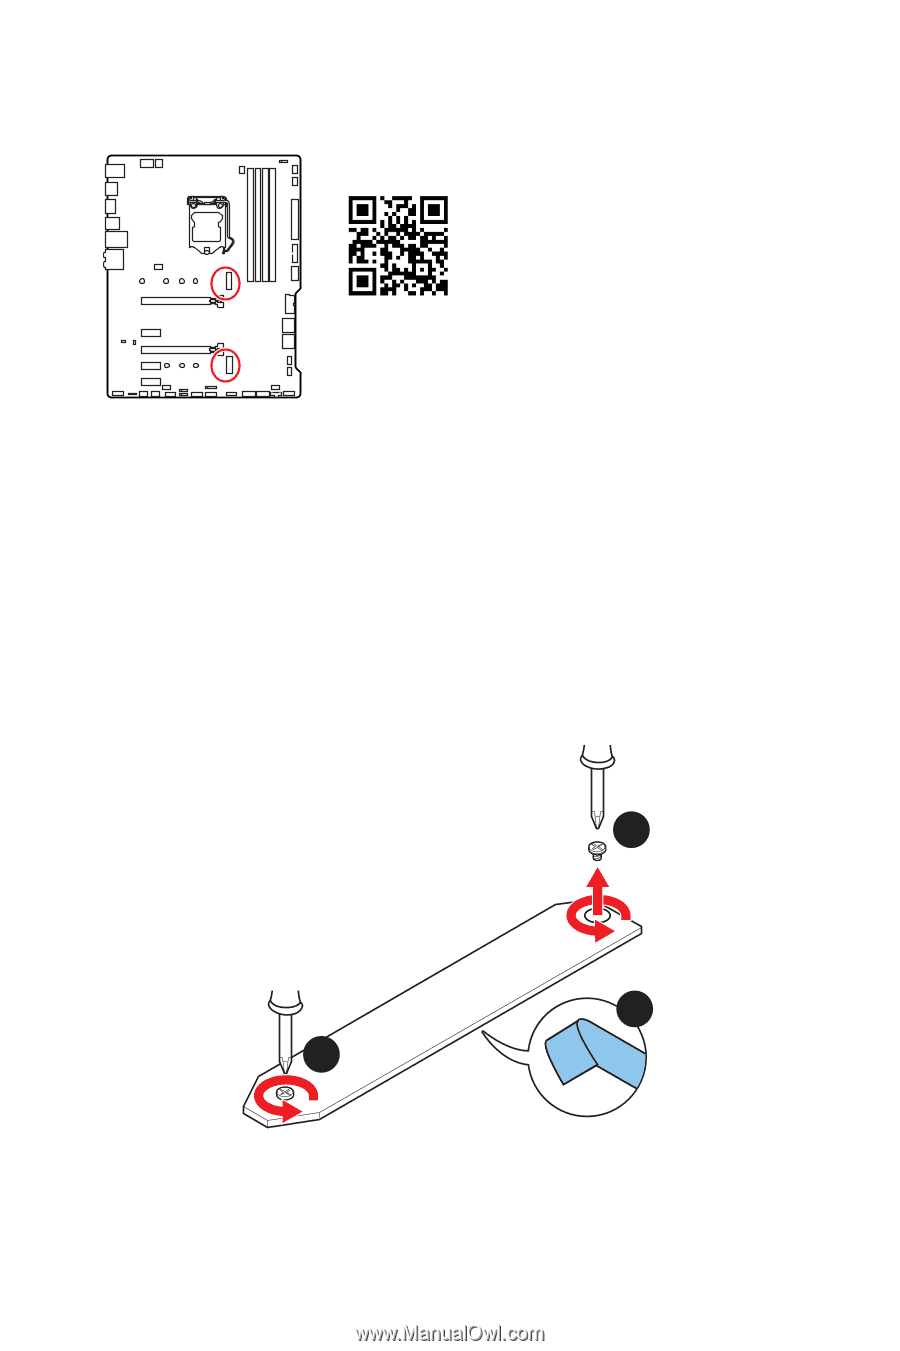
M2_1~2: M.2 Slots (Key M) ⚽⚽Video Demonstration Watch the video to learn how to Install M.2 module. M2_1 http://youtu.be/JCTFABytrYA M2_2 ⚠⚠Important ∙∙Intel® RST only supports PCIe M.2 SSD with UEFI ROM. ∙∙Intel® Optane™ Memory Ready for all M.2 slots. Installing M.2 module 1. Loosen the screws of M.2 SHIELD FROZR heatsink. (For installing M.2 module to M2_2 slot, please skip to step 3) 2. Remove the M.2 SHIELD FROZR and remove the protective films from the thermal pads. 1 2 1 Overview of Components 29
-
 1
1 -
2
-
3
-
4
-
5
-
6
-
7
-
8
-
9
-
10
-
11
-
12
-
13
-
14
-
15
-
16
-
17
-
18
-
19
-
20
-
21
-
22
-
23
-
 24
24 -
 25
25 -
 26
26 -
 27
27 -
 28
28 -
 29
29 -
 30
30 -
 31
31 -
 32
32 -
 33
33 -
 34
34 -
35
-
36
-
37
-
38
-
39
-
40
-
41
-
42
-
43
-
44
-
45
-
46
-
47
-
48
-
49
-
50
-
51
-
52
-
53
-
54
-
55
-
56
-
57
-
58
-
59
-
60
-
61
-
62
-
63
-
64
-
65
-
66
-
67
-
68
-
69
-
70
-
71
-
72
-
73
-
74
-
75
-
76
 |
 |
29
Overview of Components
M2_1~2: M.2 Slots (Key M)
M2_1
M2_2
⚠
Important
∙
Intel® RST only supports PCIe M.2 SSD with UEFI ROM.
∙
Intel® Optane™ Memory Ready for all M.2 slots.
⚽
Video Demonstration
Watch the video to learn how to Install
M.2 module.
http://youtu.be/JCTFABytrYA
1
1
2
Installing M.2 module
1.
Loosen the screws of M.2 SHIELD FROZR heatsink. (For installing M.2 module to
M2_2 slot, please skip to step 3)
2.
Remove the M.2 SHIELD FROZR and remove the protective films from the thermal
pads.