Magnavox 51MP392H User manual, English (US) - Page 22
Setting The Smart Scan Control
 |
View all Magnavox 51MP392H manuals
Add to My Manuals
Save this manual to your list of manuals |
Page 22 highlights
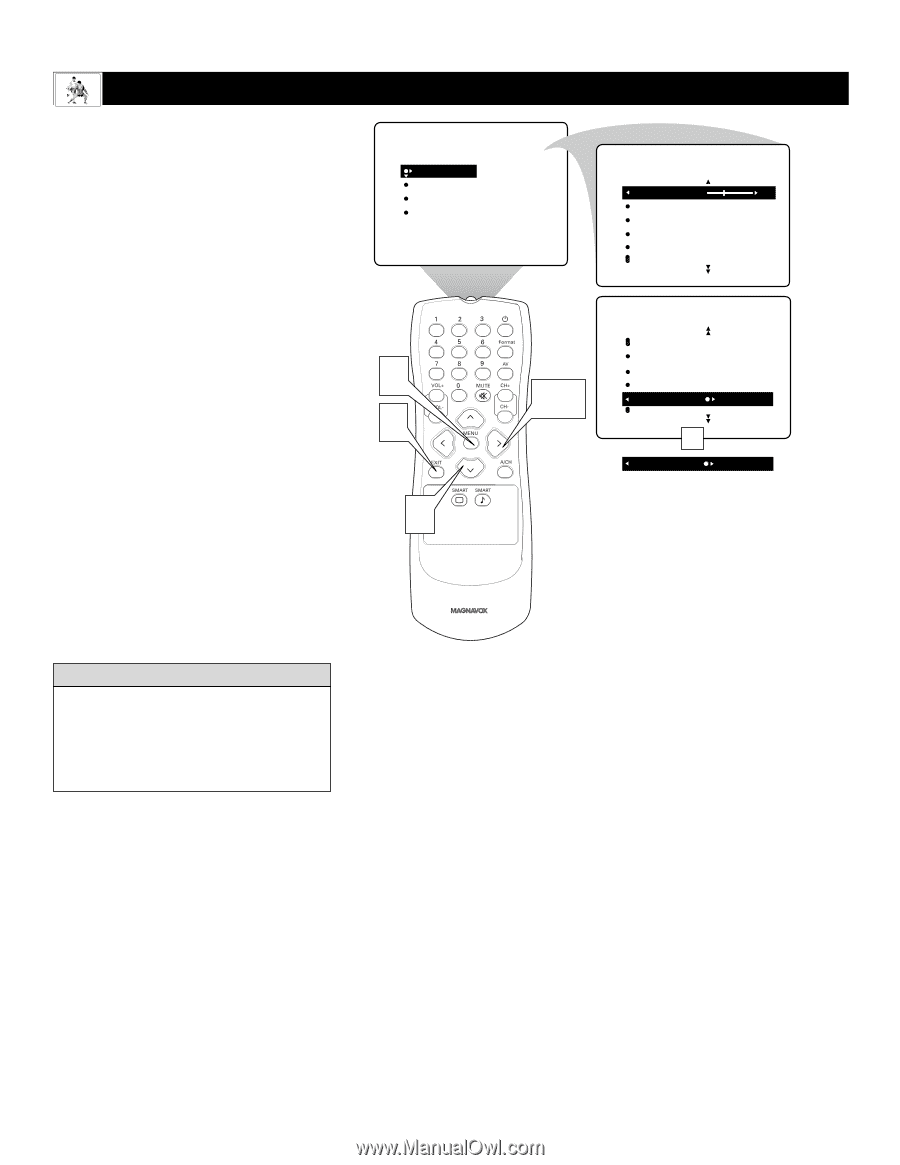
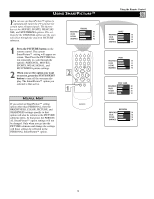
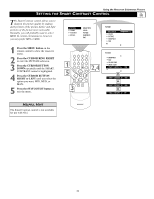
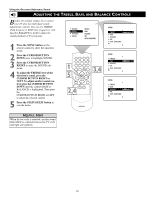
Using the Onscreen Submenus: Picture SETTING THE SMART SCAN CONTROL Smart Scan gives you a choice between two different scanning techniques-progressive or interlaced. Progressive scan doubles the number of picture lines, eliminating line flicker and providing a jitter-free picture. Interlaced improves the appearance of onscreen motion. It also helps smooth out jagged lines that are sometimes seen on curved and angled surfaces in the picture. PICTURE SOUND FEATURES INSTALL BRIGHTNESS COLOR PICTURE SHARPNESS TINT PICTURE BRIGHTNESS 30 COLOR PICTURE SHARPNESS TINT 1 Press the MENU button on the remote to show the onscreen menu. 2 Press the CURSOR BUTTON RIGHT to enter the PICTURE submenu. 3 Press the CURSOR BUTTON DOWN repeatedly until the SMART SCAN control is highlighted. 4 Press the CURSOR BUTTON RIGHT or LEFT until you select the option you want, either PROGRESSIVE or INTERLACED. 5 Press the STATUS/EXIT button to turn the menu off. 1 5 3 2,4 PICTURE PICTURE SHARPNESS TINT COLOR TEMP SMART SCAN PROGRESSIVE OR SMART SCAN INTERLACED HELPFUL HINT • The Smart Scan control is not available for use with AV4. • You may want to use the interlaced option to enhance programs containing a lot of motion. 22
-
 1
1 -
2
-
3
-
4
-
5
-
6
-
7
-
8
-
9
-
10
-
11
-
12
-
13
-
14
-
15
-
16
-
 17
17 -
 18
18 -
 19
19 -
 20
20 -
 21
21 -
 22
22 -
 23
23 -
 24
24 -
 25
25 -
 26
26 -
 27
27 -
28
-
29
-
30
-
31
-
32
-
33
-
34
-
35
-
36
-
37
-
38
-
39
-
40
-
41
-
42
-
43
-
44
-
45
-
46
-
47
-
48
-
49
-
50
-
51
-
52
-
53
-
54
-
55
-
56
 |
 |