Magnavox MBP5320F Owner's Manual - English - Page 40
Note for IP Address, Subnet Mask, Default Gateway, Primary DNS and Secondary DNS
 |
View all Magnavox MBP5320F manuals
Add to My Manuals
Save this manual to your list of manuals |
Page 40 highlights
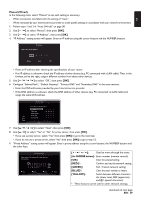
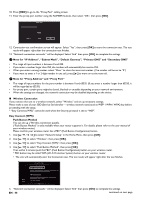
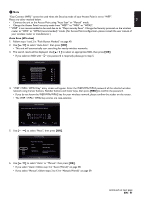
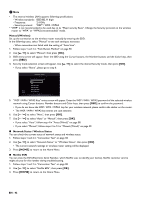
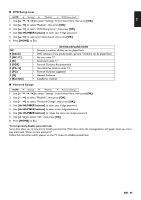
10. Press [RED] to go to the "Proxy Port" setting screen. 11. Enter the proxy port number using the NUMBER buttons, then select "OK", then press [OK]. Proxy Port Please input the Proxy Port. 65525 Return Clear OK 12. Connection test confirmation screen will appear. Select "Yes", then press [OK] to start the connection test. The test result will appear right after the connection test finishes. 13. "Network connection succeeds." will be displayed. Select "End" then press [OK] to complete the settings. D Note for "IP Address", "Subnet Mask", "Default Gateway", "Primary DNS" and "Secondary DNS" • The range of input numbers is between 0 and 255. • If you enter a number larger than 255, the number will automatically be reset to 255. • When you enter a wrong number, select "Clear" to clear the incorrect number. (The number will be set to "0") • If you want to enter a 1 or 2-digit number in one cell, press [ ] to move on to the next cell. D Note for "Proxy Address" and "Proxy Port" • The range of input numbers for the port number is between 0 and 65535. (If you enter a number larger than 65535, it will be regarded as 65535.) • For proxy port, certain ports might be closed, blocked or unusable depending on your network environment. • When the settings are changed, the network connection may be disabled depending on the device. Wireless Connection If you connect this unit to a wireless network, select "Wireless" and set up necessary settings. Please make a note of your SSID (Service Set Identifier ― wireless network name) and its WEP* / WPA / WPA2 key before proceeding with the setup. * "Easy Connect (WPS)" cannot be used when the Security protocol is set to "WEP". Easy Connect (WPS) Push Button Method You can set up a Wireless connection quickly. ("Push Button Method" is only available when your router supports it. For details, please refer to the user manual of your wireless router.) Please confirm your wireless router has a PBC* (Push Button Configuration) button. 1. Use [ ] to select "Network Setup" in the Home Menu, then press [OK]. 2. Use [ ] to select "Wireless", then press [OK]. 3. Use [ ] to select "Easy Connect (WPS)", then press [OK]. 4. Use [ ] to select "Push Button Method", then press [OK]. Then within 2 minutes push the PBC* (Push Button Configuration) button on your wireless router. * PBC button may be called WPS (Wi-Fi Protection System) button on your wireless router. • The unit will automatically start the Connection test. The test result will appear right after the test finishes. Access Point Setting Return Cancel Push Button Method Please push the PBC (push button configuration) on the wireless router and select 'Push Button Method' button on screen. PIN Code Method Please input the PIN number into the wireless router and select 'PIN Code Method' button on screen. PIN Code is: xxxxxxxx 2 / 7 5. "Network connection succeeds." will be displayed. Select "End" then press [OK] to complete the settings. EN - 40 continued on next page
-
 1
1 -
2
-
3
-
4
-
5
-
6
-
7
-
8
-
9
-
10
-
11
-
12
-
13
-
14
-
15
-
16
-
17
-
18
-
19
-
20
-
21
-
22
-
23
-
24
-
25
-
26
-
27
-
28
-
29
-
30
-
31
-
32
-
33
-
34
-
 35
35 -
 36
36 -
 37
37 -
 38
38 -
 39
39 -
 40
40 -
 41
41 -
 42
42 -
 43
43 -
 44
44 -
 45
45 -
46
-
47
-
48
-
49
-
50
-
51
-
52
-
53
-
54
-
55
-
56
-
57
-
58
-
59
-
60
-
61
-
62
-
63
 |
 |
