Olympus WS-801 WS-801 Detailed Instructions (English)
Olympus WS-801 Manual
 |
View all Olympus WS-801 manuals
Add to My Manuals
Save this manual to your list of manuals |
Olympus WS-801 manual content summary:
- Olympus WS-801 | WS-801 Detailed Instructions (English) - Page 1
DIGITAL VOICE RECORDER DETAILED INSTRUCTIONS Thank you for purchasing an Olympus Digital Voice Recorder. Please read these instructions for information about using the product correctly and safely. Keep the instructions handy for future reference. To ensure successful recording, we recommend that - Olympus WS-801 | WS-801 Detailed Instructions (English) - Page 2
of this document are subject to change without notice. Contact our Customer Support Center for the latest information relating to product names and model numbers. • Illustrations of the screen and the recorder shown in this manual may differ from the actual product. The utmost care has been taken - Olympus WS-801 | WS-801 Detailed Instructions (English) - Page 3
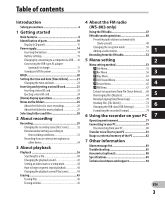
Using the recorder on your PC 7 Operating environment 77 Connecting to your PC 79 Disconnecting from your PC 80 Transfer voice files to your PC 81 Usage as external memory of the PC 82 7 Other information Alarm message list 83 Troubleshooting 85 Accessories (optional 88 Specifications 89 - Olympus WS-801 | WS-801 Detailed Instructions (English) - Page 4
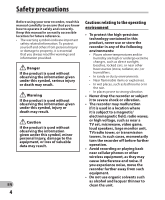
Safety precautions Before using your new recorder, read this manual carefully to ensure that you know how to operate it safely and correctly. Keep this manual in an easily accessible location for future reference. • The warning symbols indicate important safety related information. To protect - Olympus WS-801 | WS-801 Detailed Instructions (English) - Page 5
Olympus or an your hands. Olympus authorized service station, or for any other reasons. • Be careful with the strap. Be careful with the strap when carrying Handling the recorder the recorder . 2 Accidentally swallowing the battery, • If the recorder contains metal parts, overheating can - Olympus WS-801 | WS-801 Detailed Instructions (English) - Page 6
other nonrechargeable batteries. • Batteries should battery leaks or damaging their terminals, carefully follow all instructions regarding the use of batteries. Never attempt to disassemble a battery the recorder. • If a battery leaks fluid attention immediately. • Keep batteries out of the reach of - Olympus WS-801 | WS-801 Detailed Instructions (English) - Page 7
and always observe local laws and regulations. • Always charge a rechargeable battery before using it for the first time, or if it has not been used for a long period. • Rechargeable batteries have a limited life. When the recorder's operating time becomes notably shorter even after the rechargeable - Olympus WS-801 | WS-801 Detailed Instructions (English) - Page 8
register the best setting according to the use (☞ P.32, P.44, P.59, P.63). s It is equipped with the [Calendar * WS-803, WS-802 only. Search] function, convenient for s It supports high capacity searching for files (☞ P.40). recording media. Besides the s It features a [Voice Detect] internal - Olympus WS-801 | WS-801 Detailed Instructions (English) - Page 9
the folders in the memory (WS-803, WS-802 only) (☞ P.70). s You can divide files (PCM*, MP3) that have been recorded with this recorder into two files (☞ P.72). * WS-803, WS-802 only. s Index mark and temp mark features allow you to quickly find desired locations (☞ P.42). s The playback speed and - Olympus WS-801 | WS-801 Detailed Instructions (English) - Page 10
MIC (Microphone) jack 7 Display (LCD panel) 8 MENU button 9 + button 0 REC (s) (Record) button ! 9 button @ - button # SCENE/INDEX button $ STOP (4) button % 0 button ^ `OK button & ERASE button * Built-in speaker ( Battery cover ) EAR (Earphone) jack - POWER/HOLD switch = USB connector slide lever - Olympus WS-801 | WS-801 Detailed Instructions (English) - Page 11
Recording media indicator 2 Current file name 3 Battery indicator 4 Folder indicator, Recording mode indicator, File Lock indicator 5 Recorder status indicator [K]: Record number/ Total number of recorded files in the folder 9 Elapsed recording time, Elapsed playback time 0 Remaining recording - Olympus WS-801 | WS-801 Detailed Instructions (English) - Page 12
3 Battery indicator 4 Recorder status indicator [•]: Play indicator [ ]: Stop indicator [ß]: Forwarding indicator [™]: Rewinding indicator [N]: F. Play indicator [M]: S. Play indicator [ ]: Change playback tone indicator (sharp) [ ]: Change playback tone indicator (flat) Current file number/ Total - Olympus WS-801 | WS-801 Detailed Instructions (English) - Page 13
) [Ø]: Speaker muting [ ]: Voice Playback *1 [ ]: Voice Detect *1 [?]: Rec Level [û]: VCVA [Æ]: Voice sync [ù]: Equalizer [0]: Low Cut Filter [≤]: Zoom Mic *2 [%]: Noise Cancel [$]: Voice Balancer *1 Voice Filter *3 Playback mode *1 WS-803, WS-802 only. *2 WS-803 only. *3 WS-801 only. EN 13 - Olympus WS-801 | WS-801 Detailed Instructions (English) - Page 14
B. For WS-801: This recorder cannot charge the rechargeable battery. 1 Lightly press down on the arrow and slide the battery cover open. Notes • A manganese battery cannot be used in this recorder. • When the battery is changed, a AAA alkaline battery or Olympus Ni-MH rechargeable battery is - Olympus WS-801 | WS-801 Detailed Instructions (English) - Page 15
Note • When a voice/music file is played, depending on the volume level the recorder may be reset due to a drop in the voltage output of the battery even if [ ] is displayed in the battery indicator. In this case, lower the volume of the recorder. [Ni-MH] ( ): Select when using the Olympus Ni-MH - Olympus WS-801 | WS-801 Detailed Instructions (English) - Page 16
via USB For WS-803, WS-802: Before connecting via USB, exit HOLD 1 mode (☞ P.20). You can charge the battery by connecting to a PC's USB port. When charging, be sure to place the rechargeable battery (supplied) correctly into the recorder (☞ P.14). 3 Make sure that the recorder is in stop - Olympus WS-801 | WS-801 Detailed Instructions (English) - Page 17
and the state of the battery. Connecting the USB-type AC adapter (optional) to charge For WS-803, WS-802: • Before connecting the AC Do not charge the recorder with the USB hub connected. • Insert the supplied rechargeable battery and set [Battery] to [Ni-MH]. If [Battery] is set to [Alkaline - Olympus WS-801 | WS-801 Detailed Instructions (English) - Page 18
battery life. In order to prevent battery leakage or rust, remove the rechargeable battery from the recorder when you will not be using it for a long time, and store it separately. Notes • This recorder is designed to fully charge the battery regardless of its energy level. However, for best - Olympus WS-801 | WS-801 Detailed Instructions (English) - Page 19
The resume function remembers the stop position before the power is turned off. 1 Turning on/off the power When the recorder is not being used, turn the power off to reduce battery consumption. Existing data, mode settings, and clock settings are not lost when the power is turned off. Turning on - Olympus WS-801 | WS-801 Detailed Instructions (English) - Page 20
has to be carried in a bag or pocket. This mode can also prevent you from accidentally stopping recording. Setting the recorder to HOLD mode Slide the POWER/HOLD switch to the 1 [HOLD] position. Exiting HOLD mode Slide the POWER/HOLD switch to the A position. HOLD • After [ - Olympus WS-801 | WS-801 Detailed Instructions (English) - Page 21
stored for each file. Setting the time and date beforehand enables easier file management. When you use the recorder for the first time, or when the battery is inserted after the recorder has not been used for a long time, [Set time & date] will appear. When "Hour" is flashing, conduct setup - Olympus WS-801 | WS-801 Detailed Instructions (English) - Page 22
on the display. • "Hour" flashes on the display, indicating the start of the Time and Date setup process. + − button 9 0 button `OK button 1 While the recorder is in stop mode, press the MENU button. • The menu will appear on the display (☞ P.53). 2 Press the + or − button to select [Device Menu - Olympus WS-801 | WS-801 Detailed Instructions (English) - Page 23
card The "microSD" indicated in the instruction manual refers to both microSD and microSDHC. This recorder enables you to store data not only to the internal memory but also to a commercially available microSD card. Inserting a microSD card 1 While the recorder is in stop mode, open the card - Olympus WS-801 | WS-801 Detailed Instructions (English) - Page 24
correctly due to circumstances such as changes in manufacturer specifications. • If a microSD card is not recognized, remove the microSD card and then insert it again to see if the recorder recognizes the microSD card. • Always read the instructions that come with your microSD card before using - Olympus WS-801 | WS-801 Detailed Instructions (English) - Page 25
You can use the recorder not only as a voice recorder and a music player but also as a radio*. * WS-803 only. LIST button recording date (☞ P.40). * WS-803, WS-802 only When [FM Radio]* is selected: The recorder will go into [FM Radio] mode, and you will be able to receive FM radio (☞ P.47). * WS - Olympus WS-801 | WS-801 Detailed Instructions (English) - Page 26
the destination for microphone recording. 200 Radio Folder When you record from the radio, the recorded file will be stored automatically in the [Radio Folder] folder (WS-803 only). Each folder can store up to 200 files. EN Note 26 • Files or folders located under the [Recorder] folder will not - Olympus WS-801 | WS-801 Detailed Instructions (English) - Page 27
03 004 200 Each folder can store up to 200 files. Up to 300* folders can be created under the [Music] folder, including [Music]. * For WS-801: 128 folders. Folder File EN 27 - Olympus WS-801 | WS-801 Detailed Instructions (English) - Page 28
structure of the folders, see the section entitled "Notes on the folders" (☞ P.26). [Home] display Operation of the folders for voice recordings 1 Example: WS-803 Folder list display File list display File display Operation of the folders for music playback Selecting folders and files - Olympus WS-801 | WS-801 Detailed Instructions (English) - Page 29
might be dedicated to holding business information. STOP (4) button REC (s) button • [Rec Mode] cannot be changed in recording standby mode or while recording. Configure this while the recorder is stopped (☞ P.56). • The proper position of the built-in stereo microphone for performing stereo - Olympus WS-801 | WS-801 Detailed Instructions (English) - Page 30
folder or delete unnecessary files before 4 It is possible to record data exceeding 2GB: recording (☞ P.45). • [Memory full] will appear when the For WS-803, WS-802: memory is full. Delete unnecessary files before recording any further (☞ P.45). • When a microSD card is inserted into the - Olympus WS-801 | WS-801 Detailed Instructions (English) - Page 31
and other similar 2 noises. [VCVA] (☞ P.57) [V-Sync. Rec] (☞ P.58) Sets the threshold level for the Variable Control Voice Actuator (VCVA). Sets the start level for voice sync recording. • [≠] will appear on the display. • The recorder will stop if left on pause for more than 60 minutes. Resume - Olympus WS-801 | WS-801 Detailed Instructions (English) - Page 32
Scene] earphones into the EAR jack on the recorder, you can hear the audio being recorded. The recording monitor volume can be adjusted by pressing the + or − button. You can easily change the recording settings by selecting the scene which best matches your usage (☞ P.59). Connect the earphones - Olympus WS-801 | WS-801 Detailed Instructions (English) - Page 33
to the volume being recorded. [Off] *1 WS-803 only. *2 WS-803, WS-802 only. File names are automatically created for files recorded by this recorder. 803_ 0001 .WMA 1 2 3 1 User ID: This is the user ID name that has been set on the Digital Voice Recorder. 2 File number: 3 Extension: This is - Olympus WS-801 | WS-801 Detailed Instructions (English) - Page 34
into your ear while you are phoning. The voice or conversation from the phone can be recorded clearly. Applicable external microphones (optional) (☞ P.88 sensitive omni-directional EN microphones are supported by plug-in power and are well-suited to recording 34 musical performances. Notes • - Olympus WS-801 | WS-801 Detailed Instructions (English) - Page 35
and then adjust the output level for the external devices. For WS-802, WS-801: • The recording level cannot be adjusted on this recorder. When an external device is connected, perform a test recording and then adjust the output level on the external device. Note • When you adjust the various - Olympus WS-801 | WS-801 Detailed Instructions (English) - Page 36
can play back WAV*, MP3 and WMA format files. To play back a file recorded with another machine, you need to transfer (copy) it from a computer. * WS-803, WS-802 only. 3 Press the + or − button to adjust the volume. • The volume can be adjusted within the range of [00] to [30]. Playback STOP - Olympus WS-801 | WS-801 Detailed Instructions (English) - Page 37
Voice Balancer] *1 *3 (☞ P.61) When playing back a recorded audio file, the recorder compensates for any low-volume portions in the file. [Voice Filter] *2 *3 (☞ P.61) The recorder has a Voice WS-803, WS-802 only. *2 WS-801 only. *3 Function active only in [Recorder] mode. *4 Function active only - Olympus WS-801 | WS-801 Detailed Instructions (English) - Page 38
resumes normal playback. • If there is an index mark or temp mark within the file, the recorder stops at that location (☞ P.42). • The recorder stops when it reaches the beginning of the file. Continue pressing the 0 button to continue rewinding from the end of the previous file. Playback EN - Olympus WS-801 | WS-801 Detailed Instructions (English) - Page 39
, WS-802 only. • Variable bit rate MP3 files (in which conversion bit rates can vary) may not be played back properly. • For WAV files, this recorder can only play back those in the linear PCM format. WAV files other than these cannot be played back. • Even if the file format is - Olympus WS-801 | WS-801 Detailed Instructions (English) - Page 40
for a file For WS-803, WS-802: You can search for voice files by the date they were recorded. As long as you know the date, you can quickly find a file even if you have forgotten what folder it is in. It is only possible to search for files saved in the voice recordings folder (& to *). 3 LIST - Olympus WS-801 | WS-801 Detailed Instructions (English) - Page 41
, or insert an 9, 0 buttons: Change the playback speed. +, − buttons*: Change the playback tone. * WS-803, WS-802 only. • If you are still having trouble catching the words after changing the playback speed, you can make the voice clearer by changing the tone. index or temp mark in playback speed - Olympus WS-801 | WS-801 Detailed Instructions (English) - Page 42
into files created by Olympus voice recorders, but temp marks can be used to temporarily remember desired locations. Clearing an index mark SCENE/INDEX button 1 While the recorder is in recording mode or playback mode, press the SCENE/INDEX button. • A number appears on the display and an index - Olympus WS-801 | WS-801 Detailed Instructions (English) - Page 43
well (☞ P.41). If an index mark or temp mark is set or cleared during segment repeat playback, segment repeat playback is canceled and the recorder returns to normal playback mode (☞ P.42). Playback • While [w] is flashing, you can fast forward, rewind, or change the playback speed in the same way - Olympus WS-801 | WS-801 Detailed Instructions (English) - Page 44
segment repeat playback, and it will return to normal playback mode. c Press the 9 button Pressing the 9 button releases segment repeat playback, and makes the recorder skip to the beginning of the next file. d Press the 0 button Pressing the 0 button releases segment repeat playback, and makes the - Olympus WS-801 | WS-801 Detailed Instructions (English) - Page 45
to [Erasing!] and erasing starts. • [Erased] is displayed when the file is erased. File numbers are reassigned automatically. Erasing ERASE button 3 1 Select the file you want to erase (☞ P.28). 2 While the recorder is in stop mode in the file display, press the ERASE button. • If an action is - Olympus WS-801 | WS-801 Detailed Instructions (English) - Page 46
The default folders of the recorder, namely [Recorder] (including [Folder A] to [Folder E] and [Radio Folder]*) and [Music] cannot be erased. * WS-803 only. • In the battery during processing. 3 Remove the microSD card during processing when [microSD card] is selected as the recording media. - Olympus WS-801 | WS-801 Detailed Instructions (English) - Page 47
be able to get radio reception in these locations. • For best reception, avoid using the radio at the same time as a cellular phone, PC, television or other electrical product. Such products may cause noise. EN • If you use the radio while the recorder is connected to the AC adapter (A514 etc - Olympus WS-801 | WS-801 Detailed Instructions (English) - Page 48
FM radio mode operations For WS-803: Plug in the earphones Adding a radio station to the preset stations: Change the reception mode to manual reception, and adjust the frequency. The station you are tuned to can then be added (☞ P.50, P.51). 3 Press the 9 or 0 button to select a station. • You - Olympus WS-801 | WS-801 Detailed Instructions (English) - Page 49
is complete. FM radio mode operations 3 Press the `OK button to move the cursor to the item you want to set. Note EN • The preset numbers are automatically assigned according to the frequency. 49 - Olympus WS-801 | WS-801 Detailed Instructions (English) - Page 50
signal (Manual reception). • Press and hold the 9 or 0 button to scan through the receivable radio stations (Auto reception). b Tuning frequency • If you press the `OK button while a frequency that you have not preset is being received, the recorder will tune in to the station whose preset number is - Olympus WS-801 | WS-801 Detailed Instructions (English) - Page 51
radio station You can add radio stations from Auto/ Manual reception to the preset stations. Plug in the earphones . FM radio mode operations 2 Press the SCENE/INDEX button. Note • The preset numbers are automatically assigned according to the frequency. • Select [Cancel] and press the ` - Olympus WS-801 | WS-801 Detailed Instructions (English) - Page 52
radio For WS-803: Plug in the earphones STOP (4) button 4 REC (s) button When recording from the FM radio: Even if the sound of the FM radio is clear, in certain conditions there may be cases of electric interference when the recording starts. To avoid such a problem, perform a recording test - Olympus WS-801 | WS-801 Detailed Instructions (English) - Page 53
or − button to move to the item you want to set. 1 While the recorder is in stop mode, press the MENU button. • The menu appears on the display. • Menu items can be set during recording or playback. 2 Press the + or − button to move to the tab - Olympus WS-801 | WS-801 Detailed Instructions (English) - Page 54
[Backlight] and [LED] settings are available. Function Setting [Rec Mode] [Auto-preset] [Scan Level] [Backlight] To menu item options [LED] [Output] *1 WS-803 only. *2 WS-803, WS-802 only. *3 WS-801 only. *4 Function active only in [Recorder] mode. *5 Function active only in [Music] mode. - Olympus WS-801 | WS-801 Detailed Instructions (English) - Page 55
WS-803, WS-802: [Name] (File name), [Date] (Time stamp), [Size] (File size), [Bit Rate]*1 (File format), [Artist]*2 (Artist name) and [Album]*2 This function extracts voice portions from a (Album name) appear on the display. recorded voice this recorder are not included in the number Replace - Olympus WS-801 | WS-801 Detailed Instructions (English) - Page 56
a small number of people. [Low]: Lowest recording sensitivity suitable for dictation. [Manual]*: The recording level must be adjusted manually during recording. The level can be adjusted from [01] to [30]. 5 * WS-803, WS-802 only. • When you want to record a speaker's voice clearly, set - Olympus WS-801 | WS-801 Detailed Instructions (English) - Page 57
(low) Sound collection (narrow) Sound collection (wide) Low Cut Filter Menu setting method The recorder has a Low Cut Filter function to minimize low-frequency sounds and record voices more clearly. This function can reduce noise from air conditioners and projectors and other similar noises - Olympus WS-801 | WS-801 Detailed Instructions (English) - Page 58
the REC (s) button to start recording. 2 Press the 9 or 0 button to adjust the voice sync level. • The voice sync level can be set to any of 28 different values. • The higher the value, the more sensitive the recorder is to sounds. At the highest value, even the faintest sound activates recording. - Olympus WS-801 | WS-801 Detailed Instructions (English) - Page 59
display and the LED indicator light flashes. • When the input is at or above the voice sync level, recording starts automatically. [Select]: From the templates, select 4 Voice sync recording stops a recording scene that suits the automatically. • If sound at a volume equal to or below the - Olympus WS-801 | WS-801 Detailed Instructions (English) - Page 60
from [User Setting 1], [User Setting 2] and [User Setting 3]. 4 When [Select] is selected: 4 Select a recording scene. Template Off] [DNS]: For Dragon Naturally Speaking (Nuance Communications Inc.) * WS-803 only. • When a recording scene is selected, recording-related menu settings cannot - Olympus WS-801 | WS-801 Detailed Instructions (English) - Page 61
] function is being used, the following functions are not available. • Change playback speed/tone (☞ P.41) • [Voice Playback] • [Voice Balancer] • [Voice Filter] For WS-801: The recorder has a Voice Filter Function to cut low and high frequency tones during normal, fast, or slow playback, and - Olympus WS-801 | WS-801 Detailed Instructions (English) - Page 62
Mode You can select the playback mode that best suits the type of audio. 4 When the recorder is in [Recorder] mode: 1 Select [File] or [ [Pop] [Jazz]: Enables the equalizer function. [User]: Select [User] to save your own custom equalizer settings. If [User] is selected, proceed to Step 2. 2 Select - Olympus WS-801 | WS-801 Detailed Instructions (English) - Page 63
is convenient for quickly skipping to another playback position or repeatedly playing back short phrases. 1 Select [Forward Skip] or [Reverse Skip]. Voice files recorded in the recorder and music files downloaded from a PC can be saved with the playback settings of your choice to suit the different - Olympus WS-801 | WS-801 Detailed Instructions (English) - Page 64
can select the save destination from among [VOICE 1] to [MUSIC 3]. 4 When [Select] is selected: 4 Select a playback scene. . LCD/Sound Menu Backlight The display will remain lit for about 10 (Initial setting) seconds when a button on the recorder is pressed. [Off]: Disables the Backlight function - Olympus WS-801 | WS-801 Detailed Instructions (English) - Page 65
(Appears when [Speaker] is set to [Off].) WS-803 only: • This is a different function from is inserted, you can select to record to either the internal memory or Battery Select the battery type to match the battery you are using. [Ni-MH] ( ): Select when using the Olympus Ni-MH rechargeable battery - Olympus WS-801 | WS-801 Detailed Instructions (English) - Page 66
to their initial values, the time settings and file numbers are preserved, without being returned to their initial settings. WS-803 only. *2 WS-803, WS-802 only. *3 WS-801 only. *4 Function active only in [Recorder] mode. *5 Function active only in [Music] mode. Format When the recorder - Olympus WS-801 | WS-801 Detailed Instructions (English) - Page 67
, but this is not a malfunction. System Info. You can check information about the recorder on the menu screen. [Model] (Model Name), [Version] (System version) and [Serial No.] (Serial Number) appear on the display. FM Menu For WS-803: Can be operated only in [FM Radio] mode. Rec Mode You can change - Olympus WS-801 | WS-801 Detailed Instructions (English) - Page 68
under -12 dB) and/or the ambient noise was high at the time of the recording. • The larger a recorded voice file, the more time extraction processing will take. Before starting extraction, charge the EN 4 Press the `OK button. 68 battery or replace it with a new one in order to ensure that the - Olympus WS-801 | WS-801 Detailed Instructions (English) - Page 69
flash to confirm that the file can be moved. STOP (4) button MENU button + − button 9 0 button `OK button 5 Press the + or − button to select the location to which you want to move the file. 1 Select the folder for which you want to rearrange the file order (☞ P.28). 2 Select [Replace] from the - Olympus WS-801 | WS-801 Detailed Instructions (English) - Page 70
"Menu setting method" (☞ P.53). 3 Press the + or − button to select the location to which you want to move or copy the file. [Move to memory]: Move a 4 Press the `OK button. 5 Press the + or − button to select the number of files you want to move or copy. [One file]: Select only the specified file - Olympus WS-801 | WS-801 Detailed Instructions (English) - Page 71
memory capacity is not sufficient. • The recorder cannot move or copy when the number of files exceeds 200. • Do not remove the battery during 7 Press the 9 , 0 or copy process has already been completed are saved at the new location. The move or copy process is canceled for all other files. - Olympus WS-801 | WS-801 Detailed Instructions (English) - Page 72
files 5 recorded on this recorder can be divided. * WS-803, WS-802 only. 1 Stop playback at the divide position. • While the recorder is in be performed only when the file list is displayed. • The recorder cannot divide files when the number of files in the folder exceeds 199. • Locked files - Olympus WS-801 | WS-801 Detailed Instructions (English) - Page 73
has an extremely short recording time, it may not be divided even if it is an MP3 file or PCM file. • Do not remove the battery while dividing a setting. When [USB Connection] is selected: [PC]: Setting for when the recorder is connected to a PC and used as a storage device or composite device. - Olympus WS-801 | WS-801 Detailed Instructions (English) - Page 74
Menu setting method Notes • When you first connect the recorder to your PC as an external storage device, the driver for the recorder will be automatically installed in your PC. • The PC cannot recognize that the recorder is connected to the PC if [USB Connection] is set to [AC Adapter]. • If the - Olympus WS-801 | WS-801 Detailed Instructions (English) - Page 75
Press the + button again to select [Start]. Notes • Never format the recorder from a PC. • When the recorder is formatted, all the saved data, including locked files and read-only files, is erased. • After formatting, recorded voice file names may start from [0001]. • To restore the function - Olympus WS-801 | WS-801 Detailed Instructions (English) - Page 76
damage the data. 1 Disconnect the AC Adapter during processing. 2 Remove the battery during processing. 3 Remove the microSD card during processing when [microSD card] is selected as the recording media. • Formatting on the recorder is Quick 5 Format. If you format the microSD card, file - Olympus WS-801 | WS-801 Detailed Instructions (English) - Page 77
recorder is compatible with WMA, MP3 and WAV* language content. * WS-803, WS-802 only. • In addition to its uses as a voice recorder and a music player, this recorder required for saving files recorded by this recorder to your PC via the USB connection. • The support service does not cover you if - Olympus WS-801 | WS-801 Detailed Instructions (English) - Page 78
be successfully transferred. • On a PC, do not format the drive of the recorder. Initialization is not successfully achieved on a PC. For initialization, follow the instructions in the [Format] display of the recorder (☞ P.74). • Folder (directory) names that appear in file management tools such as - Olympus WS-801 | WS-801 Detailed Instructions (English) - Page 79
to the PC's USB port. 6 Connecting to your PC • [Remote (Storage)] is displayed on the recorder if the USB connector is connected. Notes • Before connecting via USB, exit HOLD mode. • Refer to the user's manual for your PC regarding the USB port on your PC. • Be sure to push the cable - Olympus WS-801 | WS-801 Detailed Instructions (English) - Page 80
Connecting to your PC Disconnecting from your PC Windows 1 Click [ ] on the task bar located at the lower-right corner of the screen. Click [Safely remove USB Mass Storage Device]. Macintosh 1 Drag and drop the recorder's drive icon on the desktop to the Recycle Bin icon. • The drive letter will - Olympus WS-801 | WS-801 Detailed Instructions (English) - Page 81
2 Double-click the product name icon on the desktop. *1 Recognized by the drive name of the product. *2 WS-803 only Transfer voice files to your PC 3 Copy the data. 4 Disconnect the recorder from the PC (☞ P.80). Notes • While data is being transmitted, [Busy] is displayed and the LED indicator - Olympus WS-801 | WS-801 Detailed Instructions (English) - Page 82
as external memory of the PC In addition to its uses as a voice recorder and a music player, this recorder can also be used as external memory for a computer by storing data from a computer and reading it back out. With the recorder connected to your PC, you can download data from the memory to - Olympus WS-801 | WS-801 Detailed Instructions (English) - Page 83
battery (WS-803, WS-802 only) or replace with a new battery (☞ P.14, P.16). [File locked] Erase-locked. Tried to delete a locked file. Unlock the file (☞ P.55). Not an audio recording folder. Recording the store where you purchased the recorder or an Olympus service station for repair (☞ P.94). - Olympus WS-801 | WS-801 Detailed Instructions (English) - Page 84
were found in the Select another folder folder. (☞ P.26 to P.28). [Format error] Formatting error. There was an error while formatting the recorder's memory. Reformat the memory (☞ P.74). [Can't create the system file. Connect to PC and erase unnecessary file] The management file cannot be - Olympus WS-801 | WS-801 Detailed Instructions (English) - Page 85
is in HOLD mode. Charge the battery (WS-803, WS-802 only) or replace with a new battery (☞ P.14, P.16). Turn the power on (☞ P.19). Release the recorder from HOLD (☞ P.20). Low remaining memory. Erase unnecessary files (☞ P.45). Unable to record The maximum number of files has been reached - Olympus WS-801 | WS-801 Detailed Instructions (English) - Page 86
Troubleshooting Symptom Recording level too high Voice files are not recorded in stereo Probable cause WS-803 only: The recording level has not been adjusted. This could potentially be because the recording level and output level for connected external devices is too high. The connected external - Olympus WS-801 | WS-801 Detailed Instructions (English) - Page 87
number of marks has been reached. The file is locked. The file is read-only. WS-803 only: Cannot receive FM radio signal The earphones are not plugged into the EAR jack. [Output] is set to [Earphone]. WS-803, WS-802 only: Cannot recharge The PC is unable to recognize the recorder [Battery - Olympus WS-801 | WS-801 Detailed Instructions (English) - Page 88
Accessories (optional) Accessories exclusive to the Olympus voice recorder can be purchased directly from Online Shop on our company's website. Availability of accessories differs depending on the country. s Stereo microphone: ME51S The built-in large-diameter microphone enables sensitive stereo - Olympus WS-801 | WS-801 Detailed Instructions (English) - Page 89
memory: WS-803: 8 GB/WS-802: 4 GB/ WS-801: 2 GB microSD card: 2 GB to 32 GB 4 Speaker: Built-in ø 18 mm round dynamic speaker 4 MIC jack: ø 3.5 mm mini-jack, impedance 2 kΩ 4 EAR jack: ø 3.5 mm mini-jack, impedance 8 Ω or more 4 Input power requirement: Battery: AAA battery (LR03) or 7 Olympus Ni - Olympus WS-801 | WS-801 Detailed Instructions (English) - Page 90
-802 only *2 WS-801 only 7 4 During recording mode (Built-in stereo microphone): 70 Hz to 20 kHz (However, for recording in the MP3 format or the WMA format, the upper limit value of the frequency response depends on the recording mode) 4 During playback mode: 20 Hz to 20 kHz EN 90 Specifications - Olympus WS-801 | WS-801 Detailed Instructions (English) - Page 91
radio reception During FM radio recording Earphone playback Alkaline battery 12 h. Ni-MH Rechargeable battery 11 h. 7 h. 7 h. * WS-803, WS-802 only. Specifications Note EN • Battery life is measured by Olympus. It varies greatly according to the type of battery used and the conditions of - Olympus WS-801 | WS-801 Detailed Instructions (English) - Page 92
Specifications Guide to recording times The following values are strictly for reference only. 4 Linear PCM format: Recording media Internal memory microSD card WS-803 (8 GB) WS-802 (4 GB) 8 GB 4 GB 2 GB Recording mode 44.1 kHz/16 bit 12 h. 5 min. 6 h. 12 h. 5 min. 6 h. 3 h. 4 MP3 format: - Olympus WS-801 | WS-801 Detailed Instructions (English) - Page 93
WAV). • Regardless of the amount of remaining memory, the longest sound recording time per file is restricted to the following value. Linear PCM format 44.1 kHz/16 bit *1 approx. 3 h. 20 min. WS-803: 2,000 songs WS-802: 1,000 songs WS-801: 500 songs (At 128 kbps, 4 minutes per song) MP3 format 256 - Olympus WS-801 | WS-801 Detailed Instructions (English) - Page 94
567 1083 + 49 40 23773 4899 s User Support E-mail address in Europe [email protected] Technical assistance and support Declaration of Conformity: Model Number: WS-803/WS-802/WS-801 Trade Name: DIGITAL VOICE RECORDER Responsible Party: OLYMPUS IMAGING AMERICA INC. Address: 3500 - Olympus WS-801 | WS-801 Detailed Instructions (English) - Page 95
IMAGING CORP. Shinjuku Monolith, 3-1 Nishi-Shinjuku 2-chome, Shinjuku-ku, Tokyo 163-0914, Japan. Tel. +81 (0)3-3340-2111 http://www.olympus.com OLYMPUS IMAGING AMERICA INC. 3500 Corporate Parkway, P.O. Box 610, Center Valley, PA 18034-0610, U.S.A. Tel. 1-888-553-4448 http://www.olympusamerica
-
 1
1 -
 2
2 -
 3
3 -
 4
4 -
 5
5 -
 6
6 -
 7
7 -
8
-
9
-
10
-
11
-
12
-
13
-
14
-
15
-
16
-
17
-
18
-
19
-
20
-
21
-
22
-
23
-
24
-
25
-
26
-
27
-
28
-
29
-
30
-
31
-
32
-
33
-
34
-
35
-
36
-
37
-
38
-
39
-
40
-
41
-
42
-
43
-
44
-
45
-
46
-
47
-
48
-
49
-
50
-
51
-
52
-
53
-
54
-
55
-
56
-
57
-
58
-
59
-
60
-
61
-
62
-
63
-
64
-
65
-
66
-
67
-
68
-
69
-
70
-
71
-
72
-
73
-
74
-
75
-
76
-
77
-
78
-
79
-
80
-
81
-
82
-
83
-
84
-
85
-
86
-
87
-
88
-
89
-
90
-
91
-
92
-
93
-
94
-
95
 |
 |
Register your product on
www.olympus-consumer.com/register
and get additional benefits from Olympus!
DETAILED
INSTRUCTIONS
DIGITAL VOICE
RECORDER
Thank you for purchasing an Olympus
Digital Voice Recorder.
Please read these instructions for information
about using the product correctly and safely.
Keep the instructions handy for future reference.
To ensure successful recording, we recommend that
you test the record function and volume before use.
EN