Olympus WS-801 WS-801 Detailed Instructions (English) - Page 49
Presetting radio stations, automatically [Auto-preset]
 |
View all Olympus WS-801 manuals
Add to My Manuals
Save this manual to your list of manuals |
Page 49 highlights
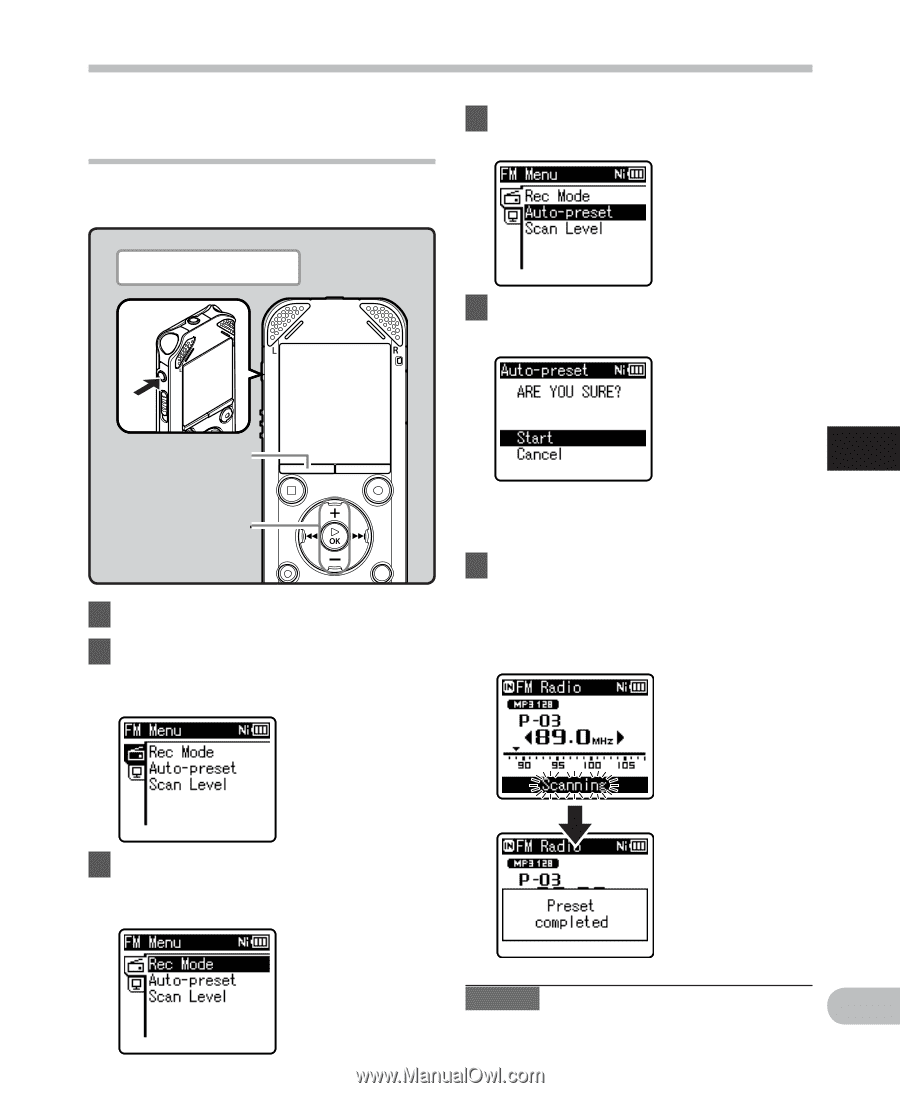
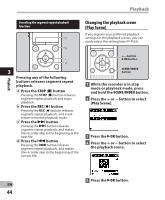
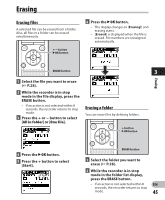
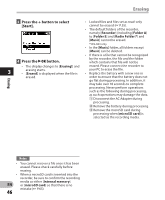
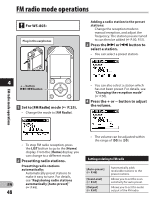
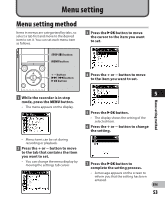
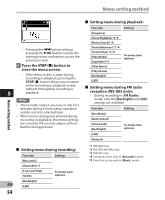
Presetting radio stations automatically [Auto-preset] Presetting radio stations makes it easy to find your desired station. Plug in the earphones FM radio mode operations 4 Press the + or - button to select [Auto-preset]. 5 Press the `OK button. • [Auto-preset] appears on the display. MENU button + − button `OK button 1 Set to [FM Radio] mode (☞ P.25). 2 Press the MENU button. • The menu appears on the display (☞ P.53) 4 • Select [Cancel] and press the `OK button to return to the previous display. 6 Press the `OK button again. • [Scanning] appears on the display and scanning starts. When [Preset completed] appears, the scan is complete. FM radio mode operations 3 Press the `OK button to move the cursor to the item you want to set. Note EN • The preset numbers are automatically assigned according to the frequency. 49
-
 1
1 -
2
-
3
-
4
-
5
-
6
-
7
-
8
-
9
-
10
-
11
-
12
-
13
-
14
-
15
-
16
-
17
-
18
-
19
-
20
-
21
-
22
-
23
-
24
-
25
-
26
-
27
-
28
-
29
-
30
-
31
-
32
-
33
-
34
-
35
-
36
-
37
-
38
-
39
-
40
-
41
-
42
-
43
-
 44
44 -
 45
45 -
 46
46 -
 47
47 -
 48
48 -
 49
49 -
 50
50 -
 51
51 -
 52
52 -
 53
53 -
 54
54 -
55
-
56
-
57
-
58
-
59
-
60
-
61
-
62
-
63
-
64
-
65
-
66
-
67
-
68
-
69
-
70
-
71
-
72
-
73
-
74
-
75
-
76
-
77
-
78
-
79
-
80
-
81
-
82
-
83
-
84
-
85
-
86
-
87
-
88
-
89
-
90
-
91
-
92
-
93
-
94
-
95
 |
 |