Panasonic AG-HMC80PJ User Manual - Page 11
Marker, Checking and displaying shooting status, PRE REC, Optical Image Stabilizer
 |
View all Panasonic AG-HMC80PJ manuals
Add to My Manuals
Save this manual to your list of manuals |
Page 11 highlights
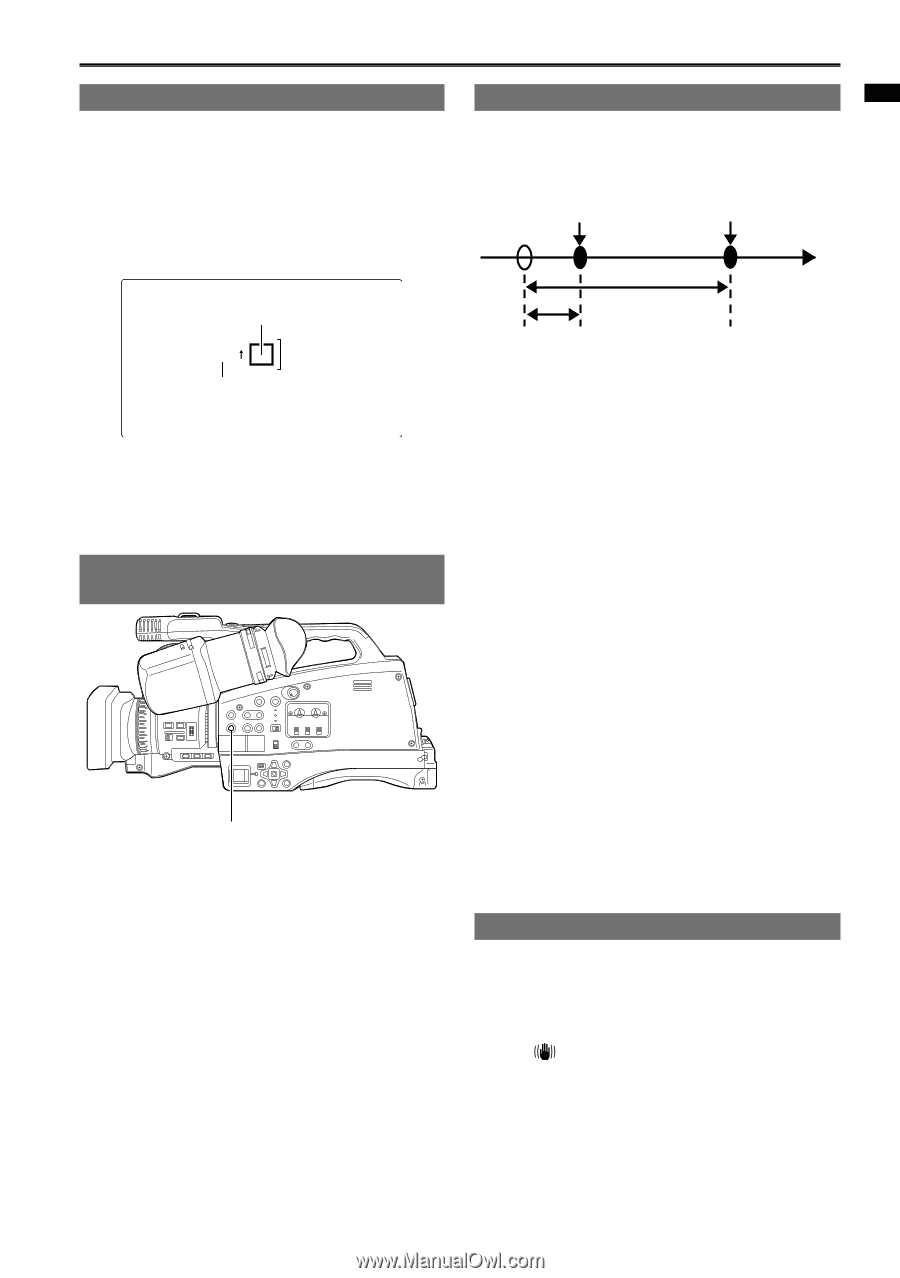
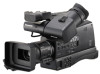
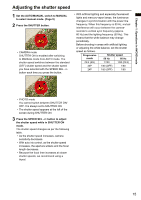
Chapter 1: Operations in AVCHD mode Marker If you press the ZEBRA button while zebra patterns are displayed, a marker appears near the center of the display (if you have set the setup menu, SW&DISP SETUP, MARKER to ON). The brightness of the areas near the screen center can be checked as a percentage (0 % to 99 %). "99%↑" appears if the percentage is over 99. PRE REC Record video and audio from three seconds before the time of the operation to begin recording. Operation to start recording Operation to stop recording (Time) Image level detection area 99% Image level Marker The normal display reappears if you press the ZEBRA button again. • The marker does not appear when the face detection function is set to ON. Checking and displaying shooting status DISP/MODE CHK button If you press and hold the DISP/MODE CHK button in recording standby mode or while recording, the configuration status of all recording functions, a list of USER button function assignments, focus ring function, and all other camera information will be displayed. Release the button to return to the normal display. Pressing the DISP/MODE CHK button during recording or while recording is paused will remove all displays from the screen except for the operation status, counter, marker, and safety zone display. Press the button again to return to the normal display. (Page 99) The display mode selected using the DISP/MODE CHK button is retained even if you turn off the camera by setting the POWER switch to OFF, or change the operating mode. Actual recording time PRE REC time 1 Select ON for the PREREC MODE item in the setting menu RECORD SETUP screen, and then press the ENTER button. PRE REC is displayed on the screen. • When the TCG item on the RECORD SETUP screen has been set to REC RUN in AVCHD mode, the setting will be automatically changed to FREE RUN. 2 Press the START/STOP button. Video and audio from approximately 3 seconds previously will be recorded. • Recording of the previous 3 seconds of video and audio may not be possible if recording is started immediately in the following cases. � Immediately after switching from another mode to CAMERA mode � Immediately after turning power on � Immediately after changing to PREREC MODE item • The thumbnail for clips recorded using the PREREC function will display the image from when the START/STOP button was pressed. Optical Image Stabilizer Use the Optical Image Stabilizer (OIS) to reduce the effects of camera shake when shooting by hand. Press the OIS button to turn the function on and off. The appears on the viewfinder when this function is on. Turn the function off when using a tripod for more natural images. 11
-
 1
1 -
2
-
3
-
4
-
5
-
 6
6 -
 7
7 -
 8
8 -
 9
9 -
 10
10 -
 11
11 -
 12
12 -
 13
13 -
 14
14 -
 15
15 -
 16
16 -
17
-
18
-
19
-
20
-
21
-
22
-
23
-
24
-
25
-
26
-
27
-
28
-
29
-
30
-
31
-
32
-
33
-
34
-
35
-
36
-
37
-
38
-
39
-
40
-
41
-
42
-
43
-
44
-
45
-
46
-
47
-
48
-
49
-
50
-
51
-
52
-
53
-
54
-
55
-
56
-
57
-
58
-
59
-
60
-
61
-
62
-
63
-
64
-
65
-
66
-
67
-
68
-
69
-
70
-
71
-
72
-
73
-
74
-
75
-
76
-
77
-
78
-
79
-
80
-
81
-
82
-
83
-
84
-
85
-
86
-
87
-
88
-
89
-
90
-
91
-
92
-
93
-
94
-
95
-
96
-
97
-
98
-
99
-
100
-
101
-
102
-
103
-
104
-
105
-
106
-
107
-
108
-
109
-
110
-
111
-
112
-
113
-
114
-
115
-
116
-
117
-
118
-
119
-
120
-
121
-
122
-
123
-
124
-
125
-
126
 |
 |