Panasonic AG-HMC80PJ User Manual - Page 13
Shot mark function, Interval recording, Time stamp function, Operations in AVCHD mode
 |
View all Panasonic AG-HMC80PJ manuals
Add to My Manuals
Save this manual to your list of manuals |
Page 13 highlights
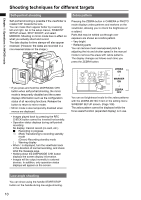
Shot mark function The marks attached to the thumbnails of clips are called shot marks. On the thumbnail screen monitor you can select only those clips with a shot mark and display them or play them back. During recording, when you press the USER button to which the SHOT MARK function has been allocated, MARK ON appears in the LCD monitor or the viewfinder, and a shot mark is set for the thumbnail of the clip being recorded. If you press the button again, the shot mark is released. You can also set or release the shot marks by performing the thumbnail operations for clips. (Page 49) However, note that you cannot set or release shot marks during playback. • INVALID appears when you cannot set or release shot marks. Interval recording This function allows you to create short videos of scenes that move slowly over long periods of time through frame-by-frame recording at specified intervals. Single frames are recorded at the specified interval, with 24 frames equaling 1 second of video. You can specify the interval in CAMERA mode with the INTERVAL REC item in the setting menu RECORD SETUP screen. • 1 SECOND/10 SECONDS/30 SECONDS/1 MINUTE/2 MINUTES: Change the recording interval. OFF: Disable interval recording. • appears on the screen. • Interval recording will be disabled when shooting is finished. • Audio recording is disabled. • The PRE-REC function is disabled, even if it is set. Example Recording interval Shooting time Video length Sunsets 1 SECOND 30 min to 1 hour 1 min 15 sec to 2 min 30 sec Butterfly emerging from cocoon 10 SECONDS 2 hr to 4 hr 30 sec to 1 min Flowers 30 1 hr to blooming SECONDS 3 hr 5 sec to 15 sec • The maximum shooting time is 24 hours. • When recording for long periods, use the AC adaptor to eliminate battery concerns. • Do not remove the battery or disconnect the AC adaptor during interval recording. Doing so may damage recorded image data or result in data loss. • You cannot change the recording mode while interval recording is enabled. • Depending on lighting and shooting conditions, color and focus settings may not adjust automatically. In such cases, make adjustments manually. • The digital zoom function, and BLACKFADE and WHITEFADE functions cannot be used while INTERVAL REC is enabled. • Set the below values for REC FORMAT when setting INTERVAL REC. If the settings differ to the below, INTERVAL REC will be displayed in gray and disabled. REC FORMAT: PH 1080/24P • When playing back a recorded video, set the playback format to 1080/24P. • Photo shooting is disabled. • Even if you have not met 24 frames when you stop recording, a 1 second video will be created. Time stamp function The date and time of recording can be recorded to video images. Select ON in the TIME STAMP item on the settings menu RECORD SETUP screen. When the TIME STAMP function is ON, R will be displayed in front of the date and time display in the viewfinder. In addition, the month display will change from a numerical value to an English name display. • The letter R display itself will not be recorded to the video. • The size and position of the time and date characters recorded to the image will vary depending on the recording format. • The size and position of the time stamp characters in external output displays may vary from the displays in the viewfinder and external input/output displays. • The recorded time and date display will follow the settings made in the DATE/TIME item on the SW&DISP SETUP screen. If this item is set to OFF, the date and time will not be recorded as a time stamp. • To avoid date and time displays overlapping when clips with time stamps recorded are played with this camera, please set the DATE/TIME item on the SW&DISP SETUP screen to OFF. 13 Chapter 1: Operations in AVCHD mode
-
 1
1 -
2
-
3
-
4
-
5
-
6
-
7
-
 8
8 -
 9
9 -
 10
10 -
 11
11 -
 12
12 -
 13
13 -
 14
14 -
 15
15 -
 16
16 -
 17
17 -
 18
18 -
19
-
20
-
21
-
22
-
23
-
24
-
25
-
26
-
27
-
28
-
29
-
30
-
31
-
32
-
33
-
34
-
35
-
36
-
37
-
38
-
39
-
40
-
41
-
42
-
43
-
44
-
45
-
46
-
47
-
48
-
49
-
50
-
51
-
52
-
53
-
54
-
55
-
56
-
57
-
58
-
59
-
60
-
61
-
62
-
63
-
64
-
65
-
66
-
67
-
68
-
69
-
70
-
71
-
72
-
73
-
74
-
75
-
76
-
77
-
78
-
79
-
80
-
81
-
82
-
83
-
84
-
85
-
86
-
87
-
88
-
89
-
90
-
91
-
92
-
93
-
94
-
95
-
96
-
97
-
98
-
99
-
100
-
101
-
102
-
103
-
104
-
105
-
106
-
107
-
108
-
109
-
110
-
111
-
112
-
113
-
114
-
115
-
116
-
117
-
118
-
119
-
120
-
121
-
122
-
123
-
124
-
125
-
126
 |
 |