Panasonic AG-HMC80PJ User Manual - Page 26
Charging the built-in battery/Setting the time code, Recharging the built-in battery
 |
View all Panasonic AG-HMC80PJ manuals
Add to My Manuals
Save this manual to your list of manuals |
Page 26 highlights
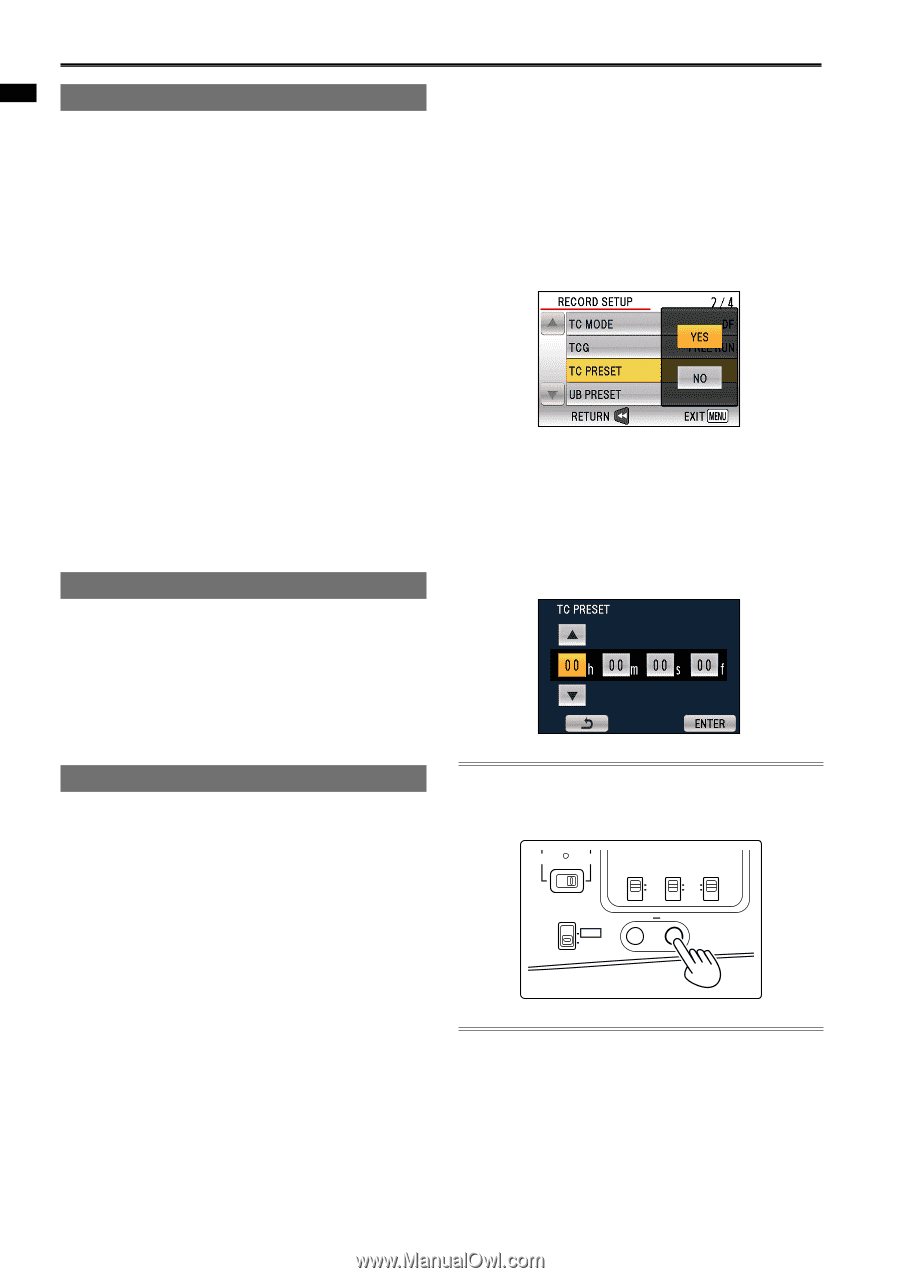
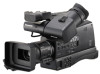
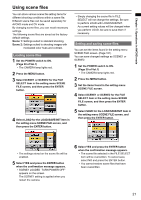
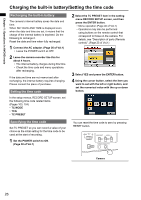
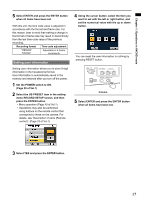
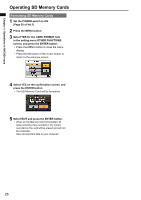
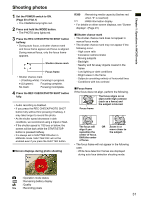
Chapter 1: Operations in AVCHD mode Charging the built-in battery/Setting the time code Recharging the built-in battery The camera's internal battery saves the date and time. When SET DATE AND TIME is displayed even when the date and time are set, it means that the charge of the internal battery is depleted. Do the following to recharge it. Reset the date and time when fully recharged. 1 Connect the AC adaptor. (Page 26 of Vol.1) • Leave the POWER switch at OFF. 2 Leave the camera-recorder like this for about 4 hours. • The internal battery charges during this time. • Check the time code and menu operations after recharging. If the date and time are not memorized after recharging, the internal battery requires changing. Please consult the place of purchase. Setting the time code In the setup menus, RECORD SETUP screen, set the following time code related items. (Pages 103, 104) • TC MODE • TCG • TC PRESET 2 Select the TC PRESET item in the setting menu RECORD SETUP screen, and then press the ENTER button. • Menu operation (Page 40 of Vol.1) • Operations may also be performed using buttons on the remote control that correspond to those on the camera. For details, see "Description of parts (Remote control)". (Page 23 of Vol.1) 3 Select YES and press the ENTER button. 4 Using the cursor button, select the item you want to set with the left or right button, and set the numerical value with the up or down button. Specifying the time code Set TC PRESET so you can record a value of your choice as the initial setting for the time code to be used at the start of recording. 1 Set the POWER switch to ON. (Page 30 of Vol.1) You can reset the time code to zero by pressing RESET button. PHOTO MCR AVCHD DV AUDIO SELECT AUDIO IN CH1 CH2 CH1 AUDIAOULTEOVEL MAN FRONT RCEHA2R COUNTER RESET/ TC SET AUTO AUDIO SELECT MANUAL AUDIO IN CH1 CH2 AUTO FRONT MAN REAR Camera 26
-
 1
1 -
2
-
3
-
4
-
5
-
6
-
7
-
8
-
9
-
10
-
11
-
12
-
13
-
14
-
15
-
16
-
17
-
18
-
19
-
20
-
 21
21 -
 22
22 -
 23
23 -
 24
24 -
 25
25 -
 26
26 -
 27
27 -
 28
28 -
 29
29 -
 30
30 -
 31
31 -
32
-
33
-
34
-
35
-
36
-
37
-
38
-
39
-
40
-
41
-
42
-
43
-
44
-
45
-
46
-
47
-
48
-
49
-
50
-
51
-
52
-
53
-
54
-
55
-
56
-
57
-
58
-
59
-
60
-
61
-
62
-
63
-
64
-
65
-
66
-
67
-
68
-
69
-
70
-
71
-
72
-
73
-
74
-
75
-
76
-
77
-
78
-
79
-
80
-
81
-
82
-
83
-
84
-
85
-
86
-
87
-
88
-
89
-
90
-
91
-
92
-
93
-
94
-
95
-
96
-
97
-
98
-
99
-
100
-
101
-
102
-
103
-
104
-
105
-
106
-
107
-
108
-
109
-
110
-
111
-
112
-
113
-
114
-
115
-
116
-
117
-
118
-
119
-
120
-
121
-
122
-
123
-
124
-
125
-
126
 |
 |