Panasonic DMR-ES40VS DMRES40 User Guide - Page 12
STEP 1 CONNECTION, Connecting a TV and VCR
 |
View all Panasonic DMR-ES40VS manuals
Add to My Manuals
Save this manual to your list of manuals |
Page 12 highlights
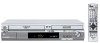
Getting started STEP 1 Connection ≥Please read "Precautions for installation". (l 3) ≥Before connection, turn off all equipment and read the appropriate operating instructions. ∫ Connecting a TV and VCR indicates included accessories. indicates accessories not included. Red White Yellow Cable TV Outdoor antenna Indoor antenna ∫ Connection (without Audio/Video cable) Connect in numerical order 1 to 3. The unit supplies a signal to the TV via the 75 ≠ coaxial cable on channel 3 or 4. It is possible to view the video picture on your TV in the same way that you watch TV broadcasts. ≥After this connection, set the RF output channel to "CH3" or "CH4" (l 15). ∫ Connection (with Audio/Video cable) Connect in numerical order 1 to 4. ≥After this connection, set the RF output channel to "OFF" (l 15). Antenna cable TV AUDIO IN VHF/UHF R L VIDEO IN RF IN Splitter Use a splitter if you also want to connect the antenna to your VCR. Audio/Video cable 3 1 75 ≠ coaxial cable 2 1 2 Cooling fan 3 4 AC power supply cord Connect to household AC outlet only after all other connections are complete. DIGITAL AUDIO OUT (PCM/BITSTREAM) COMPONENT VIDEO OUT (480p/480i) Y PB PR S VIDEO OPTICAL R - AUDIO - L VIDEO R - AUDIO - L VIDEO S VIDEO R - AUDIO - L VIDEO To IN1 RF IN RF OUT 75 ≠ coaxial cable Audio/Video cable To household AC outlet (AC 120 V, 60 Hz) Video cassette recorder R L VIDEO AUDIO OUT OUT VHF/UHF RF IN ≥If the antenna connector doesn't match (l 13) ∫ Do not connect the unit through a video cassette recorder Video signals sent through video cassette recorders will be affected by copyright protection systems and the picture will not be shown correctly on the TV. ∫ Connection examples with other equipment Amplifier (l 14) Video camera (l 57) TV TV The unit VCR VCR The unit ≥When connecting the unit to a TV with a built-in VCR, connect to the input terminals on the TV, not the VCR. 12 VQT0R73 From the AUDIO/VIDEO OUT terminal or the DIGITAL AUDIO OUT terminal The unit To IN2 input terminals (front) For your reference ≥The equipment connections described are examples. ≥Peripheral equipment and optional cables are sold separately unless otherwise indicated.
-
 1
1 -
2
-
3
-
4
-
5
-
6
-
 7
7 -
 8
8 -
 9
9 -
 10
10 -
 11
11 -
 12
12 -
 13
13 -
 14
14 -
 15
15 -
 16
16 -
 17
17 -
18
-
19
-
20
-
21
-
22
-
23
-
24
-
25
-
26
-
27
-
28
-
29
-
30
-
31
-
32
-
33
-
34
-
35
-
36
-
37
-
38
-
39
-
40
-
41
-
42
-
43
-
44
-
45
-
46
-
47
-
48
-
49
-
50
-
51
-
52
-
53
-
54
-
55
-
56
-
57
-
58
-
59
-
60
-
61
-
62
-
63
-
64
-
65
-
66
-
67
-
68
-
69
-
70
-
71
-
72
-
73
-
74
-
75
-
76
-
77
-
78
-
79
-
80
 |
 |
