Panasonic WVCW384 WVCW384 User Guide
Panasonic WVCW384 - COLOR CCTV CAMERA Manual
 |
UPC - 791871505830
View all Panasonic WVCW384 manuals
Add to My Manuals
Save this manual to your list of manuals |
Panasonic WVCW384 manual content summary:
- Panasonic WVCW384 | WVCW384 User Guide - Page 1
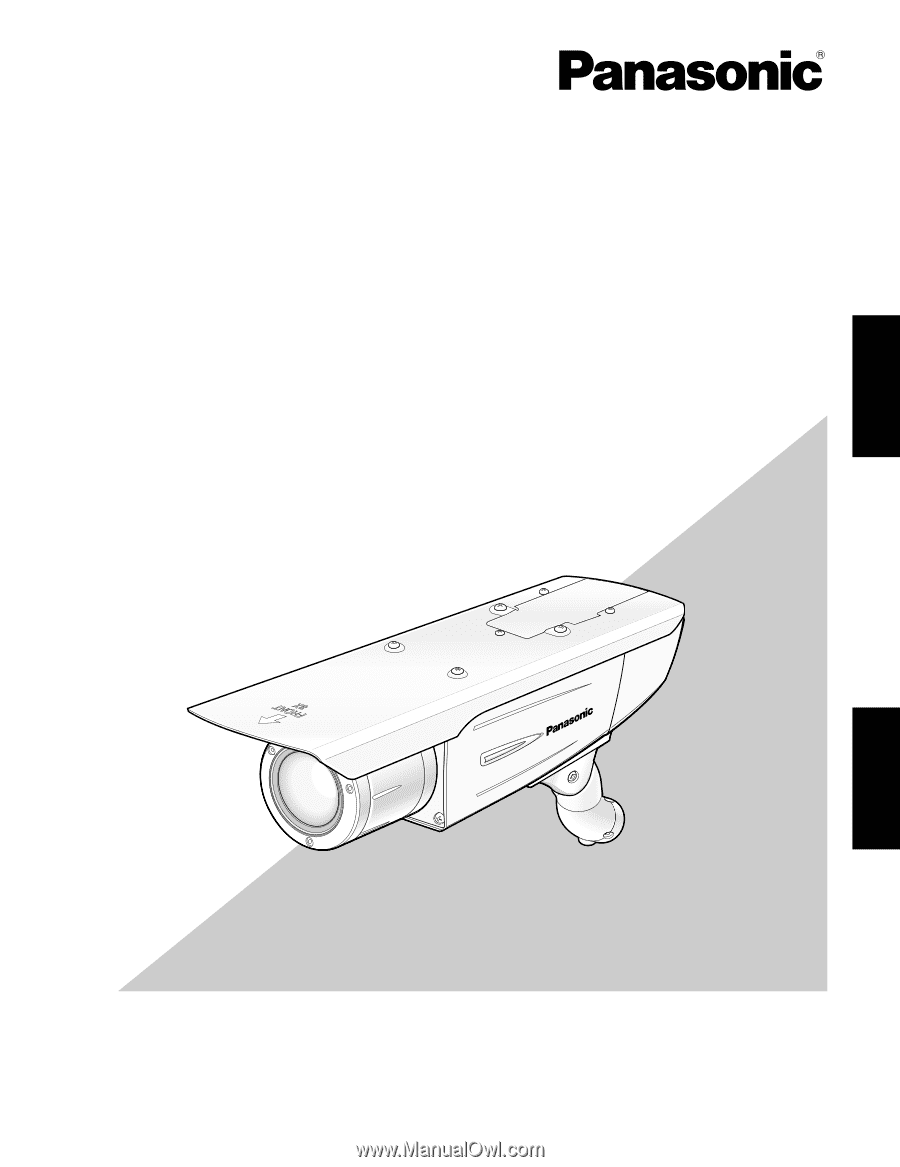
ENGLISH Operating Instructions Color CCTV Camera WV-CW384 Model No. WV-CW384 Before attempting to connect or operate this product, please read these instructions carefully and save this manual for future use. No model number suffix is shown in this manual. FRANÇAIS - Panasonic WVCW384 | WVCW384 User Guide - Page 2
operating and maintenance (servicing) instructions in the literature accompanying the appliance. 2 For Canada This Class A digital apparatus complies with Canadian if not installed and used in accordance with the instruction manual, may cause harmful interference to radio communications. Operation - Panasonic WVCW384 | WVCW384 User Guide - Page 3
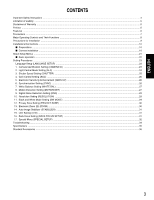
Important Safety Instructions ...4 Limitation of Liability ...5 Disclaimer of Warranty ...5 Preface ...6 Features ...6 Precautions ...7 Major Operating Controls and Their Functions ...8 Precautions for Installation ...9 Installations/Connections ...10 Preparations ...10 Camera installation ...10 - Panasonic WVCW384 | WVCW384 User Guide - Page 4
. 5) Clean only with dry cloth. 6) Do not block any ventilation openings. Install in accordance with the manufacturer's instructions. 7) Do not install near any heat sources such as radiators, heat registers, stoves, or other apparatus (including amplifiers) that produce heat. 8) Do not defeat - Panasonic WVCW384 | WVCW384 User Guide - Page 5
PROBLEM, CONSEQUENTIAL INCONVENIENCE, OR LOSS OR DAMAGE, ARISING OUT OF THE SYSTEM COMBINED BY THE DEVICES OF THIRD PARTY; (6) ANY CLAIM OR ACTION FOR DAMAGES, BROUGHT BY ANY PERSON OR ORGANIZATION BEING A PHOTOGENIC SUBJECT, DUE TO VIOLATION OF PRIVACY WITH THE RESULT OF THAT SURVEILLANCE-CAMERA - Panasonic WVCW384 | WVCW384 User Guide - Page 6
Panasonic's WV-CW384 camera introduces high picture quality by use of Super-Dynamic 1/3-inch type {1/3"} CCD and digital signal processing LSIs. This camera is designed for installation on the wall or the ceilling, using the supplied camera the system controller (option) even the color mode and - Panasonic WVCW384 | WVCW384 User Guide - Page 7
power off immediately and contact qualified service personnel for service. Do not rub the edges color filter When continuously shooting a bright light source such as a spotlight, the color at 12 V DC Use at low temperatures • To operate the camera at temperatures of -10 °C {14 °F} or lower, it will take - Panasonic WVCW384 | WVCW384 User Guide - Page 8
Major Operating Controls and Their Functions t !4 e wq y u !6 @0 !9 !8 r !3 Tilting lock screw Locks the tilt position. ( page 15) !0 Panning lock screw Locks the panning position. ( page 15) 8 !1 Power cord Caution: • Set button (SET) @1 Camera mount bracket (accessory) @2 Adapter box (accessory) - Panasonic WVCW384 | WVCW384 User Guide - Page 9
the following cases. • When a subject is extremely less white or nearly single colored • When a subject is in the outdoors in the morning or evening or and noise sound may be produced. In such a case, run the camera cable through specialized conduit tubes. Mounting screws Only the fixing screws are - Panasonic WVCW384 | WVCW384 User Guide - Page 10
Prepare the mounting screws according to the material of the area where the camera mount bracket is to be installed. In this case, wood screws and more. • If a ceiling board such as plaster board is too weak to support the total weight, the area shall be sufficiently reinforced. • When using the - Panasonic WVCW384 | WVCW384 User Guide - Page 11
adapter box, cable access hole, Video output cable screw holes, and screws. • To install this product on a wall, face the drain slit of the camera mount bracket downward. Do not block the drain slit. Do not waterproof the drain slit, either. • Be sure to use the supplied waterproof tape at - Panasonic WVCW384 | WVCW384 User Guide - Page 12
a junction box is used, putting the boxes side by side is recommended as shown in the illustration at right. (for easy cable passing) Camera mount bracket Mounting screw x4 (locally procured) 83.5 mm {3-1/4"} 6 mm (W) x 10 mm (L) {1/4" (W) x 3/8" (L)} (long hole) 46 mm {1-13/16"} Junction boxes - Panasonic WVCW384 | WVCW384 User Guide - Page 13
right or left hinges of the adapter box shall be selected so as to prevent the motion of the camera mount bracket from being interfered with by obstructions such as a wall when the camera mount bracket is connected to the hinges of the adapter box. Adapter box Mount bracket c Secure the mount - Panasonic WVCW384 | WVCW384 User Guide - Page 14
800 1 980 2 640 Power connection Caution: • The following connections should be made by qualified service personnel or system installers in accordance with NEC 725-51. • Wire colors & functions Camera power cord Wire Color Brown Blue Green/Yellow 24 V AC 24 V AC (L) 24 V AC (N) To GND 12 V DC - Panasonic WVCW384 | WVCW384 User Guide - Page 15
for the monitor for adjustment. 9 mm or less {11/32"} 9 mm or less {11/32"} Straight type L-type Important: • After camera angle adjustment, the panning lock screw and tilting lock screw shall be securely tightened. Recommended tightening torque: 2.45 N·m {1.8 lbf·ft} Notes: • Use a hexagonal - Panasonic WVCW384 | WVCW384 User Guide - Page 16
n Adjust the focus Focus adjustment must be performed when camera angle ( page 15) adjustment are performed. Zoom adjustment among the operation buttons simultaneously for 2 seconds or more, or move the cursor to "MANUAL-ADJ" of "BACK-FOCUS SETUP" in the setup menu and hold down the right and - Panasonic WVCW384 | WVCW384 User Guide - Page 17
the 4 fixing screws of lens cover. Recommended tightening torque: 0.59 N·m {0.44 lbf·ft} • Be sure to attach the desiccant (accessory). Refer to the instructions for the desiccant for how to attach it. • The tightening sequence of the 4 fixing screws of the lens cover shall be observed and repeated - Panasonic WVCW384 | WVCW384 User Guide - Page 18
upward. And then, mount the rear cover. Cable clamp Rear cover Fixing screw x1 Switch cover 5. Mount the tripod head on the top of the camera body with the 4 tripod head mounting screws that were removed in the step 1. Important: • Caution shall be taken to prevent the video output cable and - Panasonic WVCW384 | WVCW384 User Guide - Page 19
and pull out the video output cable and power cord. 2. Mount the tripod socket (accessory) with the 4 mounting screws for tripod socket (accessories). Camera main body 2. Mount the tripod socket (accessory). Mounting screw for tripod socket x4 (M3 x 8) (accessories) 1. Remove the tripod head. 19 - Panasonic WVCW384 | WVCW384 User Guide - Page 20
the instructions of the safety wire for the following steps. Important: • Be sure to use the 4 mounting screws for tripod socket (accessories). Use of screws with inappropriate length may damage the unit. • The 4 screws removed from the tripod head cannot be used. • The camera mount brackets, WV-831 - Panasonic WVCW384 | WVCW384 User Guide - Page 21
CAMERA RESET SER.NO. LANGUAGE Description Configure the settings relating to camera operations The camera title can be edited and displayed on the screen. Configure the light control the DNR (Digital Noise Reduction) function as the settings for switching between the color mode and the BW mode. It - Panasonic WVCW384 | WVCW384 User Guide - Page 22
system controller is also available. Note: • The illustrations below are the examples to be displayed on a video monitor. 1. Hold down the [SET] button for around 2 seconds. → The top page will be displayed. 2. Move the cursor onto "END" by press the [UP] or [DOWN] button. MODEL WV-CW384 CAMERA - Panasonic WVCW384 | WVCW384 User Guide - Page 23
ALC SHUTTER OFF AGC ON(HIGH) SENS UP OFF SYNC INT WHITE BAL ATW1 MOTION DET OFF DNR HIGH RESOLUTION HIGH BW MODE CAMERA ID 0123456789 ABCDEFGHIJKLM NOPQRSTUVWXYZ SPACE POSI RET TOP END RESET Character Cursor Character Area Command Editing Area Pointer FLOOR 1 Highlighted 23 - Panasonic WVCW384 | WVCW384 User Guide - Page 24
move the camera ID faster as nec- essary. 2. Light Control Mode Setting (ALC) Select a light control mode depending SUPER-D3 OFF: Enables manual setting to compensate backlight. "OFF" when noise in a bright portion, flickerings, or color deterioration are observed. 1. Move the cursor to "ALC" and - Panasonic WVCW384 | WVCW384 User Guide - Page 25
the bright and the dim portions. This is a natural phenomenon and does not indicate trouble. 3. Shutter Speed Setting (SHUTTER) Select a proper shutter speed when "ALC" is selected on the "CAMERA SETUP" menu. Selecting a faster speed will reduce blurring when objects quickly move. The default - Panasonic WVCW384 | WVCW384 User Guide - Page 26
X2 FIX OFF* X2 AUTO X4 AUTO X6 AUTO X10 AUTO Notes: • Some types of system controllers may not operate some of the SENS UP functions. If this happens, use the operation but- tons on the camera. • When you select "AUTO" for "SENS UP" and "ON" for "SUPER-D3", the SENS UP - Panasonic WVCW384 | WVCW384 User Guide - Page 27
controller. • Select "AWC" in the following cases: the color temperature is out of the 2 000 K - 6 000 K range, the scene contains mostly high color . 3. Press the [RIGHT] button. Manual Fine Adjustment Perform fine adjustment as necessary. "MOTION DET" on the "CAMERA SETUP" menu. The default setting - Panasonic WVCW384 | WVCW384 User Guide - Page 28
CAMERA SETUP" menu is set to "OFF". 5. Select "ON" or "OFF" for "ALARM" under "DISPLAY MODE". ON: Outputs an alarm OFF: Does not output an alarm. This is applicable any of the following controllers are used: WV-RM70, WV-CU550 series, WV-CU161, WV-CU360, WV-CU650, WV-CU850, WV than Panasonic, select - Panasonic WVCW384 | WVCW384 User Guide - Page 29
9. Digital Noise Reduction Setting (DNR) Select a "DNR" mode suitable to the camera site conditions. The default up the back-focus mode to compensate for defocus liable to happen when the camera automatically switches between the color and black-and-white modes. Refer to page 31. Back-focus Setting - Panasonic WVCW384 | WVCW384 User Guide - Page 30
for "PRIVACY ZONE" on page 2 of the "CAMERA SETUP" menu and press the [SET] button. The zoom is available with the ZOOM switch on the controller. OFF: The electronic zoom function is disabled. cursor to "→PUSH SW" for "PAN/TILT" and press the [SET] button. The "PAN/TILT" setting menu appears. 7. - Panasonic WVCW384 | WVCW384 User Guide - Page 31
system controller. After manual adjustment is required. The manual back-focus adjustment screen will open. • Use the [LEFT] or [RIGHT] buttons to move the "I" cursor and obtain a proper focus. → Refer to the 4-digit every time the camera switches the mode between color and black-andwhite. - Panasonic WVCW384 | WVCW384 User Guide - Page 32
Enables the [SET] button to open the back-focus adjustment screen while the camera picture is displayed. ON: Disables the [SET] button from opening the back simultaneously. Important: • Select "FIX" or "PRESET" and adjust manually the back-focus when automatic adjustment is hindered by the following - Panasonic WVCW384 | WVCW384 User Guide - Page 33
vertical positions (coordinate) of the blemish will be displayed with a 6-digit number on the second bottom line. → The blemish position is registered has been cancelled. 17-6. To reset to the default settings (CAMERA RESET) 1. Select "CAMERA RESET". → The "→PUSH SW" is highlighted. 2. While - Panasonic WVCW384 | WVCW384 User Guide - Page 34
Troubleshooting Before asking for repairs, check the symptoms with the following table. Contact your dealer if a problem cannot be solved even after checking and trying the solution in the table or a problem power supplied to the camera? → Check whether power is supplied to the camera. - • Is "ON - Panasonic WVCW384 | WVCW384 User Guide - Page 35
Color CCTV Cameras Power source and power consumption: Image sensor: Effective pixels: Scanning area: Scanning system: Scanning frequency: Synchronization: Resolution: Minimum illumination: Signal-to-noise ratio: Dynamic range: Video output: Monitor output: Functions Camera title: Light control - Panasonic WVCW384 | WVCW384 User Guide - Page 36
(TELE) - 52.0° (WIDE) Vertical: 5.0° (TELE) - 39.6° (WIDE) Camera mount bracket Adjusting angle: Dimensions: Weight: Finish: Panning range: ±100° Tilting range: +30°, -90° 125 (W) mm x 125 (H) Instructions (this document 1 pc. Warranty Card ...1 pc. The following are for installation. Camera - Panasonic WVCW384 | WVCW384 User Guide - Page 37
connexions doivent être conformes au code électrique local. ATTENTION: Avant d'effectuer le branchement ou de mettre cet appareil en service, veuillez lire les instructions de l'étiquette collée dessous. CAUTION RISK OF ELECTRIC SHOCK DO NOT OPEN ATTENTION: POUR ÉVITER TOUT RISQUE D'ÉLECTROCUTION - Panasonic WVCW384 | WVCW384 User Guide - Page 38
TABLE DES MATIÈRES Instructions de sécurité importantes ...39 Limitation de responsabilité ...40 Déni de la garantie ...40 Préface ...41 Caractéristiques dominantes ...41 Mesures de précaution ...42 - Panasonic WVCW384 | WVCW384 User Guide - Page 39
6) N'obturer aucune des ouvertures d'aération. Installer conformément aux instructions du fabricant. 7) Ne pas utiliser à proximité de sources les accessoires spécifiés par le fabricant. 11) Utiliser uniquement le chariot, le support, le trépied, la platine de fixation ou la tablette spécifiée par - Panasonic WVCW384 | WVCW384 User Guide - Page 40
ÊTRE TENU POUR RESPONSABLE POUR TOUT PARTI OU TOUTE PERSONNE, À L'EXCEPTION DE CERTAINS PROGRAMMES SOUS GARANTIE OFFERTS PAR LE DISTRIBUTEUR LOCAL DE PANASONIC POUR LES CAS, Y COMPRIS MAIS NON LIMITÉ À CE QUI EST MENTIONNÉ CI-DESSOUS: (1) TOUT DÉGÂT ET PERTE, Y COMPRIS SANS LIMITATION, DIRECT OU - Panasonic WVCW384 | WVCW384 User Guide - Page 41
Préface La caméra vidéo Panasonic WV-CW384 introduit un haut niveau technologique de qualité d'image en faisant usage d'un capteur d'image D.T.C. de 1/3e de pouce Super-Dynamic et de circuits à haute inté - Panasonic WVCW384 | WVCW384 User Guide - Page 42
chaleur comme celle produite par un appareil de chauffage. • Cet appareil doit être mis en service dans des limites de température comprises entre -30 °C à +50 °C {22 °F coton-tige imprégné d'éthanol pour faire le nettoyage. Décoloration se produisant sur le filtre couleur de D.T.C Lorsqu'une - Panasonic WVCW384 | WVCW384 User Guide - Page 43
dans des conditions excédant ses limites définies en termes de température, d'humidité ou de puissance d'alimentation. Cet appareil doit être mis en service dans des limites de température comprises entre -30 °C à +50 °C {22 °F à 122 °F} et un taux d'humidité égal ou inférieur à 90 %. La source - Panasonic WVCW384 | WVCW384 User Guide - Page 44
Principaux organes de commande et fonctions t !4 e wq y u !6 @0 !9 !8 r !3 i !2 o !0 !7 !1 !5 @1 @2 q Prise de sortie moniteur vidéo (mini-prise ø3,5 mm (monaurale)) Se connecte à un moniteur vidéo aux fins réglage et pour ajuster l'angle de vue et la mise au point. w Bague de réglage de - Panasonic WVCW384 | WVCW384 User Guide - Page 45
environnement. S'assurer que la zone d'installation est suffisamment robuste pour supporter le poids de cet l'appareil comme dans le cas d'un a pas de jeu. Conduits de passage des câbles Si ce produit est mis en service à l'extérieur, faire en sorte de monter des tubes de raccordement et de faire - Panasonic WVCW384 | WVCW384 User Guide - Page 46
des manières indiquées cidessous. • Pour installer directement la camera vidéo sur un mur • Comment installer la caméra vidéo panneau en plâtre donc un support trop fragile pour pouvoir supporter le poids total de la caméra Remarque: • Utiliser une clef à six pans avec une largeur des méplats de 4 - Panasonic WVCW384 | WVCW384 User Guide - Page 47
4. Installer solidement la caméra vidéo sur la platine de fixation d'installation de caméra vidéo en utilisant les 3 vis de fixation de caméra vidéo (en accessoires). Boîtier principal de la caméra vidéo Câble de sécurité Câble de sortie vidéo Cordon d'alimentation Bossage de fixation pour le câ - Panasonic WVCW384 | WVCW384 User Guide - Page 48
x Fixer la platine de fixation de caméra vidéo • Quand la caméra vidéo est directement installée sur un mur Utiliser 4 vis (procurées localement) pour fixer la platine de fixation d'installation de caméra vidéo sur un mur ou à une boîte de jonction (procurée localement). 6 mm (L) x 10 mm (l) {1/4" - Panasonic WVCW384 | WVCW384 User Guide - Page 49
2. Fixer la platine de fixation d'installation de caméra vidéo aux charnières gauches ou droites du boîtier d'adaptation. Vis de fixation de boîtier adaptateur (M4 x 35) Charnières SDII Boîtier adaptateur Platine de fixation Vis de montage pour le boîtier d'adaptation/platine de fixation d' - Panasonic WVCW384 | WVCW384 User Guide - Page 50
v Réaliser les connexions Cordon d'alimentation (environ 72 cm {28-3/8"}) Marron (actif) A relier à Bleu (neutre) l'alimentation à 24 V Vert et jaune (GND) À la borne GND * Quand une source d'alimentation à 12 V c.c. est utilisée. Connecteur BNC Connecteur BNC Câble de sortie vidéo (Environ - Panasonic WVCW384 | WVCW384 User Guide - Page 51
avoir fait le réglage d'angle d'orientation de la caméra vidéo. Couple de serrage recommandé: 2,45 N·m {1,8 lbf·ft} Remarques: • Utiliser une clef à six pans avec une largeur des méplats de 4 mm (à se procurer localement) pour desserrer ou serrer la vis de blocage de balayage panoramique et la vis - Panasonic WVCW384 | WVCW384 User Guide - Page 52
n Ajuster la mise au point Le réglage de mise au point doit être exécuté lorsque réglage d'angle d'orientation de caméra vidéo est exécuté ( page 51). 1. Refaire les étapes (1) et (2) pour régler l'angle de vue et la mise au point. (1) Faire tourner l'anneau de réglage de zoom pour régler l'angle de - Panasonic WVCW384 | WVCW384 User Guide - Page 53
couvercle d'objectif. Couple de serrage recommandé: 0,59 N·m {0,44 lbf·ft} • Ne pas oublier de fixer le déshydratant (accessoire). Se référer aux instructions d'utilisation du déshydratant pour savoir comment le fixer. • La séquence de serrage des 4 vis de fixation du couvercle d'objectif doit être - Panasonic WVCW384 | WVCW384 User Guide - Page 54
, Fixer la visière pare-soleil Installer la visière pare-soleil sur la caméra vidéo en utilisant les 4 vis de fixation de visière pare-soleil (en accessoires). Vis de fixation de visière pare-soleil x4 (M3 x 6) (accessoires) Aligner la flèche avec le sens d'orientation de l'objectif. Visière pare - Panasonic WVCW384 | WVCW384 User Guide - Page 55
6. Installer solidement la caméra vidéo sur la platine de fixation d'installation de caméra vidéo en utilisant les 3 vis de fixation de caméra vidéo (en accessoires). Faire passer le câble de sortie vidéo, le cordon d'alimentation et le câble de sécurité dans la platine de fixation d'installation de - Panasonic WVCW384 | WVCW384 User Guide - Page 56
murale Pour une installation au plafond Câble de sécurité WV-831 WV-7010A WV-Q140 WV-Q141 4. Accrocher l'extrémité (la partie en anneau) de sécurité Installation par fixation au plafond 5. Se référer aux instructions d'utilisation du câble de sécurité pour les étapes suivantes. Important - Panasonic WVCW384 | WVCW384 User Guide - Page 57
BLC DÉTECT MVT RÉDUCT BRUIT RÉSOLUTION MODE NB ZONE PRIVEE ZOOM ELEC STABILISATEUR LED BACK-FOCUS SPECIAL GAIN CHROMA CONTOURS PEDESTAL NUANCE PIX OFF RESET CAMERA NO SER LANGUAGE Description Configurer les paramétrages relatifs aux opérations exécutées par la caméra vidéo Le titre de caméra - Panasonic WVCW384 | WVCW384 User Guide - Page 58
le curseur sur "FIN" et presser le bouton [UP] ou [DOWN]. MODEL WV-CW384 CAMÉRA BACK-FOCUS SPECIAL LANGUAGE 3. Appuyer sur le bouton [SET] après avoir "PRI" (TOP) en appuyant sur le bouton [SET]. FIN AJUST VALIDE **CAMERA AJUST** 1/2 CAMÉRA ID OFF ALC ALC SHUTTER OFF CAG OUI(ÉLEVÉ) - Panasonic WVCW384 | WVCW384 User Guide - Page 59
Les caractères sélectionnés sont affichés dans la zone de modification. **CAMERA AJUST** 1/2 CAMÉRA ID OFF ALC ALC SHUTTER OFF CAG OUI(ÉLEVÉ) est possible de saisir jusqu'à 8 caractères au maximum. CAMERA ID 0123456789 ABCDEFGHIJKLM NOPQRSTUVWXYZ ESPACE POSI RET PRI FIN RESET Curseur - Panasonic WVCW384 | WVCW384 User Guide - Page 60
4. Comment spécifier la position d'affichage du numéro d'identification de caméra vidéo: 1. Sélectionner "POSI" appuyer sur le bouton [SET]. → L'identification de caméra vidéo saisie sera mise en surbrillance sur l'écran. 2. La déplacer jusqu'à la position appropriée et appuyer sur le bouton [SET]. - Panasonic WVCW384 | WVCW384 User Guide - Page 61
ALC". 2. Sélectionner "REGLAGE MASQUE" et appuyer sur le bouton [SET]. → Les 48 zones masquées apparaissent en superposition à l'image de caméra vidéo camera avec le curseur clignotant dans le coin supérieur gauche. 3. Amener le curseur dans une zone où l'éclairage arrière est intense et appuyer sur - Panasonic WVCW384 | WVCW384 User Guide - Page 62
"OUI" pour le paramètre "SUPER-D3", la fonction VISION NUIT est prioritaire de telle sorte que la fonction SUPER-D3 n'est pas mise en service automatiquement. • Quand la fonction VISION NUIT est sélectionnée, du bruit, des taches lumineuses ou un phénomène de virage au blanc peuvent apparaître - Panasonic WVCW384 | WVCW384 User Guide - Page 63
• Sélectionner une phase "FIN" appropriée qui permet de rapprocher au mieux les deux signaux vidéo sur l'oscilloscope. Remarques: • Le fait de amener le curseur "I" jusqu'en bout de course +/- permet d'agir sur la gamme "FIN". • Pour ramener les paramétrages de "PHASE V" sur leurs valeurs à réglage - Panasonic WVCW384 | WVCW384 User Guide - Page 64
des contrôleurs suivants est utilisé: WV-RM70, séries WV-CU550 , WV-CU161, WV-CU360, WV-CU650, WV-CU850, WV-CU950 6. Sélectionner "MODE DE VISU sur l'écran "MODE DE VISU". Important: • Dans les systèmes autres que Panasonic, sélectionner "OFF" pour le paramètre "DÉTECT MVT" pour empêcher toute - Panasonic WVCW384 | WVCW384 User Guide - Page 65
9. Paramétrage de la réduction de bruit numérique (RÉDUCT BRUIT) Sélectionner un mode "RÉDUCT BRUIT" approprié aux conditions présentées par le site de caméra vidéo. Le réglage implicite a été fait sur "ÉLEVÉ". ÉLEVÉ: Atténue considérablement le bruit bien que cela produise une rémanence d'image en - Panasonic WVCW384 | WVCW384 User Guide - Page 66
sur le bouton [UP] ou [DOWN] pour opérer un rapprochement ou un éloignement de l'image par zoom. 6. Amener le curseur sur "→APP BOUTON" pour "PAN/AZIMUTH" et appuyer sur le bouton [SET]. Ceci a pour effet de faire apparaître le menu de réglage - Panasonic WVCW384 | WVCW384 User Guide - Page 67
14. Stabilisateur d'image automatique (STABILISATEUR) Cette fonction compense électroniquement une image de caméra vidéo instable issue d'un mouvement du pôle d'installation ou de la platine de fixation. Le réglage implicite a été fait sur "OFF". OUI: Compense automatiquement une instabilité d'image - Panasonic WVCW384 | WVCW384 User Guide - Page 68
pour régler le niveau de chrominance. **AJUST SPECIAL** GAIN CHROMA ...I...128 CONTOURS ...I...128 PEDESTAL ...I...128 NUANCE ...I...128 - + PIX OFF RESET CAMERA→APP BOUTON 17-2. Réglage de gain d'ouverture (CONTOURS) NO SER XXXXXXXX RET PRI FIN Amener le curseur "I" pour régler le - Panasonic WVCW384 | WVCW384 User Guide - Page 69
érisque si son enregistrement a été annulé. 17-6. Comment opérer la réinitialisation des réglages sur les réglages par défaut usine (RESET CAMERA) 1. Sélectionner "RESET CAMERA". → "→APP BOUTON" est mis en surbrillance. 2. Appuyer simultanément sur les boutons [LEFT] et [RIGHT] puis appuyer sur le - Panasonic WVCW384 | WVCW384 User Guide - Page 70
Dépannage Avant de faire une demande de réparation, veuillez vérifier les symptômes mentionnés dans le tableau suivant. Si une panne ne peut pas être corrigée même après avoir vérifié et essayer d'y remédier ou si un problème n'est pas décrit cidessous ou en cas de problème d'installation, contacter - Panasonic WVCW384 | WVCW384 User Guide - Page 71
Caractéristiques techniques Caméras couleur CCTV Source d'alimentation et puissance consommée: Capteur d'image: Pixels électroluminescente: Foyer arrière: Spécial: Langue: Température ambiante de service: Humidité ambiante de service: Résistance à l'eau: Dimensions: Poids: Finition: 24 V c.a. 60 - Panasonic WVCW384 | WVCW384 User Guide - Page 72
x 1-31/32" (P)} 510 g {1,12 lbs.} Revêtement argent métallique Les poids et dimensions indiqués sont approximatifs. Accessoires standard Instructions d'utilisation (présent document 1 él. Carte de garantie ...1 él. Les éléments suivants sont destinés à l'installation. Platine de fixation de cam - Panasonic WVCW384 | WVCW384 User Guide - Page 73
73 - Panasonic WVCW384 | WVCW384 User Guide - Page 74
System Solutions Company, Unit Company of Panasonic Corporation of North America www.panasonic.com/business/ For customer support, call 1.800.528.6747 Three Panasonic Way 2H-2, Secaucus, New Jersey 07094 Panasonic Canada Inc. 5770 Ambler Drive,Mississauga, Ontario, L4W 2T3 Canada (905)624-5010
-
 1
1 -
 2
2 -
 3
3 -
 4
4 -
 5
5 -
 6
6 -
 7
7 -
8
-
9
-
10
-
11
-
12
-
13
-
14
-
15
-
16
-
17
-
18
-
19
-
20
-
21
-
22
-
23
-
24
-
25
-
26
-
27
-
28
-
29
-
30
-
31
-
32
-
33
-
34
-
35
-
36
-
37
-
38
-
39
-
40
-
41
-
42
-
43
-
44
-
45
-
46
-
47
-
48
-
49
-
50
-
51
-
52
-
53
-
54
-
55
-
56
-
57
-
58
-
59
-
60
-
61
-
62
-
63
-
64
-
65
-
66
-
67
-
68
-
69
-
70
-
71
-
72
-
73
-
74
 |
 |
Before attempting to connect or operate this product,
please read these instructions carefully and save this manual for future use.
No model number suffix is shown in this manual.
Operating Instructions
Color CCTV Camera
Model No.
WV-CW384
WV-CW384
ENGLISH
FRANÇAIS