Panasonic WVCW384 WVCW384 User Guide - Page 29
Digital Noise Reduction Setting DNR, Resolution Setting RESOLUTION
 |
UPC - 791871505830
View all Panasonic WVCW384 manuals
Add to My Manuals
Save this manual to your list of manuals |
Page 29 highlights
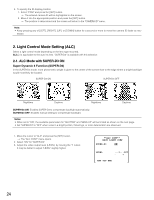
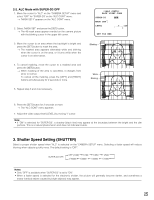
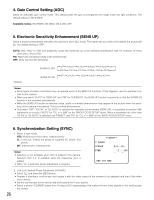
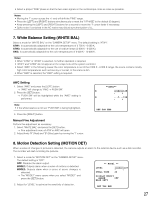
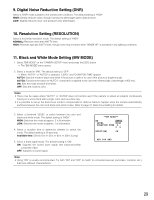
9. Digital Noise Reduction Setting (DNR) Select a "DNR" mode suitable to the camera site conditions. The default setting is "HIGH". HIGH: Greatly reduces noise, though it produces afterimages when objects move. LOW: Slightly reduces noise, and produces less afterimages. 10. Resolution Setting (RESOLUTION) Select a horizontal resolution mode. The default setting is "HIGH". NORMAL: Resolves more than 480 TV lines. HIGH: Resolves typically 540 TV lines, though noise may increase when "SENSE UP" is activated in low lighting conditions. 11. Black and White Mode Setting (BW MODE) 1. Select "BW MODE" on the "CAMERA SETUP" menu and press the [SET] button. → The "BW MODE" menu opens. 2. Select a mode for "BW". The default setting is "OFF". → When "AUTO1" or "AUTO2" is selected, "LEVEL" and "DURATION TIME" appear. AUTO1: Sets the mode to black-and-white if the picture is dark or to color if the picture is bright enough. AUTO2: Functions the same as "AUTO1", except this is applied to the use near infrared light. (wavelength ≥ 800 nm). ON: Sets the mode to black-and-white. OFF: Sets the mode to color. Notes: • There may be cases where "AUTO1" or "AUTO2" does not function well if the camera is aimed at subjects continuously moving or a scene filled with a single color such as a blue sky. • It is possible to set up the back-focus mode to compensate for defocus liable to happen when the camera automatically switches between the color and black-and-white modes. Refer to page 31. Back-focus Setting for details. 3. Select a threshold "LEVEL" to switch between the color and black-and-white mode. The default setting is "HIGH". HIGH: Switches the mode at approx. 5 lx illumination. LOW: Switches the mode at approx. 1 lx illumination. 4. Select a duration time to determine whether to switch the mode. The default setting is 30 seconds. Available time: (Short) 10 s ↔ 30 s ↔ 60 s ↔ 300 s (Long) 5. Select a burst signal mode. The default setting is "ON". ON: Supplies the (color) burst signal with black-and-white composite video. OFF: Supplies no burst signal. **BW MODE** BW AUTO1 LEVEL HIGH DURATION TIME .I.. S L BURST(BW) ON RET TOP END Note: • Using "ON" is usually recommended. Try both "ON" and "OFF" to match to connected devices (recorders, monitors, etc.) that have different characteristics. 29
-
 1
1 -
2
-
3
-
4
-
5
-
6
-
7
-
8
-
9
-
10
-
11
-
12
-
13
-
14
-
15
-
16
-
17
-
18
-
19
-
20
-
21
-
22
-
23
-
 24
24 -
 25
25 -
 26
26 -
 27
27 -
 28
28 -
 29
29 -
 30
30 -
 31
31 -
 32
32 -
 33
33 -
 34
34 -
35
-
36
-
37
-
38
-
39
-
40
-
41
-
42
-
43
-
44
-
45
-
46
-
47
-
48
-
49
-
50
-
51
-
52
-
53
-
54
-
55
-
56
-
57
-
58
-
59
-
60
-
61
-
62
-
63
-
64
-
65
-
66
-
67
-
68
-
69
-
70
-
71
-
72
-
73
-
74
 |
 |
