Panasonic WVCW384 WVCW384 User Guide - Page 33
To reset to the default settings CAMERA RESET
 |
UPC - 791871505830
View all Panasonic WVCW384 manuals
Add to My Manuals
Save this manual to your list of manuals |
Page 33 highlights
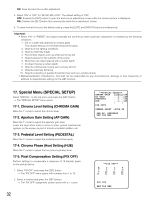
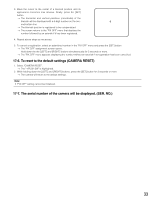
3. Move the cursor to the center of a blemish position until its appearance becomes less obvious. Finally, press the [SET] button. → The horizontal and vertical positions (coordinate) of the blemish will be displayed with a 6-digit number on the second bottom line. → The blemish position is registered to be compensated. → The screen returns to the "PIX OFF" menu that displays the number followed by an asterisk if it has been registered. 4. Repeat above steps as necessary. 5. To cancel a registration, select an asterisked number in the "PIX OFF" menu and press the [SET] button. → The "PIX OFF" assignment screen opens. Hold down the the [LEFT] and [RIGHT] buttons simultaneously for 2 seconds or more. → The "PIX OFF" menu appears displaying the number without an asterisk if its registration has been cancelled. 17-6. To reset to the default settings (CAMERA RESET) 1. Select "CAMERA RESET". → The "→PUSH SW" is highlighted. 2. While holding down the [LEFT] and [RIGHT] buttons, press the [SET] button for 2 seconds or more. → The camera will return to the default settings. Note: • "PIX OFF" setting cannot be initialized. 17-7. The serial number of the camera will be displayed. (SER. NO.) 33
-
 1
1 -
2
-
3
-
4
-
5
-
6
-
7
-
8
-
9
-
10
-
11
-
12
-
13
-
14
-
15
-
16
-
17
-
18
-
19
-
20
-
21
-
22
-
23
-
24
-
25
-
26
-
27
-
 28
28 -
 29
29 -
 30
30 -
 31
31 -
 32
32 -
 33
33 -
 34
34 -
 35
35 -
 36
36 -
 37
37 -
 38
38 -
39
-
40
-
41
-
42
-
43
-
44
-
45
-
46
-
47
-
48
-
49
-
50
-
51
-
52
-
53
-
54
-
55
-
56
-
57
-
58
-
59
-
60
-
61
-
62
-
63
-
64
-
65
-
66
-
67
-
68
-
69
-
70
-
71
-
72
-
73
-
74
 |
 |
