Pentax ZX-60 ZX-60 Manual - Page 14
Date6
 |
View all Pentax ZX-60 manuals
Add to My Manuals
Save this manual to your list of manuals |
Page 14 highlights
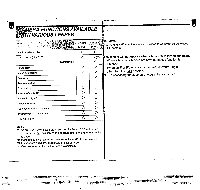
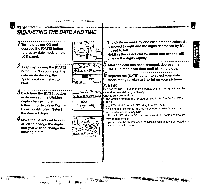
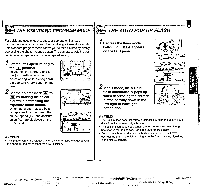
Step-4 '7' ADJUSTING THE DATE AND TIME 1Turn the power ON and depress the [DATE] button to display date mode on the LCD panel. 2 Keep depressing the [DATE] button for 3 seconds on the date mode display, the "year" digits will start to blink. 3 Each time the [DATE] button is depressed, the blinking digits change in the following order: Year-MonthDay-Hour-Minute-: . Select the desired digits. 4 Move the Select dial to right or left to change the digits that you wish to change the blinking digits. eMOf',aDDYEATE6 The digits increase by one each time the select dial is moved to right and the digits decreased by it's moved to left. Holding the select dial for about one second will change the digits rapidly. ON/OFF 0 L %It IFLAMTvAvM After the data has been changed, depress the [DATE] button each time until blinking stops. 'x AUTO 6 Depress the [DATE] button to select your date Nuc : mode that you wish to imprint on your pictures. MEMO Depress the [DATE] button in synchronize with a time signal to set the OwOFF second to zero while ( : ) is blinking. OL A a N.PTvAvM Operational precautions The working temperature for data printing is -10°C - 50°C (14°F - AUTO ro 122°F). :2-35 • Use DX-coded films with ISO rating from 25 - 5000. • If high-speed film with an ISO rating of1000 or faster is used, the imprinted characters may blur. • If film with ISO rating of 50 or slower is used, the printed characters may be dark or dim. • If you release the shutter while the blinking data is being corrected, the data cannot be imprinted. 'ON/OFF eL di& 3COMTVAVM • Y.
-
 1
1 -
2
-
3
-
4
-
5
-
6
-
7
-
8
-
 9
9 -
 10
10 -
 11
11 -
 12
12 -
 13
13 -
 14
14 -
 15
15 -
 16
16 -
 17
17 -
 18
18 -
 19
19 -
20
-
21
-
22
-
23
-
24
-
25
-
26
-
27
-
28
-
29
-
30
-
31
-
32
-
33
-
34
-
35
-
36
-
37
-
38
-
39
-
40
-
41
-
42
-
43
-
44
-
45
-
46
-
47
-
48
-
49
-
50
-
51
-
52
-
53
-
54
-
55
-
56
-
57
-
58
 |
 |
