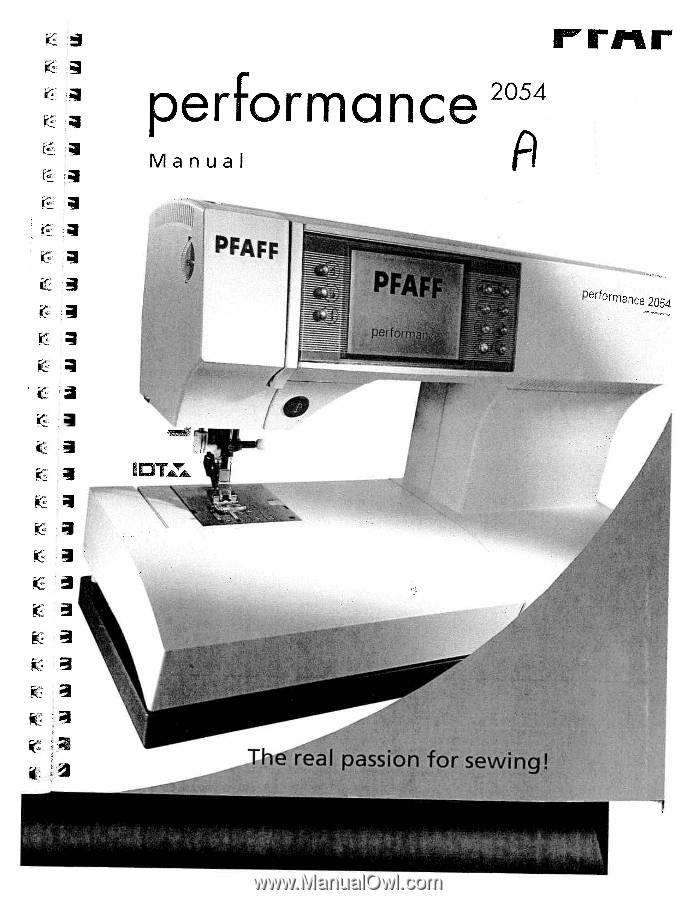
Pfaff performance 2054 Owner's Manual
Pfaff performance 2054 Manual
 |
View all Pfaff performance 2054 manuals
Add to My Manuals
Save this manual to your list of manuals |
Pfaff performance 2054 manual content summary:
- Pfaff performance 2054 | Owner's Manual - Page 1
. ' J S 1 I I IS iI .1 ik -o CD I -, -Il -F, 0 B Q n CD CD 0 3 CD C) CD Cj, - Pfaff performance 2054 | Owner's Manual - Page 2
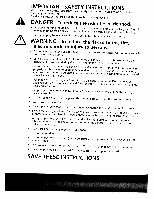
: appliance, basic safety precautions should always be followed, Read all instructions before using this household Sewing machine. DANGER - To reduce the risk of electric shock: • A sewing machine should sewing machine from the never be left unattended when plugged in. electric outlet - Pfaff performance 2054 | Owner's Manual - Page 3
- Pfaff performance 2054 | Owner's Manual - Page 4
11 12345678 910 peiformance 2O4 a 12 34 33 32 31 3 15 V 16 25 24 - 23 12 22 21 i. peJormance 2054 4 - Pfaff performance 2054 | Owner's Manual - Page 5
r- - Needle button 2. Sew slowly button 3. Pattern start button 4. Touch screen (Welcome screen) 5. Thread cutter 25. Needle holder with retaining screw 26, Touchscreen 27. Take up lever 28. Thread guide 29. Knee lift attachment hole 30. Base plate 31. Removable accessory tray 32. Presser foot - Pfaff performance 2054 | Owner's Manual - Page 6
Cross-hem stitch Provides a highly elastic, sportswear and casuals. decorative seam for hem finishing on 7 14 Stretch triple zigzag stitch For sewing elastic tape ble for hem finishing. on sportswear and bathing suits. Also suita- 7 15 Blindhem stitch For securing hems invisibly - Pfaff performance 2054 | Owner's Manual - Page 7
stretch fabrics. For basting cut-out parts together. Durable work. elastic seam, light-knit fabric. stitch most suited for sewing and darning 38 Closed overedge stitch For joining stitch 40 Cover stitch 56 Unen buttonhole 57 Standard buttonhole Elastic assembly and serging seam for - Pfaff performance 2054 | Owner's Manual - Page 8
Description No. Appication 58 Stretch buttonhole 59 Cross-stitch buttonhole 60 Round buttonhole with longitudinal bar 61 Eylet buttonhole with tapered bar 62 Eyelet buttonhole with crosswise bar 63 Fancy buttonhole 64 Program for sewing on buttons' Buttonhole for stretch materials and knitwear - Pfaff performance 2054 | Owner's Manual - Page 9
L a CD VLdI w. F44 LLWLLLLLLLLLLLLLL1 AJ t1 0 CD 1.0 1.0 I CD 3 OJID nTm CD cou U eeeee af' w'Jw 1ff1ff n 0 C 0 P. D'. P. '7 P. P. P. P. vCDI CD Id,' J9 CD I Id,' ujuuu It:j1 NV g .I'I1, aiUL Jfl $h fl aiIA jA 01 - Pfaff performance 2054 | Owner's Manual - Page 10
C (D 0 CD CD VI - Pfaff performance 2054 | Owner's Manual - Page 11
r pyj ran 'n rn rr n Ti 1' in in i'ti Ti rn in iii it iii in in in in in in in ft a - Pfaff performance 2054 | Owner's Manual - Page 12
switch 17 Voltage switch 17 Accessory tray 18 Sewing with free arm 19 Preparing the machine 19 for bobbin winding Winding the bobbin performance 2054 Instructions on operating your Pfaff performance 2054 Function buttons Sewing menu Altering the stitch settings More options for sewing - Pfaff performance 2054 | Owner's Manual - Page 13
with the elastic stitch - No 4 63 Sewing-on patches - No 4 63 Repairing tears 63 Overlock stitches 64 Buttonholes 65 Sewing on buttons - No 64 68 Eyelets-No foot Ruffle r Open toe appliqué foot Quilting guide Eyelet plate Bridging guide 1/4 inch Quilting foot with IDT Quilting of the - Pfaff performance 2054 | Owner's Manual - Page 14
Pt - Pfaff performance 2054 | Owner's Manual - Page 15
- Pfaff performance 2054 | Owner's Manual - Page 16
Carrying case Place the enclosed lead cord, the foot control and instruction book into the compartment of the carrying case. PFRFF Lid Open the lid upwards. fi jj - pL ' 0 L IF The stitches of the sewing machine are illustrated on the inside of the lid. 16 - Pfaff performance 2054 | Owner's Manual - Page 17
. DO NOT modify the plug in any wayl Connecting the foot control Connect the plug of the foot control to the I connection socket of the sewing machine. The sewing speed is controlled by pressing the foot control. The foot control type ATK 0070 has to be used for this - Pfaff performance 2054 | Owner's Manual - Page 18
the left of the lid and open the lid upwards and towards you. L - Arranging the accessories The standard accessories are marked with numbers. Arrange the parts in the respective compartments of the accessory tray. 18 - Pfaff performance 2054 | Owner's Manual - Page 19
upwards out of the hole. 0 When replacing the tray, make sure it is flush with 0 the free arm of the sewing machine. 8) 188 189 190 191 192 193 194 195 J Preparing the machine for bobbing winding Place an empty bobbin so that the black pin of the bobbin winder snaps into the slot - Pfaff performance 2054 | Owner's Manual - Page 20
Winding the bobbin from the spool pin Place the sewing thread spool cap, slightly larger against the spool. on the spool than the the pin. Slide a spool, firmly Threading da( Turn on the machine tbwfHhooioeobnltdbdbiicotnnohbgnefbrtiaorencomntltid.ootAnhotshefwsetwiohllloeiennbftdteh, - Pfaff performance 2054 | Owner's Manual - Page 21
Winding from the second spool pin Insert the second spooi pin in the hole provided. Threading Thread as shown on page 24. Turn on the machine Hold the end of the thread firmly and press the foot control. As soon as the bobbin is full, the winding action will stop automatically - Pfaff performance 2054 | Owner's Manual - Page 22
Inserting the bobbin case Lift latch E and push the bobbin case fully onto pin C of the sewing hook. Opening D of the bobbin case must face upwards. check: Pull the bobbin thread sharply. the bobbin case out of the machine. Release the latch and take the empty bobbin out of the bobbin case. A -B - Pfaff performance 2054 | Owner's Manual - Page 23
amount of the needle thread tension ! using the markings on the tension dial. The normal setting for sewing is 4 - 5. For using decorative stitches, darning and buttonhole sewing 3. pFAFF 4 EI FH Thread tension For the best stitch appearance and durability make sure the needle and bobbin - Pfaff performance 2054 | Owner's Manual - Page 24
. Place the thread on the spool pin and fit a spool cap. Using both hands, pull the thread into thread guide A from the front. Place the thread from right to left into the pretension guide B. Now pass it through the left threading slot downwards. Pull the thread around the stop C and into the - Pfaff performance 2054 | Owner's Manual - Page 25
- - - F Integrated Needle Threader In order to make threading the needle easier and quicker use the PFAFF Integrated Needle Threader. Lower the presser foot. Press the threader down with the handle. Threader hook F swivels through the needle eye. Place the thread over - Pfaff performance 2054 | Owner's Manual - Page 26
Presser foot 'ift The presser foot is raised or lowered with the presser foot lifter. -'- Bringing up the bobbin thread Raise the presser foot While holding the end of the needle thread, press the foot control so the needle moves down and up. Pull the needle thread to draw up the bobbin thread. - Pfaff performance 2054 | Owner's Manual - Page 27
the presser foot upwards and at the same time the rear part downwards until it disengages from the presser foot holder. Snap on the presser foot • Place the presser foot under the presser foot shank, so that - Pfaff performance 2054 | Owner's Manual - Page 28
It is possible to wind bobbins even when the machine is fully threaded. Raise the presser foot lifter to - -- - - - ---- --- -------- - $J(2 fCfl rngnc(. '(jt,3 Guide the thread to the right under thread guide C. Wind the beginning of the Hold the end of the thread thread several - Pfaff performance 2054 | Owner's Manual - Page 29
off the machine. To firmly. F ii F F F F F F Threading the twin need'e Replace the sewing needle with a twin needle. Insert the second spool pin and place one spool of thread into thread the needles. the right guide and one in the left thread guide above the needle, and Note: It is - Pfaff performance 2054 | Owner's Manual - Page 30
IDT (Integrated Duai Feed) For sewing difficult materials PFAFF provides the ideal solution: the Integrated Dual Feed, IDT system. As on industrial machines, the IDT feeds the fabric from the top and bottom at the same time. The material is fed precisely. On light or difficult fabrics such - Pfaff performance 2054 | Owner's Manual - Page 31
Engaging the IDT Important: For all sewing with the IDT - Integrated Dual Feed, use presser feet with the center of the IDT with two fingers. Pull the IDT down, then back away from the machine and release the IDT slowly upward. Stripes and plaids match perfectly due to the even feed of the IDT. - Pfaff performance 2054 | Owner's Manual - Page 32
Lowering the feed dog For certain lowered. sewing work such as free-motion quilting or darning the feed dog has to be Raise the presser foot before lowering the feed dog. Push slide A - Pfaff performance 2054 | Owner's Manual - Page 33
1 • i I 1. 2. ir Ii '"' Electronic knee 'ift Your Pfaff performance 2054 lift for regulating the presser is provided with foot height. an electronic kn 1. Push the knee lift fully into the provided hole on the machir - Pfaff performance 2054 | Owner's Manual - Page 34
-- r1 - Pfaff performance 2054 | Owner's Manual - Page 35
1 1fI !Il ii r' i' 1" isa, SI III I.i SR z (D (D € gD 3 z 4 'I (D tt r fP It I 4. ' w -o CD 0 I CD 0 3 -U n CD 0 0 - Pfaff performance 2054 | Owner's Manual - Page 36
instructions on operating your Pfaff performance 2054 tmsmTocuueerrenncnehuuno,ininsstgotvyittioccshulhieobrslseaeme.pliaeYpt,ccrohtYoiuiopornnruePirafmaatmnefefdanicupcaho,einwrnsfeeoeowlrnicmsiontahamglnewecmatesoyecusn2rc0uerhe5eno4asrdcaiyssrpteoitpetopcenhea.srreasswe. - Pfaff performance 2054 | Owner's Manual - Page 37
before starting to s the machine sews in reverse until you press the button agair When the function is activated, a reverse sewing arrow appe on the touch If you are programming the length of a buttonhole, you determine the length of the buttonhole seam with this buttc These buttons have several - Pfaff performance 2054 | Owner's Manual - Page 38
menu The sewing menu is divided into three sections. 1. Status bar, It is always changing a awscehtwievirenegatnhfudeniacsctiatoiuvntao. tmedatsiceawlliyngufpudnactteidonbsyasreeleschtoinwgn.or 2. ssAeeclqetuicoetninncgfeiealtdnh,dewcahhcetairnoegnitnhfigeeladchsiostistaecchnt.isvtaittcehd - Pfaff performance 2054 | Owner's Manual - Page 39
that can be selected are visible. in the status bar. stitch. Only sewing Selected functions are Icons in the More options window Ok OK. The More the automatically. If this function is active, the raised 10.5 mm when the machine stops. end of the seam presser foot is alv If the • and icons are - Pfaff performance 2054 | Owner's Manual - Page 40
Free motion sewing When lowered automatically to the on the foot control. activated the free motion presser position foot is ding This function must be switched needle from the machine. off when you remove the twin pat lleePnnrggottghhr.afmormjoaibnliengsetaomgeltehnegrthsefvuenrcatliopnie - Pfaff performance 2054 | Owner's Manual - Page 41
off the main menu appears. Note. if you press the foot control once at this point, the corresponding sewing menu opens. if you press the foot control once more the machine starts to sew. UtiHty stitches Stitches 1 -30 This menu provides a selection of stitch types that you can use fc a variety - Pfaff performance 2054 | Owner's Manual - Page 42
Buttonholes Stitches 56 - 64 This menu provides a selection of 8 different buttonhole styles and one program for sewing on buttons. Each designed for a specific application and fabric. buttonhole sequence In this menu, stitches. you can create sewing sequences from the machine's 42 - Pfaff performance 2054 | Owner's Manual - Page 43
LI ¶ r 0 -n I I 1.. DCD - 0 B 0 n CD 0 C,, cr J ml - Pfaff performance 2054 | Owner's Manual - Page 44
a stitch There are several ways to select a stitch. Selection by category Touch "Utility stitches". This category contains 30 stitches that are suitable for utility sewing.You can browse one column at a time with the buttons. You can touch any stitch to select it and open the screen for that stitch - Pfaff performance 2054 | Owner's Manual - Page 45
menu) In this menu, you can select the language of your Pfaff performance 2054. Touch the "Language selection" icon. Touch the language of your 1. Context menu (available from main menu) Touch "Calibration" in the context machine settings menu. In the upper left corner, a small circle appears in a - Pfaff performance 2054 | Owner's Manual - Page 46
and sequence menu) You can specify whether your pattern and / or sewing paramete settings are to be discarded ("Back to default setting"), or can switch off the messages that automatically appear ii the machine. 2. You can specify whether the machine should stop when a message appears. An X in the - Pfaff performance 2054 | Owner's Manual - Page 47
number in your machine is shown here. Software updates (available from main menu) This function is for Pfaff certified service technicians only. Wekorne all stitch sequences. nfo system There is an Info system function in your sewing machine to help you; it can be cahed up at any orne by pressing - Pfaff performance 2054 | Owner's Manual - Page 48
: Needle size/type recommendation, to engage or disengage the IDT, recommended presser foot and upper thread tension. For tapering, patchwork, buttonhole sewing, quilt stitches and darning program there is a more detailed information. Information in the more options window When you press the - Pfaff performance 2054 | Owner's Manual - Page 49
I I I I I I I I I I I F F F I 48 £ - Pfaff performance 2054 | Owner's Manual - Page 50
! ! ! fI Ill IJI II II Ill lii (II rN ii m1 Ls II Ill Ill l1 111 ill 'i I" iw -- - v) LI, (D (D - Pfaff performance 2054 | Owner's Manual - Page 51
Your performance 2054 offers you the possibility of storing stitch and word sequences in the memories of the machine. The stitch sequences are stored and remain in the memory until you overwrite or delete it. Up to 99 stitches or letters can be stored in each of the 50 memories. AvaiabIe sewing - Pfaff performance 2054 | Owner's Manual - Page 52
stitch is selected that cannot be used in stitch sequence, for example, a buttonhole, a message is displayed. 2. Selection by Stitch selection keys. Touch ZE . The selected stitch appears in the preview field and all settings and sewing functions can be changed. Touch m to insert the stitch into the - Pfaff performance 2054 | Owner's Manual - Page 53
machine is idle and the action field is active. Activate the action field by touching it. Touching moves the cursor to the position where the sequence is to be edited. All settings and sewing exit the Stitch sequence menu with , your Pfaff performance 2054 asks if you want to say your sequence. - Pfaff performance 2054 | Owner's Manual - Page 54
- ,4 I I I I Creatng a new stitch sequence If the Stitch sequence huon is touched in the main menu and a memory is already full, a dialog window opens to "New", Open' and 'Delete" a stitch sequence. If "New" is touched the stitch sequence menu opens. The stitch sequence buttons are active - Pfaff performance 2054 | Owner's Manual - Page 55
in the performance 2054 memory. All fonts should be sewn with the IDT integrated Dual Feed disengaged. All fonts include upper case letters, special characters and numbers. The Script font also include lower case letters. Touch the 'Alphabets' icon and select a font. The machine - Pfaff performance 2054 | Owner's Manual - Page 56
the selectea font type. Touch '' to change the size of the individual selec characters with You can add stitches, leUers and edt sze. T 0 save foflow instructions under "Saving a SLch Sequence". - Pfaff performance 2054 | Owner's Manual - Page 57
56 - Pfaff performance 2054 | Owner's Manual - Page 58
t1LiL LLL C Vba Da) a) - - CD ' 2 QO %.4 0 2 0 0 a) 00 (0 C, J N _) CD :T;t D CD 0) N CD i 0 N 2 D 3 0 Z 2 0 V) 0) (0 w 2 0 0 C, (11 -f (•) 2 0 I0 0 - Pfaff performance 2054 | Owner's Manual - Page 59
position. The stitch length can be increased up to 6 mm. Change the needle position of the straight stitch to sew in a zipper or topstitch along the edge of a collar. Your Pfaff performance 2054 has 19 needle positions that can be adjusted with the . icon and button. Tip: Use the "needle up / down - Pfaff performance 2054 | Owner's Manual - Page 60
on the needle plate, or the edge guide to stitch further from the fabric edge. The edge guide is inserted hole A and is secured with set screw B. Basting stitch - No 17 With stitch 17 you can baste. When you press the foot control, • machine will sew one stitch at a time. Press the foot control - Pfaff performance 2054 | Owner's Manual - Page 61
• When the needle swings into the fold it should catch a small amount of fabric. If the stitches are visible on the right side, adjust edge guide A by turning adjusting screw B, until the stitch that catches the hem just slightly barely showns. Elastic bhnd hem stitch - No 16 The elastic blind hem - Pfaff performance 2054 | Owner's Manual - Page 62
threads on denim. • Fold up a hem the correct width. . • Topstitch the hem from the right side, or thread the top wit .,.:... F :::..:;:.:. decorative thread and sew. F ,.:•: :::'::::,.. Tip: Use lower needle thread tension and stabilizer under the fabric for decora threads. F F - Pfaff performance 2054 | Owner's Manual - Page 63
Stretch trip'e straight stitch - No 2 This stitch is used for sewing seams where strength is needed, such as under arm and crotch seams. The heavier the fabric, the longer the stitch length required. Your Pfaff performance 2054 has 19 needle positions that can be adjusted with the o. icon and button - Pfaff performance 2054 | Owner's Manual - Page 64
repair holes, tears and damaged areas. • If the area is only slightly damaged, sew over it with several rows of stitching until it is well covered. • For the excess material close to the stitching on tI back side of your repair. Sewing-on patches - No 4 The best way to repair larger holes is to - Pfaff performance 2054 | Owner's Manual - Page 65
Overlock stitches For elastic, knits and stretch fabrics, your performance 2054 provide a selection of overlock stitches. These stitches Join multiple layers of fabric and overcast overlock stitch with edge thread - No 31 If you wish to sew a fabric that frays easily, select stitch 31. With this - Pfaff performance 2054 | Owner's Manual - Page 66
built-in to your Pfaff performanc 2054. Each buttonhole is especially adapted for a particular us and fabric type. Your performance 2054 is equipped with the Sensormatic buttonhole guide 10 and sensor technology to ensure that eve buttonhole is sized accurately. Beautiful buttonholes can be se on - Pfaff performance 2054 | Owner's Manual - Page 67
the cord ends under the foot and pull up into the right and left guides on the front of the presser foot. Snap on the buttonhole foot. Before starting to sew, pull it backward as far as the second red mark. Buttonhole 56, 57, 58 or 59 can now be sewn. After completing the - Pfaff performance 2054 | Owner's Manual - Page 68
the machine sews the guiding thE gimp cord under the stitching. After sewing the curve, hold the gimp cords into a needle and them to the vvrong side of the garment. Tie the gimp cords anc off excess cord. The round buttonhole with gimp cord is sewn in the same way Tip: This thread. buttonhole - Pfaff performance 2054 | Owner's Manual - Page 69
to make sure the needle also enters the right hole of the button. • Continue sewing on the button. The machine will complete the program for you. Tip! use the optional Sew on Button Foot to sew optimal buttons. Sewing on buttons with shanks - No 64 • Attach the presser foot. • Leave the feed dogs - Pfaff performance 2054 | Owner's Manual - Page 70
strengthening damaged areas of fabric and repairing tears. • Stitch over the damaged area at the required length. • Press the reverse key; the machine finishes sewing the darning program and the darning length is saved. The saved darning length can now be repeated as often as needed. Depending on - Pfaff performance 2054 | Owner's Manual - Page 71
. the darning foot automatically engages in Draw up the bobbin threaad and sew a few stitches to the threads close to the project and continue sewing. secure. Clip Repair the damaged area/hole by guiding the fabric evenly forwards and repair area. backwards slightly longer than the - Pfaff performance 2054 | Owner's Manual - Page 72
along this line. Leave about 4 - 5 inches (10-13 cm) of threa( the beginning and end of the seam. Sew 1 or 2 more rows of stitching, using the edge of the pn foot as a guide. • Gather the fabric by pulling the bobbin (bottom) threads tc desired fullness. • Distribute the gathers evenly and knot the - Pfaff performance 2054 | Owner's Manual - Page 73
U - Pfaff performance 2054 | Owner's Manual - Page 74
a ,* I.- •r ' IL 1±2:, 00 a' CD n0 fl oz (0 00 s 30 CD WSAt - Pfaff performance 2054 | Owner's Manual - Page 75
templates. Snap on the optional 1/4" quilting foot, Sew the pieces together following the design instructions to piece the quilt top. The seam allowance of stitches. However, it is quicker and more practical with your Pfaff performance 2054, e.g. with stitch 41 using monofilament thread on top and - Pfaff performance 2054 | Owner's Manual - Page 76
guide for optimal quilting. Set your Pfaff performance 2054 for center needle straight stitch and engage the IDT. For optimal quilt piecing set up your Pfaff performance 2054 Patchwork program in the more options menu and t touch OK. Now sew your seam length. When you get to the en the seam, touch - Pfaff performance 2054 | Owner's Manual - Page 77
Pfaff performance 2054 with a Straight Stitch (1), stitch length 2.5, Center needle position and the IDT engaged. Use the optional narrow edge foot for optimal guiding top. change to a quilting or jeans needle when sewing through thick quilts. Test sew to make sure your stitching is proper before you - Pfaff performance 2054 | Owner's Manual - Page 78
Ditch methc Engage the Single Stitch Program for one stitch. Now sew this stitch every 3 4" (7 - 10 cm) all over adds texture and interest to your quilt. Set your Pfaff performance 2054 for stippling with a Straight S (1) and the Motion Guide grip to help move the quilt in a more consister - Pfaff performance 2054 | Owner's Manual - Page 79
the applique to the block before the quilt is put together. Set your performance 2054 for a satin stitch. Choose stitch 10, stitch length 0.4 - 0.5, stitch applique foot and sew around the edge of the applique with the straight part of the hand applique stitch. Let the horizontal part of the stitch - Pfaff performance 2054 | Owner's Manual - Page 80
the market today and your performance 2054. You can a!so vary the shade of your FrE Motion Sewing by sewing in different directions or patterns embroidery weight bobbin thread. Hoop your fabric tight as a drum into a round machine embroidery hoop. You can use a wooden ring hoop bound with tape for a - Pfaff performance 2054 | Owner's Manual - Page 81
them. Clip the threads close to the fabric and continue S S •r': . " S 55 5- .. sewing. Make sure that you hold the hoop on the machine bed 5. S .5 and move it steadily. Experiment sewing different patterns and .5., \ 1 , see what different stitch directions will do with the look - Pfaff performance 2054 | Owner's Manual - Page 82
Iightweignt tear away stabilizer under stitching. Begin sewing. Use the Sew Slow button to reduce your speed while using the wing needle. Gimping Gimping adds texture to nostalgia projects. Previously done by hand, sewing over gimp cord with your performance 2054 will not only save time but add that - Pfaff performance 2054 | Owner's Manual - Page 83
' 1 r* jI:*!z, J ' 9' ---I-' I 4I CD 0 3 CD C-) CD cD n CD 0 0 - Pfaff performance 2054 | Owner's Manual - Page 84
pen. the optional Pfaff Pintuck needed. Tip: use the optional Pintuck blade and Pintuck page xx-yy for directions using the Pintuck foot feet to accentuate the tucks. See Replace the standard sewing needle with a 2.0 mm twin needle. Set your performance 2054 for length 2.5 - 3.0, presser - Pfaff performance 2054 | Owner's Manual - Page 85
on each edge. Then meas 5/8" (4 cm) from each corner diagonally and mark. F Begin sewing around the pillow with a 5/8" (16 mm) seam, lea an opening on one edge to with the fror and piping. Sew, making sure to catch all layers. Your perforrr 2054 with IDT makes sewing through all the layers easy. The - Pfaff performance 2054 | Owner's Manual - Page 86
a straight IDT engaged, 1 1/2" Overlap the folded size as the front. edges to create the pillow back in the same Tip: Use buttons and the sensormatic buttonholes to keep the envelope closed. 84 - Pfaff performance 2054 | Owner's Manual - Page 87
fabric edges. Set your performance 2054 for a Straight Stitch (1), stitch Iengt 2.0 - 2.5, presser foot 0, IDT engaged. Follow the pattern instructions on how to construct the garme Follow the directions below to create the seams. With the wrong sides of the fabric together, sew with a 3/8" (10 mm - Pfaff performance 2054 | Owner's Manual - Page 88
and giving a small amount creating a of stretch. zig zag on the Replace needle. the standard sewing needle with a 4.0 or 6.0 mm twin Set your performance 2054 for normal Straight Stitch (1), stitch length 2.5 - 3.0, presser foot 0, iDT engaged. tdttTeohihsnprkrese.iasoapddnoomtdhli - Pfaff performance 2054 | Owner's Manual - Page 89
•S - S S s - ES ES 5S a :S S a Stitch examples for eyelets a) tsrSheteivetlceehhrcstowesotibpidt.uctTthhthotneonon..2f3om4r.mmS.taTitchsheecnsolsonewdclucyirreacnlwediwtehviteahnfsleytiw,tcmhsatinntcouh.ael3ls4y.utSusiernnt igtrl b) SzSieegclzeuacrgteswsttiititctchhhannofoe..w63w4s, - Pfaff performance 2054 | Owner's Manual - Page 90
with must thus any of the above stitches. enter the pulled threads on bundling the threads. Tip: If you use neatly bundle the the "sew slow" threads. function the needle will evenly enter the fabric and Making a hem w[th a hemsttch seam This seam provides a perfect edge table linen, napkins - Pfaff performance 2054 | Owner's Manual - Page 91
up/down" Attach decorative foot no. 2A. Its red guide-grooves adapted to the size of the cross stitches. are ex Sew cross stitch borders with 72-81 These programs consist of small cross suitable for borders. They have been machine with optimum stitch length change these settings as needed - Pfaff performance 2054 | Owner's Manual - Page 92
the twin needle. Twin needle sewing is particularly effective if you use decorative sewing threads in matching colors. To sew with the twin needle, touch For active even when the stitch has been changed, even after the machine has been swithed off and back on. The twin needle function must be - Pfaff performance 2054 | Owner's Manual - Page 93
zigzag stitch allows you to put yc creative ideas into action and create stitcheswith an attractive, three-dimensional appearance, which are very easy to sew. When tapering the stitch width of the zig zag stitch is increasec decreased during sewingto create symmetric or asymmetric tap In stitch no - Pfaff performance 2054 | Owner's Manual - Page 94
ed ces the width to 0 mm. Turn and the fabric 90° and sew the rack. press the reverse button aCan: ne Sew about 1/4 machine reduces (6 mm) the width to 0 mm. • Turn the fabric 90° again and sf hc second buttonhole side. Touch reverse turn the fabdc he secood bartac as described above. 92 - Pfaff performance 2054 | Owner's Manual - Page 95
I Appliqués are easily created and produce a beautiful effect. By using different fabrics and prints you create many different lool You can sew a perfect satin stitch with the optional applique to The special cutout on the unde:scJe allows the extra thickness c a satin stitch zigzag to feed snroco - Pfaff performance 2054 | Owner's Manual - Page 96
- Pfaff performance 2054 | Owner's Manual - Page 97
'!fl!! 7i1rJfliT I - CD CD CD 0 r CD T - CDO 0 CD -' r+ ' 0-n Ca -' -I 0D CD : -I -L is S1 - -.--- 4 I I IWJ a C CD CD -U a Q) 0, CD CD C O D. V"i = flu) C 1 0 -hO 0 CD . CD CD (D :: : -4' CD CD -I, 1 O, . OOOOQó CD D VI CD VP, CD 0 0 VP, VI - Pfaff performance 2054 | Owner's Manual - Page 98
Standard presser feet and accessodes Standard nrescer foot No. CA Fancy stitch foot No. IA (for diai feed) 2 Fancy s: tc foot No. 2A (not fo dual feed) Blind sf d and overlock foot No. 3 Zfp3er rr cJgpesserootNo,4 Btrt&wc e u ,&. 96 - Pfaff performance 2054 | Owner's Manual - Page 99
i i1 ! I I I Darning foot No. 6 Roll hemmer No, 7 - Edge guide No. 8 ensormatc buttonhoie guce o. 10 Styhs Second spoo koer S€am riper Bru3h - Pfaff performance 2054 | Owner's Manual - Page 100
about 3/8 " to 5/8 (1 - 1.5 cm). • Place this overlapping edge over the tongue of the felling foot. The fabric must be placed fully under the presser foot. • Sew along the folded edge with a straight stitch. • Separate the fabric and feed the extending hem into the felling foot. The hem is turned by - Pfaff performance 2054 | Owner's Manual - Page 101
; 1.6 or 2.0 mm nee spacing; size 80). • Thread the two needles (see page xx-yy). • Using a water-soluble marker, draw a placement line for yo; first pintuck. • Sew your first pintuck. When you start on the second pintu allow the first pintuck to run parallel in a groove in the foo This will produce - Pfaff performance 2054 | Owner's Manual - Page 102
flat, right side down, on the top through the foot cut out. • Hold the top fabric slightly taut while sewing. The more you pull the greater the gathering effect. • Be sure to guide the fabric edges evenly through the foot. • Snap off the shirring foot by pushing it down at the front - Pfaff performance 2054 | Owner's Manual - Page 103
edge foot. In order to obtain a perfect seam on kr fabrics (e.g. shoulder seams), we recommend sewing over a cor ribbon, pulled slightly taut into the seam. This will give the sear additional strength . When you buy the ruffler from your PFAFF dealer, complete instructions are included. 820255 096 - Pfaff performance 2054 | Owner's Manual - Page 104
Open toe appiique foot Appliqués are easy to sew and always produce a beautiful effect. Select stitch 18 for an é pieces on the fabric. • Snap on the open toe appliqué foot. • Select stitch 18 and guide the edge of the appliqué along the right inner edge of the foot. The straight stitch will be - Pfaff performance 2054 | Owner's Manual - Page 105
slowly and evenly. The stitches should be very cbs each other. • Secure with a few straight stitches. Bridging Guide, 3 mm and 5 mm Stitch No: 11 Stitch length: 2 mm Stitch width: 6 - 9 mm 820228-096 Bridging guide The bridging guide is used for sewing together two edges of fabrics with an open - Pfaff performance 2054 | Owner's Manual - Page 106
Sew pieces of fabric together using stitch 1. For a seam allowance of 1 /4" guide your fabric along the outer edge of the foot. For a seam allowance of 1/8" guide handstitched look can be accomplished faster and easier with the sewing machine (stitch 11). • Use invisible (monofilament) thread in - Pfaff performance 2054 | Owner's Manual - Page 107
well suited for free-motion quilting. The three layers of your qui are guided manually during free-motion quilting. The faster you the more consistent and uniform your raw edge automatically during sewing. Tip: You can obtain an additional decorative effect by using a zig zag or decorative stitch. - Pfaff performance 2054 | Owner's Manual - Page 108
needles). • Thread the two needles. Set the needle thread tension tight (4 - 5) and sew one pintuck with or without gimp thread. • Place the first pintuck under the groove in the extended guide. Sew a second pintuck. The second pintuck will automatically be spaced to allow a decorative stitch to be - Pfaff performance 2054 | Owner's Manual - Page 109
front of the foot. Feed it down through the hole in the ceni i of the foot and guide under the foot and to the back • Attach the braiding foot to the machine. Select a stitch and decorative thread of your choice and overstitch the cord or ribbon. • 'a Couching/Braiding Foot with IDT Stitch - Pfaff performance 2054 | Owner's Manual - Page 110
stabilize under your fabric. • Place the center marked point of your fabric directly below the rubber tip of the embroidery guide. • Select the desired decorative stitch pattern and begin sewing. • Change the radius with every new circle by loosening the screw and sliding the circular embroidery - Pfaff performance 2054 | Owner's Manual - Page 111
3 Stitch length: 0.5 - 1 820232-096 • Set the upper thread tension to 2 - 3. • Sew the stitches row by row. For circles you must work from outside inwards. • When using heavier threads, you fabric edge. place Move the the center needle guide of into the the pre desired position and - Pfaff performance 2054 | Owner's Manual - Page 112
Using the correct needle gut rti -s tt er stitching of the fah'lc. Change the needle often. Fabric weight 19 ht needle size 60/70/75 abric weight med urn needle size 80190 Fabric weight n eaw' needle size 100/110/120 System & No. 130/705 H Size: 60-130 -rZ 130/705 H-SUK Size: 70-100 130/705 H- - Pfaff performance 2054 | Owner's Manual - Page 113
5ze: 90 c.ze: 100 2.5 mm 2.5 mm 3.0 mm 2,5 mm 3.0 mm 4.3 mm wide pintucks extra vvide pintucks topstitch i ng -: :9EtLrcs with twin needles Lefre sewing ike desired embroidery sttches, check whether the needles can penetrate freely, by ur9nq dc handwheel. In this way, needle breakage is avoided - Pfaff performance 2054 | Owner's Manual - Page 114
before sewing any decorative stitch, applique satin stitch, buttonholes, or any other stitch that will build up thread to prevent puckering and ensure a smooth beautiful result. This is most important on lighter weight and stretchy fabric because when the fabric is not stable enough to support the - Pfaff performance 2054 | Owner's Manual - Page 115
dissolve in water. Place it on the top of the fabric before sewing decorative stitching on textured, napped and looped fabrics such as terry cloth, chemical in the stabilizer that can disintegrat your fabric Your Pfaff performance 2054 features the most beautiful decorative stitches to create with. - Pfaff performance 2054 | Owner's Manual - Page 116
I I I I I I I I 1 I - Pfaff performance 2054 | Owner's Manual - Page 117
ntenance Changing the needle plate 11 Cleaning IW Changing the Ujt bulb 117 Bulb removal 117 Sewing problems and thek %qons 118 Technical data 120 Package contents 120 - Pfaff performance 2054 | Owner's Manual - Page 118
off the main switch • Remove the needle plate and lower the feed dog. Clean the feed dog and hook area with the brush. • Clean the sewing machine every 10 - 1 5 hours of operation. Cleaning the display Wipe the display with a soft, lint-free dry cloth. DO NOT use aggressive cleansers or solvents - Pfaff performance 2054 | Owner's Manual - Page 119
sewing machine near the needie 'threader. Bub remov& Push the bulb removei as shown ri the figure, up as far as it w go. Now turn the bulb half a rotation counter clock-wise and remove the bulb. nsertion of the bu!b - Insert the bulb in the lamp changer. Guide be purchased from your PFAFF dealer - Pfaff performance 2054 | Owner's Manual - Page 120
Sewing problems and their solutions Problem/Cause The machine skips stitches Remedy The needle is not properly nserted. Wrong needle is in use. Needle is bent or blunt The machine type of needle. See needle table (Page 92, 93) Only guide the fabric lightly. When you insert the bobbin case, push it - Pfaff performance 2054 | Owner's Manual - Page 121
off the machine on completion of the sewing operation and then turn it back on again after approx. 10 seconds. Select the desired stitch again. Set the contrast using the contrast adjustment. if problems remain contact an authorized Pfaff dealer. Have your Pfaff performance 2054 serviced regularly - Pfaff performance 2054 | Owner's Manual - Page 122
speed Stitching width Stitching length Presser foot lift Max. presser foot height Needle System Package contents Sewing machine Carrying case Foot control Lead cord Accessories Instruction manual 408 x 290 X 187 mm 8.3 kg 120 V 0 /22 ... 24o V 85 W 1 V/52 W max 950 Stitches/mm mi,i. 80 stitches - Pfaff performance 2054 | Owner's Manual - Page 123
I I - Pfaff performance 2054 | Owner's Manual - Page 124
0 -Co . U, , o c) D U, 0, 0 0, 2: -D o D• ' CD CD CD CD 1-I 00 D -' B Q Dn CD N) 0 C,, 412 76 60 26A • Inhouse production • 02002 VSM Group AS • All statements valid at time of printinq • Printed in Sweden on environmental frierrdlv narrer
-
 1
1 -
 2
2 -
 3
3 -
 4
4 -
 5
5 -
 6
6 -
 7
7 -
8
-
9
-
10
-
11
-
12
-
13
-
14
-
15
-
16
-
17
-
18
-
19
-
20
-
21
-
22
-
23
-
24
-
25
-
26
-
27
-
28
-
29
-
30
-
31
-
32
-
33
-
34
-
35
-
36
-
37
-
38
-
39
-
40
-
41
-
42
-
43
-
44
-
45
-
46
-
47
-
48
-
49
-
50
-
51
-
52
-
53
-
54
-
55
-
56
-
57
-
58
-
59
-
60
-
61
-
62
-
63
-
64
-
65
-
66
-
67
-
68
-
69
-
70
-
71
-
72
-
73
-
74
-
75
-
76
-
77
-
78
-
79
-
80
-
81
-
82
-
83
-
84
-
85
-
86
-
87
-
88
-
89
-
90
-
91
-
92
-
93
-
94
-
95
-
96
-
97
-
98
-
99
-
100
-
101
-
102
-
103
-
104
-
105
-
106
-
107
-
108
-
109
-
110
-
111
-
112
-
113
-
114
-
115
-
116
-
117
-
118
-
119
-
120
-
121
-
122
-
123
-
124
 |
 |
.1
ik
CD
0
3
CD
C)
CD
Cj,
1
I
-Il
-F,
I
I
-o
CD
-,
0
B
Q
n
CD
IS
iI
.
‘
J
S