Pfaff performance 2054 Owner's Manual - Page 94
Automatic, tapering, Decorative, buttonhole
 |
View all Pfaff performance 2054 manuals
Add to My Manuals
Save this manual to your list of manuals |
Page 94 highlights
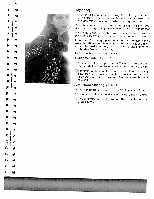
Automatic tapering Symmetric taper, stitch no. 3 or increasing the width Select stitch no. 3 or 10 and pre:s he button. Touch . The zig zag starts from 0 mm and becomes wider until the preset stitch width is reached. Stitch the desred stitch length. Reducing the width Press the reverse button. The wchh of the zig zag is reduced to 0 mm. The machine stops with the needle in the fabric and you can pivot the fabric to stitch the corner. Press the foot control again, and the stitch width increases. If you touch r the taper begns with the preset stitch width. Asymmetric taper, Stitch no. 34 Select stitch no. 34 and proceed es described above. Decorative buttonhole For beutiful decorative button hoies. any length, select stitch 34. This buttonhole is suitable for terry oth or for decorating jackets. Tip: to Rayon create thread the decorative tour on top and change color color buttonhole as ar -'.! pivot. pictured, sew with decorative Select stitch no. 34. V Touch needle stop down and proorarn the presser foot lift according to the tnickness of ynur abric • Touch andtouch Set the stitch width to 6 mm. Sew the first buttonhole side in t m desired length and touch the reverse button. The machir.n ed ces the width to 0 mm. Turn and the fabric 90° and sew the rack. press the reverse button aCan: ne Sew about 1/4 machine reduces (6 mm) the width to 0 mm. • Turn the fabric 90° again and sf hc second buttonhole side. Touch reverse turn the fabdc he secood bartac as described above. 92
-
 1
1 -
2
-
3
-
4
-
5
-
6
-
7
-
8
-
9
-
10
-
11
-
12
-
13
-
14
-
15
-
16
-
17
-
18
-
19
-
20
-
21
-
22
-
23
-
24
-
25
-
26
-
27
-
28
-
29
-
30
-
31
-
32
-
33
-
34
-
35
-
36
-
37
-
38
-
39
-
40
-
41
-
42
-
43
-
44
-
45
-
46
-
47
-
48
-
49
-
50
-
51
-
52
-
53
-
54
-
55
-
56
-
57
-
58
-
59
-
60
-
61
-
62
-
63
-
64
-
65
-
66
-
67
-
68
-
69
-
70
-
71
-
72
-
73
-
74
-
75
-
76
-
77
-
78
-
79
-
80
-
81
-
82
-
83
-
84
-
85
-
86
-
87
-
88
-
 89
89 -
 90
90 -
 91
91 -
 92
92 -
 93
93 -
 94
94 -
 95
95 -
 96
96 -
 97
97 -
 98
98 -
 99
99 -
100
-
101
-
102
-
103
-
104
-
105
-
106
-
107
-
108
-
109
-
110
-
111
-
112
-
113
-
114
-
115
-
116
-
117
-
118
-
119
-
120
-
121
-
122
-
123
-
124
 |
 |
