Pfaff performance 2054 Owner's Manual - Page 68
Buttonhole
 |
View all Pfaff performance 2054 manuals
Add to My Manuals
Save this manual to your list of manuals |
Page 68 highlights
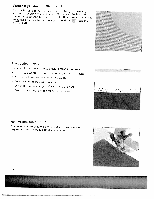
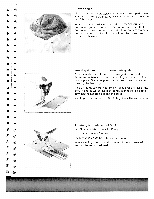
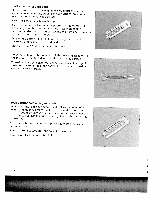
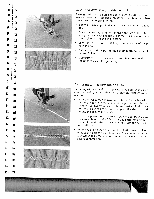
After the machine sews the first few stitches of the curved end the gimp cords down from the metal hook with a straight stitc pin. Warning: The presser foot must not be raised from the fabric surface! Pull the gimp cord on the left towards the rear until the loop i just in front of the needle. Carefufly sew the curve, guiding thE gimp cord under the stitching. After sewing the curve, hold the gimp cords into a needle and them to the vvrong side of the garment. Tie the gimp cords anc off excess cord. The round buttonhole with gimp cord is sewn in the same way Tip: This thread. buttonhole is particularly attractive when sewn wth a heavier-weighi Buttonhole tips Buttonholes that are to be sewn very close to a reinforced edg may sometimes not feed optimally with the buttonhole foot because of the bulk at the edge of the fabric. In this case, use presser foot 1A with the Integrated Dual Feed engaged. Fabrics that shft or stretch easily should be reinforced with wa soluble or liahtweight stabilizer, Buttonholes are particuiary sTable and durable if a gimp cord i inserted while sewing (see " Buttonholes, with girnp cord"). Linen buttonholes are particularly attractive if you use a heaviE weight thread through a topstitch needle. Buttonholes arc normally selected a little larger than the butto diameter. It is important to alvvays sew a test buttonhole on th same fabric/stabilizer as your project.
-
 1
1 -
2
-
3
-
4
-
5
-
6
-
7
-
8
-
9
-
10
-
11
-
12
-
13
-
14
-
15
-
16
-
17
-
18
-
19
-
20
-
21
-
22
-
23
-
24
-
25
-
26
-
27
-
28
-
29
-
30
-
31
-
32
-
33
-
34
-
35
-
36
-
37
-
38
-
39
-
40
-
41
-
42
-
43
-
44
-
45
-
46
-
47
-
48
-
49
-
50
-
51
-
52
-
53
-
54
-
55
-
56
-
57
-
58
-
59
-
60
-
61
-
62
-
 63
63 -
 64
64 -
 65
65 -
 66
66 -
 67
67 -
 68
68 -
 69
69 -
 70
70 -
 71
71 -
 72
72 -
 73
73 -
74
-
75
-
76
-
77
-
78
-
79
-
80
-
81
-
82
-
83
-
84
-
85
-
86
-
87
-
88
-
89
-
90
-
91
-
92
-
93
-
94
-
95
-
96
-
97
-
98
-
99
-
100
-
101
-
102
-
103
-
104
-
105
-
106
-
107
-
108
-
109
-
110
-
111
-
112
-
113
-
114
-
115
-
116
-
117
-
118
-
119
-
120
-
121
-
122
-
123
-
124
 |
 |
