Pfaff performance 2054 Owner's Manual - Page 105
plate - cb
 |
View all Pfaff performance 2054 manuals
Add to My Manuals
Save this manual to your list of manuals |
Page 105 highlights
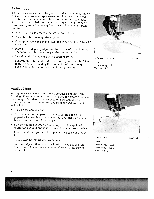
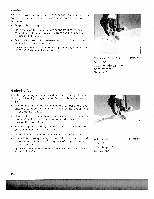
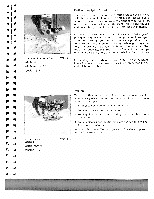
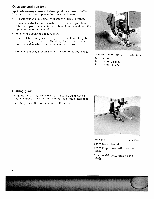
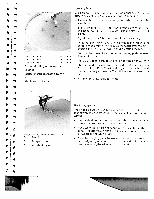
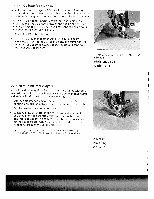
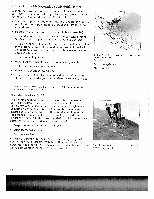
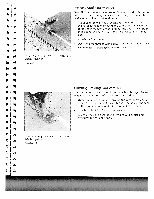
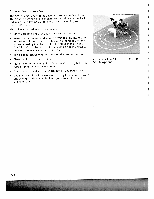
- Eyelet plate Using an eyelet plate you can create traditional eyeies. The eye plate is available in 4,5 mm, 6,5 mm and 8,5 mm sizes. • Remove the presser foot and snap the eyelet plate onto the needle plate. Make sure that the pin at the back of the plate fits into the middle cutout of the needle plate. Push the plate down at ti front. • Tightly hoop your fabric. Use a stabilizer if necessary. Eylet plate 4,5 mm Eylet plate 6,5 mm Eylet plate 8,5 mm 820238-096 820237-096 820275-096 Optional utility or decorative stitches Stitch length: according to the stitch Stitch width: 7 mm o With sharp scissors cut one or two of the fabric threads at t center of the eyelet area and push the fabric over the pin ol eyelet plate. The fabric must fit snugly around the pin. • To place the presser foot lifter in the darning position, selec free motion icon. • Pull up the bobbin thread and hold it for the first few stitch • Stitch around the eyelet cut with the desired stitch (e.g. stitc No. 6, 10, 111, 112, 113). While doing so, turn the hoop with the fabric slowly and evenly. The stitches should be very cbs each other. • Secure with a few straight stitches. Bridging Guide, 3 mm and 5 mm Stitch No: 11 Stitch length: 2 mm Stitch width: 6 - 9 mm 820228-096 Bridging guide The bridging guide is used for sewing together two edges of fabrics with an open effect. It is available in 3 mm and 5 mm widths. • Use standard presser foot I and insert the guide in the smal hole at the front edge of the needle plate. If you work on non-fraying fabric you can simply join the oic edges. If fabric frays, finish the fabric edges and press the s€ allowance to the wrong side. Place the bridging guide between the fabric edges. Sew the fabric edges together with stitch 11 .The guide allows you tc sew the openingthe edges at a consistent distance.
-
 1
1 -
2
-
3
-
4
-
5
-
6
-
7
-
8
-
9
-
10
-
11
-
12
-
13
-
14
-
15
-
16
-
17
-
18
-
19
-
20
-
21
-
22
-
23
-
24
-
25
-
26
-
27
-
28
-
29
-
30
-
31
-
32
-
33
-
34
-
35
-
36
-
37
-
38
-
39
-
40
-
41
-
42
-
43
-
44
-
45
-
46
-
47
-
48
-
49
-
50
-
51
-
52
-
53
-
54
-
55
-
56
-
57
-
58
-
59
-
60
-
61
-
62
-
63
-
64
-
65
-
66
-
67
-
68
-
69
-
70
-
71
-
72
-
73
-
74
-
75
-
76
-
77
-
78
-
79
-
80
-
81
-
82
-
83
-
84
-
85
-
86
-
87
-
88
-
89
-
90
-
91
-
92
-
93
-
94
-
95
-
96
-
97
-
98
-
99
-
 100
100 -
 101
101 -
 102
102 -
 103
103 -
 104
104 -
 105
105 -
 106
106 -
 107
107 -
 108
108 -
 109
109 -
 110
110 -
111
-
112
-
113
-
114
-
115
-
116
-
117
-
118
-
119
-
120
-
121
-
122
-
123
-
124
 |
 |
