Philips 7FF2CWO User manual - Page 13
Using your PhotoFrame
 |
UPC - 609585141773
View all Philips 7FF2CWO manuals
Add to My Manuals
Save this manual to your list of manuals |
Page 13 highlights
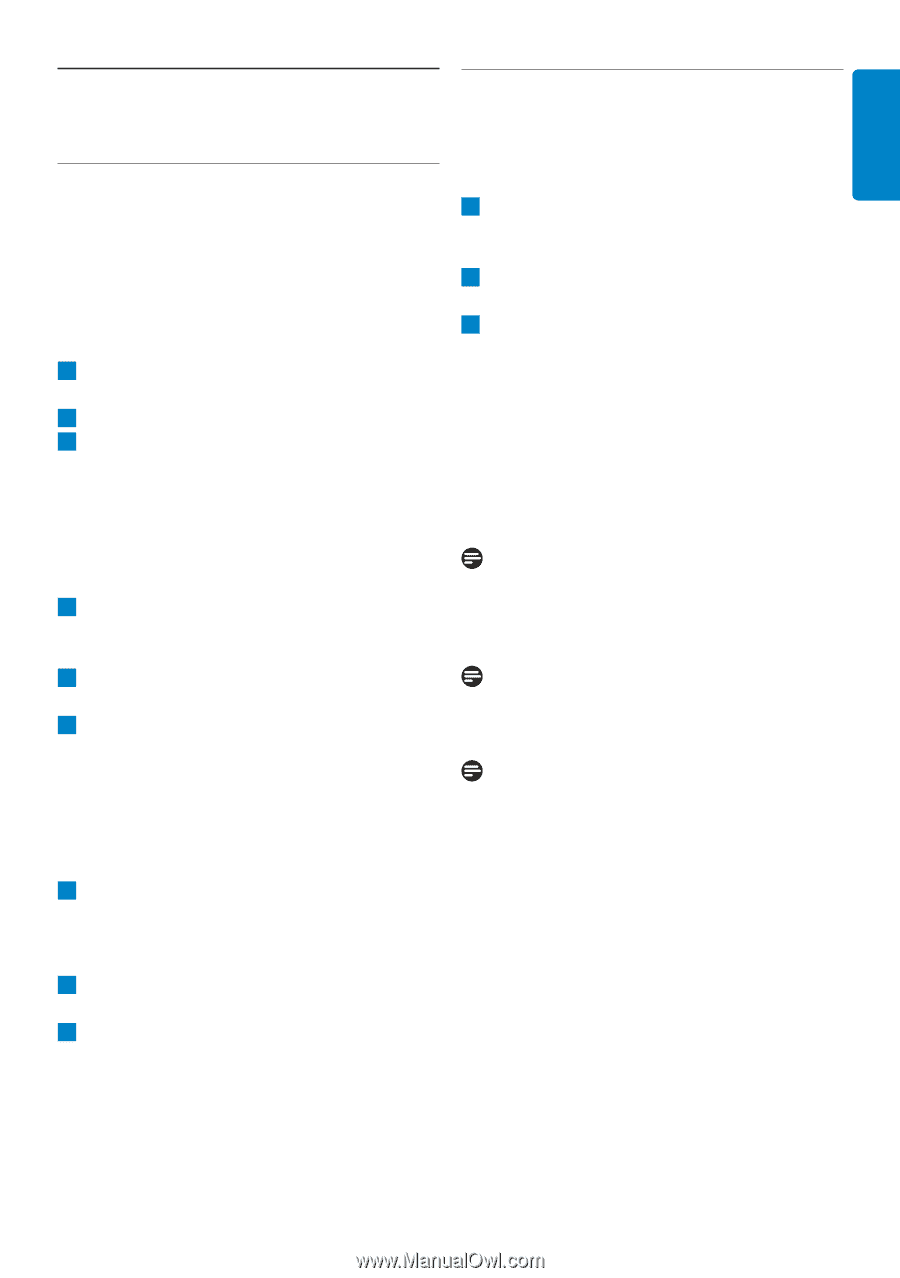
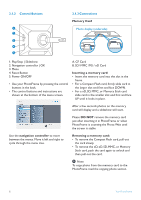
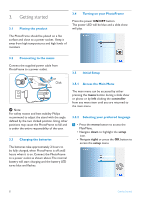
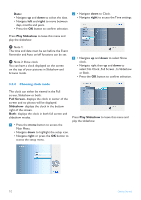
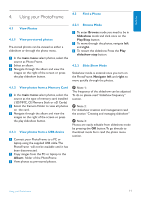
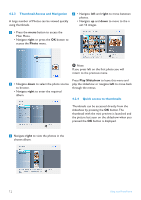
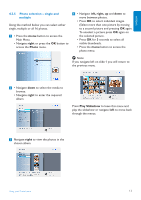
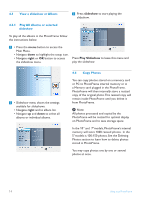
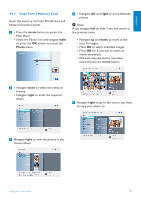
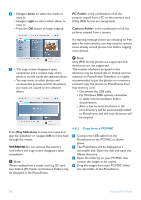
ENGLISH 4.2 Find a Photo 4. Using your PhotoFrame 4.1 View Photos 4.1.1 View pre-stored photos Pre-stored photos can be viewed as either a slideshow or through the photo menu. 1 In the main menu select photos, select the source as Photo Frame. 2 Select an album. 3 Navigate through the album and view the images on the right of the screen or press the play slideshow button. 4.2.1 Browse Mode 1 To enter Browse mode you need to be in Slideshow mode and click once on the Play/Stop button. 2 To move through the photos, navigate left and right. 3 To restart the slideshow Press the Play slideshow stop button. 4.2.2 Slide Show Mode Slideshow mode is entered once you turn on the PhotoFrame. Navigate left and right to move quickly through the photos. 4.1.2 View photos from a Memory Card 1 In the main menu select photos, select the source as the type of memory card installed ( SD/MMC, CF, Memory Stick or xD Cards) 2 Select the Camera Folder to view all photos on the card. 3 Navigate through the album and view the images on the right of the screen or press the play slideshow button. 4.1.3 View photos from a USB device 1 Connect your PhotoFrame to a PC or laptop using the supplied USB cable.The PhotoFrame will not be available until it has been disconnected. 2 Copy images from the PC or laptop to the Album folder of the PhotoFrame. 3 View photos as pre-stored photos. Note 1: The frequency of the slideshow can be adjusted. To do so please read "slideshow frequency" section. Note 2: For slideshow creation and management read the section "Creating and managing slideshow" Note 3: Photos are easily editable from slideshow mode by pressing the OK button.To go directly to thumbnail mode form read the photo menu section. Using yout PhotoFrame 11
-
 1
1 -
2
-
3
-
4
-
5
-
6
-
7
-
 8
8 -
 9
9 -
 10
10 -
 11
11 -
 12
12 -
 13
13 -
 14
14 -
 15
15 -
 16
16 -
 17
17 -
 18
18 -
19
-
20
-
21
-
22
-
23
-
24
-
25
-
26
-
27
-
28
-
29
-
30
-
31
-
32
-
33
-
34
-
35
-
36
-
37
-
38
-
39
-
40
-
41
-
42
-
43
-
44
-
45
-
46
-
47
-
48
-
49
-
50
-
51
-
52
-
53
-
54
-
55
-
56
-
57
-
58
-
59
-
60
 |
 |