Philips HTS3051BV User manual - Page 51
Proxy Setting
 |
View all Philips HTS3051BV manuals
Add to My Manuals
Save this manual to your list of manuals |
Page 51 highlights
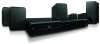
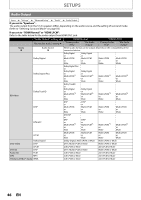
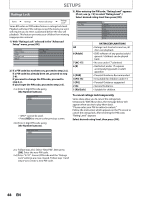
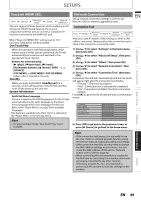
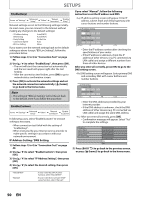
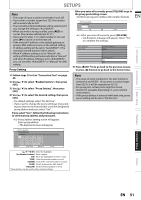
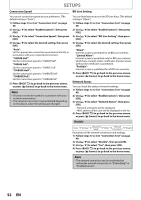
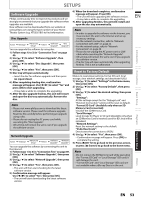
SETUPS Note • The range of input numbers is between 0 and 255. • If you enter a number larger than 255, the number will automatically be 255. • The manually entered addresses will be saved even if you change the setting to "Auto(DHCP)". • When you enter a wrong number, press [RED] to cancel. (the number will be back to "0".) • If you want to enter 1 or 2 digit number in one cell, press [B] to move on to the next cell. • If the entered IP address or the default gateway or primary DNS address is same as the default setting, IP address setting will be set to "Auto(DHCP)". (The manually entered number will be saved). • When IP address setting is set to "Manual", the setting of DNS setting will automatically be "Manual" and when IP address setting is set to "Auto(DHCP)", you can set either "Auto(DHCP)" or "Manual" for DNS setting. Proxy Setting After you enter all correctly, press [YELLOW] to go to the proxy port setting screen. 4-b) Enter proxy port number with number buttons. EN Proxy Setting Proxy Port x Clear OK 4-c) After you enter all correctly, press [YELLOW]. • Confirmation message will appear. Select "Yes" to complete the settings. Proxy Address Proxy Port xxxxxxxxxxxxxxx xxxxx Introduction Is Setting OK? Yes No 5) Press [BACK U] to go back to the previous screen, or press [ (home)] to go back to the home menu. Connections Basic Setup 1) Follow steps 1) to 4) in "Connection Test" on page 49. 2) Use [K / L] to select "Enable(Custom)", then press [OK]. 3) Use [K / L] to select "Proxy Setting", then press [OK]. 4) Use [K / L] to select the desired setting, then press [OK]. • For default settings, select "Do Not Use". • If you need to change the proxy setting as instructed by your Internet service provider to set the designated proxy address and port, select "Use". If you select "Use", follow the following instructions to set the proxy address and proxy port. 4-a) Proxy address setting screen will appear. Enter proxy address. • The keyboard screen will appear. Note • The range of input numbers for the port number is between 0 and 65535. (If you enter a number larger than 65535, it will be regarded as 65535.) • For proxy port, certain ports might be closed, blocked or unusable depending on your network environment. • If the proxy address is entered with blank only, proxy server setting will be set to "Do Not Use". Playback Proxy Setting Proxy Address xxxxxxxx_ 1234567890 abcde f gh i j k l mn o p q r s t u v w x y z . - _ OK Clear All Clear a/A/@ OK Function Setup Others [K / L / s / B] : Move the highlight. [the Number buttons] : Enter number. [OK] : Enter the highlighted number / word. *[RED] : Clear the entered number or word. [GREEN] : Clear all the entered numbers or words. [BLUE] : Switch between abc, ABC and @!? *[YELLOW] : Set the entered number or word. * These buttons can be used in other network settings. EN 51
-
 1
1 -
2
-
3
-
4
-
5
-
6
-
7
-
8
-
9
-
10
-
11
-
12
-
13
-
14
-
15
-
16
-
17
-
18
-
19
-
20
-
21
-
22
-
23
-
24
-
25
-
26
-
27
-
28
-
29
-
30
-
31
-
32
-
33
-
34
-
35
-
36
-
37
-
38
-
39
-
40
-
41
-
42
-
43
-
44
-
45
-
 46
46 -
 47
47 -
 48
48 -
 49
49 -
 50
50 -
 51
51 -
 52
52 -
 53
53 -
 54
54 -
 55
55 -
 56
56 -
57
-
58
-
59
-
60
-
61
-
62
-
63
-
64
 |
 |