Samsung SCH-R920 User Manual Ver.el03_f4 (English(north America)) - Page 54
Separating joined contacts, Sending Namecards, Exporting and Importing Contacts, Favorites, Bluetooth
 |
View all Samsung SCH-R920 manuals
Add to My Manuals
Save this manual to your list of manuals |
Page 54 highlights
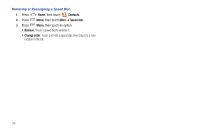
Separating joined contacts 1. Press Home, then touch Contacts. 2. Touch a contact to display its information. 3. Touch the Joined Contacts field to display joined contacts. 4. Touch a contact to separate it. Sending Namecards You can send one or more contact's information as namecards over a Bluetooth connection to another Bluetooth device, or as attachments to Gmail or Email messages. Important!: Not all Bluetooth devices will accept contact information. Check the target device's documentation. 1. Press Home, then touch Contacts. 2. Touch a contact to display its information. 3. Press Menu, then touch Import/Export ➔ Send namecard via. 4. Select the contact(s) to be sent, then touch Send. 5. At the prompt, choose a sending method, then follow the prompts to send the namecard: • Bluetooth: For more information, refer to "Bluetooth" on page 80. • Email: This option appears only if you define an Email account to your phone using Email. (For more information, refer to "Composing and Sending Email" on page 60 and "Email" on page 59.) • Gmail: For more information, refer to "Composing and Sending Gmail" on page 58. • mail@metro: For more information about mail@metro, contact your Wireless Provider. Exporting and Importing Contacts You can export your contact list to an optional installed memory card, or import a list of contacts (previously exported) from a memory card. 1. Press Home, then touch Contacts. 2. Press Menu, then touch Import/Export. 3. Touch Import from SD card or Export to SD card, then follow the prompts to complete the operation. Favorites Mark existing contacts with a star to identify them as Favorites. Favorites display on the Favorites tab in the Phone keypad, for fast dialing or messaging, and are indicated by the in Contacts. 50
-
 1
1 -
2
-
3
-
4
-
5
-
6
-
7
-
8
-
9
-
10
-
11
-
12
-
13
-
14
-
15
-
16
-
17
-
18
-
19
-
20
-
21
-
22
-
23
-
24
-
25
-
26
-
27
-
28
-
29
-
30
-
31
-
32
-
33
-
34
-
35
-
36
-
37
-
38
-
39
-
40
-
41
-
42
-
43
-
44
-
45
-
46
-
47
-
48
-
 49
49 -
 50
50 -
 51
51 -
 52
52 -
 53
53 -
 54
54 -
 55
55 -
 56
56 -
 57
57 -
 58
58 -
 59
59 -
60
-
61
-
62
-
63
-
64
-
65
-
66
-
67
-
68
-
69
-
70
-
71
-
72
-
73
-
74
-
75
-
76
-
77
-
78
-
79
-
80
-
81
-
82
-
83
-
84
-
85
-
86
-
87
-
88
-
89
-
90
-
91
-
92
-
93
-
94
-
95
-
96
-
97
-
98
-
99
-
100
-
101
-
102
-
103
-
104
-
105
-
106
-
107
-
108
-
109
-
110
-
111
-
112
-
113
-
114
-
115
-
116
-
117
-
118
-
119
-
120
-
121
-
122
-
123
-
124
-
125
-
126
-
127
-
128
-
129
-
130
-
131
-
132
-
133
-
134
-
135
-
136
-
137
-
138
-
139
-
140
-
141
-
142
-
143
-
144
-
145
-
146
-
147
-
148
-
149
-
150
-
151
-
152
-
153
-
154
-
155
-
156
-
157
-
158
-
159
-
160
 |
 |
