Samsung SPH-A640 User Manual (user Manual) (ver.1.0) (English) - Page 40
Installing the Battery, To install the Li-Ion battery, To remove your battery
 |
View all Samsung SPH-A640 manuals
Add to My Manuals
Save this manual to your list of manuals |
Page 40 highlights
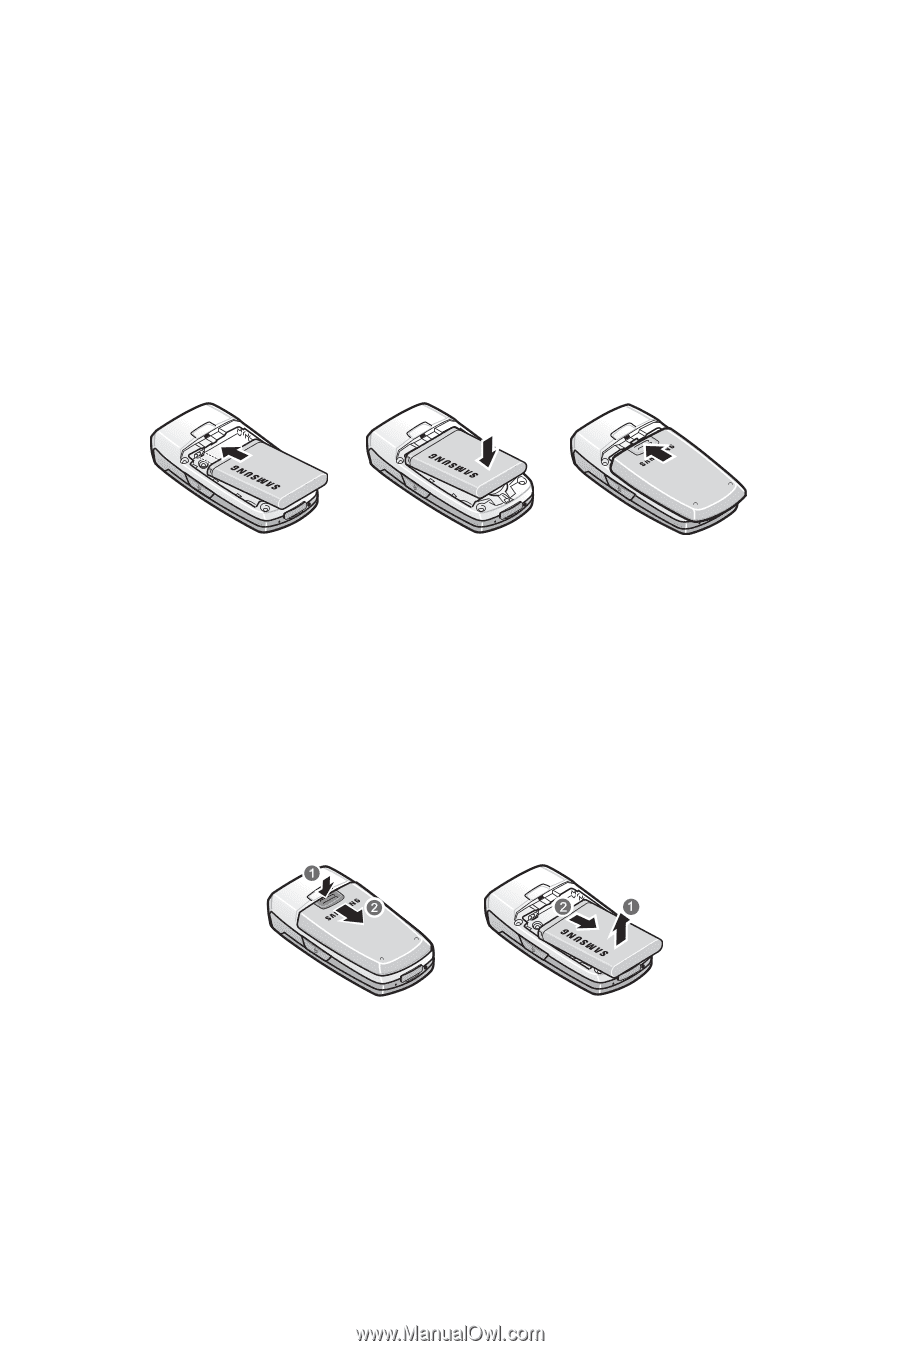
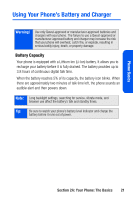
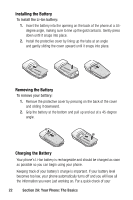
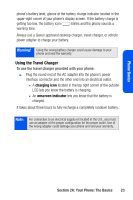
Installing the Battery To install the Li-Ion battery: 1. Insert the battery into the opening on the back of the phone at a 45degree angle, making sure to line up the gold contacts. Gently press down until it snaps into place. 2. Install the protective cover by lining up the tabs at an angle and gently sliding the cover upward until it snaps into place. Removing the Battery To remove your battery: 1. Remove the protective cover by pressing on the back of the cover and sliding it downward. 2. Grip the battery at the bottom and pull up and out at a 45-degree angle. Charging the Battery Your phone's Li-Ion battery is rechargeable and should be charged as soon as possible so you can begin using your phone. Keeping track of your battery's charge is important. If your battery level becomes too low, your phone automatically turns off and you will lose all the information you were just working on. For a quick check of your 22 Section 2A: Your Phone: The Basics
-
 1
1 -
2
-
3
-
4
-
5
-
6
-
7
-
8
-
9
-
10
-
11
-
12
-
13
-
14
-
15
-
16
-
17
-
18
-
19
-
20
-
21
-
22
-
23
-
24
-
25
-
26
-
27
-
28
-
29
-
30
-
31
-
32
-
33
-
34
-
 35
35 -
 36
36 -
 37
37 -
 38
38 -
 39
39 -
 40
40 -
 41
41 -
 42
42 -
 43
43 -
 44
44 -
 45
45 -
46
-
47
-
48
-
49
-
50
-
51
-
52
-
53
-
54
-
55
-
56
-
57
-
58
-
59
-
60
-
61
-
62
-
63
-
64
-
65
-
66
-
67
-
68
-
69
-
70
-
71
-
72
-
73
-
74
-
75
-
76
-
77
-
78
-
79
-
80
-
81
-
82
-
83
-
84
-
85
-
86
-
87
-
88
-
89
-
90
-
91
-
92
-
93
-
94
-
95
-
96
-
97
-
98
-
99
-
100
-
101
-
102
-
103
-
104
-
105
-
106
-
107
-
108
-
109
-
110
-
111
-
112
-
113
-
114
-
115
-
116
-
117
-
118
-
119
-
120
-
121
-
122
-
123
-
124
-
125
-
126
-
127
-
128
-
129
-
130
-
131
-
132
-
133
-
134
-
135
-
136
-
137
-
138
-
139
-
140
-
141
-
142
-
143
-
144
-
145
-
146
-
147
-
148
-
149
-
150
-
151
-
152
-
153
-
154
-
155
-
156
-
157
-
158
-
159
-
160
-
161
-
162
-
163
-
164
-
165
-
166
-
167
-
168
-
169
-
170
-
171
-
172
-
173
-
174
-
175
-
176
-
177
-
178
-
179
-
180
-
181
-
182
-
183
-
184
-
185
-
186
-
187
-
188
-
189
-
190
-
191
-
192
-
193
-
194
-
195
-
196
-
197
-
198
-
199
-
200
-
201
-
202
-
203
-
204
-
205
-
206
-
207
-
208
-
209
-
210
-
211
-
212
-
213
-
214
-
215
-
216
-
217
-
218
-
219
-
220
-
221
-
222
-
223
-
224
-
225
-
226
-
227
-
228
-
229
 |
 |