Sharp DX-B352P DX-B352P User Manual
Sharp DX-B352P Manual
 |
View all Sharp DX-B352P manuals
Add to My Manuals
Save this manual to your list of manuals |
Sharp DX-B352P manual content summary:
- Sharp DX-B352P | DX-B352P User Manual - Page 1
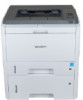
User Guide SHARP DX-B352P Monochrome Laser Printer It is recommended that you read this Guide carefully before using the printer - Sharp DX-B352P | DX-B352P User Manual - Page 2
explains how to use the SHARP DX-B352P laser printer. Please read and understand the manual in order to use the product correctly. Keep this manual in a convenient location for reference whenever needed. Legal Notice Trademark Microsoft®, Windows®, Windows Server® and Windows Vista® are trademarks - Sharp DX-B352P | DX-B352P User Manual - Page 3
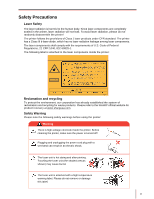
protect the environment, our corporation has already established the system of reclamation and recycling for waste products. Please refer to the SHARP official website for product recovery at www.sharpusa.com. Safety Warning Please note the following safety warnings before using the printer: There - Sharp DX-B352P | DX-B352P User Manual - Page 4
instructions marked on the equipment or specified in the manual supplied with the equipment. 4. If the operating instructions do not allow sharp objects to pierce the instructions. Incorrect adjustment of other controls may result in damage and the need for professional service representative support - Sharp DX-B352P | DX-B352P User Manual - Page 5
SHARP Service Center to purchase parts they need. If the product sold is inconsistent with the package list, please go to the specified Service Center to solve the problem installed and used in accordance with the instructions, may cause harmful interference to radio communications Guide properly. IV - Sharp DX-B352P | DX-B352P User Manual - Page 6
Supplier's Declaration of Conformity 47 CFR § 2.1077 Compliance Information Unique Identifier: Trade Name: Sharp, Model No.: DX-B352P Responsible Party - U.S. Contact Information Sharp Electronics Corporation 100 Paragon Drive, Montvale, New Jersey, United States 07645 Telephone number: +1-201-529 - Sharp DX-B352P | DX-B352P User Manual - Page 7
of the Driver Software 13 3.1. Windows-based Driver ...13 3.1.1. Introduction ...13 3.1.2. Installation Steps ...13 3.1.3. Driver Uninstallation...20 3.2. Installation of the Driver Software based on Mac System 22 4. Network Configuration (For printer models that support wired/wireless - Sharp DX-B352P | DX-B352P User Manual - Page 8
Cartridge 65 8.2.1. About Laser Toner Cartridge 65 8.2.2. Replace Laser Toner Cartridge 66 9.Troubleshooting ...68 9.1. Clearing Jammed Paper ...68 9.1.1. Paper Jam in the Tray ...68 9.1.2. Paper Jam in the Manual Input Tray 69 9.1.3. Paper Jam in the Optional Tray 70 9.1.4. Internal Paper Jam - Sharp DX-B352P | DX-B352P User Manual - Page 9
1. Before Using the Printer 1.1. Packing List When you open the package, make sure that the following parts are included in the carton: Parts Name Quantity Printer 1 Laser Toner Cartridge 1 USB Interface Cable 1 CD-ROM 1 Quick Setup Guide 1 1 - Sharp DX-B352P | DX-B352P User Manual - Page 10
toner cartridge 5 Multipurpose Input Tray To open the front cover of the multipurpose input tray, and put in the print media 6 Multipurpose Input Tray Guide To adjust the width of both sides of the paper 7 Main Power Switch To turn on or turn off the power supply 8 Standard Input Tray - Sharp DX-B352P | DX-B352P User Manual - Page 11
jammed paper at the rear during duplex printing 1.3. Laser Toner Cartridge Service Life of the Laser Toner Cartridge Type Average Print Volume Laser consumables other than that of the original SHARP consumables. • Any damages caused by using non-SHARP original consumables are not covered by - Sharp DX-B352P | DX-B352P User Manual - Page 12
1.4. Control Panel 1. Layout and Functions of the Control Panel The layout of the printer control panel is shown below: No. Name 1 LCD Display 2 UP Functions The display provides information about the printer and can be used for setting up the Product Settings. Press this button to browse - Sharp DX-B352P | DX-B352P User Manual - Page 13
printer, or the paper tray is out of paper; and in such a case, it will keep the red light on. For specific error, see Chapter 9 Troubleshooting. The display provides information about the printer and can be used for setting up the Product Settings. Press this button to browse through each menu - Sharp DX-B352P | DX-B352P User Manual - Page 14
2. Paper and Print Media 2.1. Paper Specification Media type Media size Standard Input Plain, thin paper Auto*, A4, A5 Short Edge, A5 Long Edge, A6, JIS B5, IS0 B5, B6, Letter, Legal, Executive, Folio, Oficio, Statement, 16K, Big 16K, 32K, Big 32K Tray DXB352P Multipurpose Feeder Media weight - Sharp DX-B352P | DX-B352P User Manual - Page 15
service life of the printer. • The print media that does not meet the guidelines listed in this User Guide of the print media may affect the sharpness of the print outcome. 3. Some dry environment. Special Paper Description This printer supports using special paper for printing. Special paper - Sharp DX-B352P | DX-B352P User Manual - Page 16
for use in this printer. 2.2. Loading Paper 2.2.1. Loading into Standard Input Tray 1. Completely draw out the standard input tray. 2. Slide the paper-length guide and paper-width guide of the standard input tray to the desired paper size slot, to match with the length and width of the paper. Note - Sharp DX-B352P | DX-B352P User Manual - Page 17
3. Unfold the stacked paper before loading to avoid paper jam or paper feed error, and then load the paper into the tray with the print-side down; the standard input tray can be loaded with 250 pages (21 lb. bond) at maximum. Note: • The printer tray is designed with the "paper type dial" for - Sharp DX-B352P | DX-B352P User Manual - Page 18
paper from slipping and falling, or immediately remove the printed document after the printing is completed. 2. Open the Multipurpose Input Tray. 3. Slide the paper guides of the multipurpose input tray to match both sides of the paper. Do not exert too much force, otherwise it will cause paper jam - Sharp DX-B352P | DX-B352P User Manual - Page 19
printer. Note: • For installation of the optional tray, please refer to Chapter 7. 1. Completely draw out the optional input tray. 2. Slide the paper-length guide and paper-width guide of the tray to the desired paper size slot, to match with the length and width of the paper. Note: • Do not overly - Sharp DX-B352P | DX-B352P User Manual - Page 20
side, please make the side to be printed (the blank side) down. • For installation of the optional tray, please refer to the Installation Guide attached with the optional tray. 2.3. Non-printing Area The shaded section indicates the non-printing area. Usage Print Paper Size A4 Letter Top and - Sharp DX-B352P | DX-B352P User Manual - Page 21
automatic running of the installation CD. • Installation: Provides users with the installation wizard for the print driver. • Uninstallation: Provides users with the uninstallation wizard for the print driver. Note: • For users of Windows XP and Windows Server 2003, when connecting the equipment for - Sharp DX-B352P | DX-B352P User Manual - Page 22
can select the model based on the printer to be installed. • Installation Mode: The "USB printer" is checked by default. • User Guide: Click to view the User Guide documents. • License Agreement: "I agree to the License Agreement" is checked by default. Click License Agreement to open the terms and - Sharp DX-B352P | DX-B352P User Manual - Page 23
to the original interface. 3) Installation Process Interface Select Install to enter the Driver Installation Process interface. 4) Installation Complete The program will automatically the display message below after the driver installation is completed. The window will exit in 3 seconds and printer - Sharp DX-B352P | DX-B352P User Manual - Page 24
will appear. Users can select the corresponding series name, language and installation method according to the printer model to be installed. Installation Instruction: USB Printer: applicable to the local installation of all models. Printers connected to the network: applicable to NET Model Network - Sharp DX-B352P | DX-B352P User Manual - Page 25
Printers connected to a new network: only applicable to the configuration of Wireless LAN for models with Wireless LAN function. 1. Wired NET Model Installation 1) When installing the Wired NET Model, the following interface will display: Users should select their preferred wired NET Model through " - Sharp DX-B352P | DX-B352P User Manual - Page 26
3) Printer List After searching for printers, the "Select Printer" will automatically pop up. Users can select the found printer or add printer by manually adding IP or Host Name. Note: • If the printer name does not appear under Detected Printer, please click Refresh and search for printers on the - Sharp DX-B352P | DX-B352P User Manual - Page 27
2. Wireless LAN Model Installation 1) If users install the Wireless LAN Model, the following interface will display: Users select the Wireless LAN Model through "Select Printer", and the installation options will be available through Installation mode. Generally, users select the third installation - Sharp DX-B352P | DX-B352P User Manual - Page 28
the installation is complete. It will automatically exit in 3 seconds and set the printer as default. 3.1.3. Driver Uninstallation 1) Select Uninstallation Mode. Click Start > All Programs to find the SHARP folder, and then click the name of the product to be uninstalled. Or click Start > Control - Sharp DX-B352P | DX-B352P User Manual - Page 29
appear. If any task remains in the print queue, a warning will pop up, saying "The XXX Laser Printer is in use. Please uninstall the driver after the printing is completed." See the figure below: 4) Complete Interface. After the progress bar is finished loading, the complete window will appear. Once - Sharp DX-B352P | DX-B352P User Manual - Page 30
introduction, license, destination volume, installation type, installation, and summary. Installation Steps: 1. Introduction Insert the CD-ROM into the CD-ROM driver, run the CD-ROM and click the Mac system installation package, then the following interface will display: 2. License Click Continue on - Sharp DX-B352P | DX-B352P User Manual - Page 31
3. Click Continue, it will pop up the "To continue installing the software, you must agree to the terms of the software license agreement." dialog box. Click Agree to accept the License Agreement and continue the installation. 4. Installation Type Display the installation-related information, as - Sharp DX-B352P | DX-B352P User Manual - Page 32
5. Installation The installation progress is shown below: 6. Summary Installation completes, as shown below: 24 - Sharp DX-B352P | DX-B352P User Manual - Page 33
wired and wireless network at the same time. 4.2.1. Wireless LAN Protected Setup If the wireless router to which the printer is going to be connected supports the Wireless LAN Protected Setup feature, it will be not necessary for users to use the computer, instead, they can just use the "Wireless - Sharp DX-B352P | DX-B352P User Manual - Page 34
) must support Wireless LAN with the computer, then launch the SHARP wireless network configuration tool on your LAN configuration tool from the driver installation package. The specific have a wireless card, the option of "Enter SSID Manually" will be automatically ticked on the "Wireless Network - Sharp DX-B352P | DX-B352P User Manual - Page 35
after clicking it. As shown below (click "OK" to exit, otherwise stay at the original interface). 3) Enter SSID Manually Click "Enter SSID Manually" to switch to the interface of manually entering the SSID. Enter the SSID for the printer to be connected in the "SSID" bar. Click Print Wireless - Sharp DX-B352P | DX-B352P User Manual - Page 36
Note: • If the printer with current configuration has ongoing printing work, the following error prompting window will pop up. 4) Information Input Configuration When entering the information Input interface, users can set relative information of the wireless network. Note: • Safe Mode is currently - Sharp DX-B352P | DX-B352P User Manual - Page 37
If the printer with current configuration has ongoing printing work, the following error prompting window will pop up. 5) Configuration Complete After completing the above steps, the Wireless Network Configuration Result interface pop up. The configuration result will be displayed. If the - Sharp DX-B352P | DX-B352P User Manual - Page 38
search for the printers connected to the PC currently. If searching for the printer models supported by this PC is failed, it will remain at the current interface; if it finds any supported models, a message of "trying to establish a wireless connection with the printer" will pop up. 30 - Sharp DX-B352P | DX-B352P User Manual - Page 39
following message will appear if the printer can apply the configuration by using the wireless network provided, but the PC does not support the wireless network: "The printer can successfully connect to a wireless network with the wireless credentials provided. However, this computer is unable to - Sharp DX-B352P | DX-B352P User Manual - Page 40
are supported: Mac OS 10.6, 10.7, 10.8, 10.9, 10.10 and 10.11. 1) Detect Wireless Network Card Wireless LAN configuration tool can search the wireless network automatically by using a wireless card in the computer. If the computer does not have a wireless card, the option of "Enter SSID Manually - Sharp DX-B352P | DX-B352P User Manual - Page 41
in the list and then doubleclick or click Next to enter the Information Input interface. • Enter SSID Manually: click to switch to the Enter SSID Manually interface, i.e., Step 3. • Refresh: Searching for wireless network information again. • Next: Enter the Information Input interface. • Cancel - Sharp DX-B352P | DX-B352P User Manual - Page 42
SSID: enter the service set identifier of the network for the printer to be connected, with the maximum length of 32 characters. Print Wireless Network Information Page: allow you - Sharp DX-B352P | DX-B352P User Manual - Page 43
Note: • Safe Mode is currently available in three types: None, WEP, and WPA/WPA2. When it is None, the password entry field will be hidden, which means no password is needed while connecting the SSID provided. The range for WEP entry is 1-26 characters, and that of WPA/WPA2 is 8-64 characters. • - Sharp DX-B352P | DX-B352P User Manual - Page 44
automatically search for the printers connected to the PC currently. If searching for the printer models supported by this PC fails, it will remain at the current interface; if it finds any supported models, a message of "trying to establish a wireless connection with the printer" will pop up. 36 - Sharp DX-B352P | DX-B352P User Manual - Page 45
following message will appear if the printer can apply the configuration by using the wireless network provided, but the PC does not support the wireless network: The printer can successfully connect to a wireless network with the wireless credentials provided. However, this computer is unable to - Sharp DX-B352P | DX-B352P User Manual - Page 46
If the printer can apply the configuration with the wireless network provided, and the PC supports the wireless network, the following message will appear: The printer can successfully connect to a wireless network with the wireless credentials provided. 4.2.3. Setting up through Web - Sharp DX-B352P | DX-B352P User Manual - Page 47
3. Click "Wireless Network" to enter the Wireless Network Configuration interface. 4.2.4. Turn on/off Wireless Device If you want to disconnect the printer with the wireless network, you can turn off the wireless feature of the printer via the Menu button on the control panel. 1) Press "Menu" to - Sharp DX-B352P | DX-B352P User Manual - Page 48
the web browser's address bar to access the embedded Web server of the printer. The page is shown as the following figure. Note: • This printer supports the HTTP application protocol, and users can utilize secure encrypted access by typing: https://xxxx... in the Web explorer. 40 - Sharp DX-B352P | DX-B352P User Manual - Page 49
2. There are Network Settings and Printer Settings in the "Settings" column. For Network Settings, users can complete the settings of the Networking Protocol, wireless network, Wireless LAN hotspot, etc. For Printer Setting, can complete the settings of Printing Preferences, e-mail, and other - Sharp DX-B352P | DX-B352P User Manual - Page 50
to save the settings. 4.3.1.3. IP Address The printer's IP address can be automatically set through the DHCP function and can also be set manually. Automatic Setting The DHCP automatic setting function is enabled by default. 1. Connect the printer to the network through a network cable and complete - Sharp DX-B352P | DX-B352P User Manual - Page 51
Select Network Settings - IPv4 Settings; 3. Set IP Address Assignment Mode (Manual), IP Address and Subnet Mask. Other items are optional; 4. Click embedded Web server to change the IP Address Assignment Mode into Automatic or Manual. • To reset all the parameter settings of the printer, users can - Sharp DX-B352P | DX-B352P User Manual - Page 52
4) Press direction key "▲" or "▼" to select the "2. Wireless Conf" and press "OK"; Press direction key "▲" or "▼" to select "1. Wireless NetW" or "2.WPS PIN mode". 4.3.2.2. Network Information Users can check the network status through Network Information. 1) Press "Menu" to enter the Menu Settings - Sharp DX-B352P | DX-B352P User Manual - Page 53
4) Select the "1. Wired Info" option and press "OK"; Press direction key "▲" or "▼" to select "1. IP Address", "2. Subnet mask", or "3. Gateway". 5) Select the "2. Wireless Info" option and press "OK"; Press direction key "▲" or "▼" to select "1. Connect state", "2. IP Address", "3. Subnet mask", - Sharp DX-B352P | DX-B352P User Manual - Page 54
5. Mobile Print The connection modes of the wireless network are comprised of infrastructure connection and Wireless LAN hotspot (recommended) connection. The mode of infrastructure connection: connect wireless device via the router 1. The mobile device which connects to the access point via - Sharp DX-B352P | DX-B352P User Manual - Page 55
the carton of the printer. 5.2.1.1. The operating systems which support iOS mobile printing Applicable for iOS7.0 or higher version. any printer), please tap the pull-down menu of the printer, and select your SHARP printer. 7. Set printing parameters, e.g. print pages. 8. Tap "Print". Note: - Sharp DX-B352P | DX-B352P User Manual - Page 56
6. System Settings This Chapter mainly introduces some general settings. 6.1. Language Setting 1) Press "Menu" to enter the Menu Settings interface. 2) Press "OK" to select the "1. System Setting" option. 3) Press "OK" to select the "1. Language Set" option, as shown below: 6.2. Sleep Time Setting - Sharp DX-B352P | DX-B352P User Manual - Page 57
auto off condition is satisfied, printer is now off. • After printer is off, power consumption is 0.5W or lower. • Individual countries (or regions) do not support auto-off setting. 49 - Sharp DX-B352P | DX-B352P User Manual - Page 58
6.4. Toner Save Setting Users can select Toner Save Setting to lower the cost of printing. When the Toner Save mode is "On", the output color of the print will be lighter. The Default Setting is "Off". 1) Press "Menu" to enter the Menu Settings interface. 2) Press "OK" to select the "1. System - Sharp DX-B352P | DX-B352P User Manual - Page 59
4) Press direction key "▲" or "▼" to select the "1. Turn Off" option and press "OK". When symbol "*" appears after "1. Close", it indicates that the toner save setting is off; or press direction key "▲" or "▼" to select the "2. Open" option and press "OK". When symbol "*" appears after selecting the - Sharp DX-B352P | DX-B352P User Manual - Page 60
6.5. Restore Factory Settings "Restore Factory Settings" is used to restore the default settings of the printer. 1) Press "Menu" to enter the Menu Settings interface. 2) Press "OK" to select the "1. System Setting" option. 3) Press direction key "▲" or "▼" to select the "5. Restore Set" option and - Sharp DX-B352P | DX-B352P User Manual - Page 61
7. Print 7.1. Print Function The following print functions can be achieved through the settings of various properties in the Printing Preferences. Functions Diagram Automatic Duplex Print Collate Print Reverse Print N-in-1 Poster Print (For Windows system only) Zoom Print Custom Size Note: - Sharp DX-B352P | DX-B352P User Manual - Page 62
tray. Users can also choose not to set and adjust to the position of "*", providing no limitation on the tray and the paper type. Dial Support Sizes: *, B5, STA, LGL, LTR, A4, and A5 1) Completely draw out the standard input tray from the printer. 2) Adjust the dial to match the size - Sharp DX-B352P | DX-B352P User Manual - Page 63
7.2.2. Tray Settings through Control Panel Note: • Users can perform the paper size settings on the control panel for the standard tray, the multipurpose tray and the optional tray. Below is an example with the standard input tray. 1) Press "Menu" to enter the Menu Settings interface. 2) Press - Sharp DX-B352P | DX-B352P User Manual - Page 64
Help Document You can open the "Printing Preferences" and click the "Help" button (for Windows system only). The Help document contains the User Guide where you can find the information on print settings. 7.4. Printing Mode This printer can perform the printing operation with the standard input tray - Sharp DX-B352P | DX-B352P User Manual - Page 65
7.4.1. Printing with Standard Input Tray Ensure that preferred print media is loaded into the standard input tray before printing. Note: • For precautions on loading paper, see Chapter 2. 7.4.2. Printing with Multipurpose Input Tray When loading paper into the multipurpose input tray, the printer - Sharp DX-B352P | DX-B352P User Manual - Page 66
7.4.3. Printing with Optional Tray 7.4.3.1. Installation of Optional Tray 1. Please ensure the correct placement of the printer and the optional trays, as shown below. 2. Plug the power cord into the printer to turn on the power. Note: • Please cut off the power supply of the printer when installing - Sharp DX-B352P | DX-B352P User Manual - Page 67
4. When there is no paper in the multipurpose input tray and the standard input tray, or the paper source is set as "Optional Tray I/II" by users, the printer will get paper from the optional tray to finish the print job. Note: • The optional tray can be loaded with 550 pages of plain paper (21 lb. - Sharp DX-B352P | DX-B352P User Manual - Page 68
the power of the printer is turned off when removing the optional tray. 7.5. Automatic Duplex Print 1. The printer driver supports automatic duplex print with plain paper. Paper size supported by the automatic duplex print: A4/LETTER, LEGAL, STATEMENT, and EXECUTIVE. Note: • If the paper is thin, it - Sharp DX-B352P | DX-B352P User Manual - Page 69
is no media in the standard and multipurpose input tray; or users can set the optional tray as paper source. Note: • The optional tray only supports the automatic duplex print with plain paper, so please do not load special print media. Automatic duplex print steps are as follows (for Windows system - Sharp DX-B352P | DX-B352P User Manual - Page 70
3. Select SHARP printer with the appropriate model. 4. Click Preferences or Properties button for the configuration of printing. 5. Select Basic tab in the Duplex Printing area and select Long Edge or Short Edge as the binding method. 62 - Sharp DX-B352P | DX-B352P User Manual - Page 71
6. Click OK to complete the print settings, so as to achieve the automatic duplex print. Note: • It is recommended to raise the paper platform to prevent the printed paper from sliding out of the output tray. If you choose not to raise the paper platform of the output tray, we recommend that you - Sharp DX-B352P | DX-B352P User Manual - Page 72
8. Routine Maintenance 8.1. Cleaning the Printer Note: • Please use mild detergents. • Some parts of the printer are still hot within a short time after using. When opening the front cover or rear cover to clean the parts inside the printer, please do not touch the parts in the shaded area as shown - Sharp DX-B352P | DX-B352P User Manual - Page 73
print quality, please use the original SHARP laser toner cartridge. When using the please pay attention to the toner for any leakage problems. In the case toner leakage, if the toner area reachable by children. 2. Service Life of the Laser Toner Cartridge The service life of the toner cartridge - Sharp DX-B352P | DX-B352P User Manual - Page 74
the laser toner cartridge are shown below: 1. Turn off the printer. 2. Open the front cover and remove the empty laser toner cartridge along the guides. 3. Open the package of a new laser toner cartridge, hold the handle of the cartridge and gently shake around 5-6 times, to make the toner evenly - Sharp DX-B352P | DX-B352P User Manual - Page 75
4. Remove the protective cover and put the laser toner cartridge into the printer along the guides and close the cover tightly. Note: • Check whether there is any seal before installing the toner cartridge into the printer; if there is any, please - Sharp DX-B352P | DX-B352P User Manual - Page 76
Troubleshooting Please read this section carefully. It can help you solve common malfunctions in the printing process. If the problems appeared cannot be solved, please contact SHARP Aftersales Service printer and the computer. • The correct printer driver is selected and installed properly. • The - Sharp DX-B352P | DX-B352P User Manual - Page 77
. 3. After removing the jammed paper, reload the tray into the printer, then the printer will automatically resume printing. 9.1.2. Paper Jam in the Manual Input Tray 1. Gently draw the jammed paper out. 2. After removing the jammed paper, reload the tray, then the printer will automatically resume - Sharp DX-B352P | DX-B352P User Manual - Page 78
9.1.3. Paper Jam in the Optional Tray If the paper is jammed in the optional tray, please operate according to the following steps based on the prompts on the LCD display of the control panel to remove the jammed paper. 1. Draw out the drawer of the optional tray. 2. Gently draw the jammed paper - Sharp DX-B352P | DX-B352P User Manual - Page 79
If no paper can be seen in this area, please stop and go to the next step: 1. Open the Standard Input Tray. 2. Remove the jammed paper from the standard input tray. 3. Put the tray back into the printer after removing the jammed paper. 71 - Sharp DX-B352P | DX-B352P User Manual - Page 80
9.1.4. Internal Paper Jam Note: • Do not touch the shaded area as follows to avoid burns when removing the internal jammed paper and the jammed paper in the fuser unit. 1. Open the front cover. 2. Keep level when drawing out the toner cartridge. (To avoid the exposure of the cartridge affecting the - Sharp DX-B352P | DX-B352P User Manual - Page 81
9.1.5. Paper Jam in the Fuser Unit 1. Open the rear cover. 2. Open the fuser release unit by the handles on both sides. 3. Gently remove the jammed paper. 4. Remove the jammed paper and close the fuser decompression unit and the rear cover, then the printer will automatically resume printing. 73 - Sharp DX-B352P | DX-B352P User Manual - Page 82
9.1.6. Duplex Unit Jam 1. Remove the duplex printing unit from the back of the printer. 2. Remove the jammed paper from the duplex unit. 3. If the paper does not come out together with the duplex unit, open the tray and remove the jammed paper directly from the bottom. 4. After removing the jammed - Sharp DX-B352P | DX-B352P User Manual - Page 83
Trouble Solution SHARP XXX Printer Driver cannot be found in the printer and fax folders. Reinstall the printer driver driver. Check whether the Print Spooler service is enabled. Check the power supply and the connection of the printer. The driver normal online status. Problems in Handling Paper - Sharp DX-B352P | DX-B352P User Manual - Page 84
Trouble Paper Jam Print with Multi-page Fed Paper Cause -There is too much paper in the tray. -The print media suggested that you use the recommended print media. -Separate the print media or use better and dry print media. Note: • If the problem remains, please contact SHARP Customer Service. 76 - Sharp DX-B352P | DX-B352P User Manual - Page 85
9.3.2. Image Defects Trouble Cause Solution The printout is whitish or light • Toner is low. • The print media does not meet usage specifications, such as the media is damp - Sharp DX-B352P | DX-B352P User Manual - Page 86
Trouble Black background (gray background) Cyclical traces appear Cause Solution • is damaged. • Clean the laser toner cartridge or replace it with a new one. • Please contact SHARP Customer Service to repair or replace the fuser component. • The print media is loaded incorrectly. • The feed - Sharp DX-B352P | DX-B352P User Manual - Page 87
laser toner cartridge might be damaged. • The internal part of the printer is damaged. • Check if the cartridge was installed correctly. Note: • The above troubles can be handled by cleaning or replacing the laser toner cartridge. If the problem remains, please contact SHARP Customer Service. 79 - Sharp DX-B352P | DX-B352P User Manual - Page 88
10. Product Specifications Note: • These values are based on the initial data. For more information about the latest specifications, please visit: www.sharpusa.com. 10.1. Overview of the Specifications Dimensions(W*D*H) Approx. 14.6" (w) x 14.6" (d) x 11.3" (h) Weight (without toner Approx. 21 - Sharp DX-B352P | DX-B352P User Manual - Page 89
10.2. Print Specifications Print Speed First print out time Max. monthly volume Recommended monthly volume 33ppm(A4)/35ppm(Letter) Less than 8.5 seconds 80,000 pages 5,000 pages Printer language PCL5e, PCL6/XL,PS3, PDF 81 - Sharp DX-B352P | DX-B352P User Manual - Page 90
-
 1
1 -
 2
2 -
 3
3 -
 4
4 -
 5
5 -
 6
6 -
 7
7 -
8
-
9
-
10
-
11
-
12
-
13
-
14
-
15
-
16
-
17
-
18
-
19
-
20
-
21
-
22
-
23
-
24
-
25
-
26
-
27
-
28
-
29
-
30
-
31
-
32
-
33
-
34
-
35
-
36
-
37
-
38
-
39
-
40
-
41
-
42
-
43
-
44
-
45
-
46
-
47
-
48
-
49
-
50
-
51
-
52
-
53
-
54
-
55
-
56
-
57
-
58
-
59
-
60
-
61
-
62
-
63
-
64
-
65
-
66
-
67
-
68
-
69
-
70
-
71
-
72
-
73
-
74
-
75
-
76
-
77
-
78
-
79
-
80
-
81
-
82
-
83
-
84
-
85
-
86
-
87
-
88
-
89
-
90
 |
 |

SHARP DX-B352P
Monochrome Laser Printer
It is recommended that you read this Guide carefully before using the printer
User Guide