Sharp DX-B352P DX-B352P User Manual - Page 33
Network Configuration For printer models that support, wired/wireless network features
 |
View all Sharp DX-B352P manuals
Add to My Manuals
Save this manual to your list of manuals |
Page 33 highlights
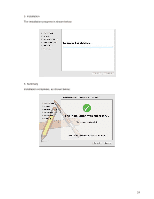
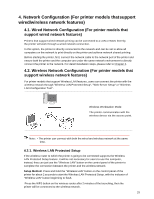
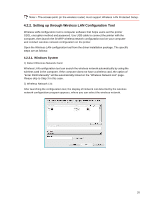
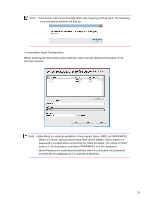
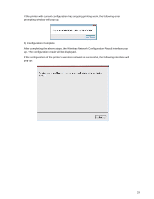
4. Network Configuration (For printer models thatsupport wired/wireless network features) 4.1. Wired Network Configuration (For printer models that support wired network features) Printers that support wired network printing can be connected to a LAN or WAN, thereby the printer will work through a wired network connection. In this option, the printer is directly connected to the network and can be set to allow all computers on the network to print directly on the printer and achieve network shared printing. Before starting the printer, first, connect the network cable to the network port of the printer and ensure both the printer and the computer are under the same network environment to directly connect the printer to the network. For detail installation steps, please refer to Chapter 3. 4.2. Wireless Network Configuration (For printer models that support wireless network features) For printer models that support Wireless LAN features, users can connect the printer with the wireless network through "Wireless LAN Protected Setup", "Web Server Setup" or "Wireless LAN Configuration Tool". Wireless Workstation Mode The printer communicates with the wireless device via the access point. Note: • The printer can connect with both the wired and wireless network at the same time. 4.2.1. Wireless LAN Protected Setup If the wireless router to which the printer is going to be connected supports the Wireless LAN Protected Setup feature, it will be not necessary for users to use the computer, instead, they can just use the "Wireless LAN" button on the control panel of the printer to complete the connection between the printer and the wireless network. Setup Method: Press and hold the "Wireless LAN" button on the control panel of the printer for about 2 seconds to start the Wireless LAN Protected Setup, with the indicator of "Wireless LAN" button beginning to flash. Press the WPS button on the wireless router after 2 minutes of the launching, then the printer will be connected to the wireless network. 25
-
 1
1 -
2
-
3
-
4
-
5
-
6
-
7
-
8
-
9
-
10
-
11
-
12
-
13
-
14
-
15
-
16
-
17
-
18
-
19
-
20
-
21
-
22
-
23
-
24
-
25
-
26
-
27
-
 28
28 -
 29
29 -
 30
30 -
 31
31 -
 32
32 -
 33
33 -
 34
34 -
 35
35 -
 36
36 -
 37
37 -
 38
38 -
39
-
40
-
41
-
42
-
43
-
44
-
45
-
46
-
47
-
48
-
49
-
50
-
51
-
52
-
53
-
54
-
55
-
56
-
57
-
58
-
59
-
60
-
61
-
62
-
63
-
64
-
65
-
66
-
67
-
68
-
69
-
70
-
71
-
72
-
73
-
74
-
75
-
76
-
77
-
78
-
79
-
80
-
81
-
82
-
83
-
84
-
85
-
86
-
87
-
88
-
89
-
90
 |
 |
