Sharp DX-B352P DX-B352P User Manual - Page 12
Control Panel
 |
View all Sharp DX-B352P manuals
Add to My Manuals
Save this manual to your list of manuals |
Page 12 highlights
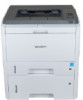
1.4. Control Panel 1. Layout and Functions of the Control Panel The layout of the printer control panel is shown below: No. Name 1 LCD Display 2 UP Functions The display provides information about the printer and can be used for setting up the Product Settings. Press this button to browse through each menu and its options. Move the position of the cursor to input menu items. 3 Menu Open the main menu of the control panel to adjust the menu setting. 4 Down Press this button to browse through each menu and its options. For menu items need to input, move the position of the cursor, e.g., IP address input. This button can enable the Wireless LAN feature and indicate 5 Wireless LAN/ Configuration the Wireless LAN connection status (only applicable to Wireless LAN model). Report For non-Wireless LAN model, this button will be used to print the "Printer Information Page" and the "Network Configuration Report". 6 OK 7 Back 8 Cancel • Press this button to save the settings. • Open the submenu on the display of the control panel. • Select the menu item. Back Arrow Button: • Exit the control panel menu. • Scroll back to the previous menu in the list in the submenu. • Return to the previous menu; if already at the top menu, return to the Ready interface. Press this button to cancel the operation or printing. This light indicates the ready, alarm and other statuses of the printer. 9 Status Indicator Green light: Normal. Orange light: Alarm or cartridge toner level is low. Red light: Error. 10 Power Indicator Green for starting up, working, and sleeping; while staying on indicates the power supply is ready. 4
-
 1
1 -
2
-
3
-
4
-
5
-
6
-
 7
7 -
 8
8 -
 9
9 -
 10
10 -
 11
11 -
 12
12 -
 13
13 -
 14
14 -
 15
15 -
 16
16 -
 17
17 -
18
-
19
-
20
-
21
-
22
-
23
-
24
-
25
-
26
-
27
-
28
-
29
-
30
-
31
-
32
-
33
-
34
-
35
-
36
-
37
-
38
-
39
-
40
-
41
-
42
-
43
-
44
-
45
-
46
-
47
-
48
-
49
-
50
-
51
-
52
-
53
-
54
-
55
-
56
-
57
-
58
-
59
-
60
-
61
-
62
-
63
-
64
-
65
-
66
-
67
-
68
-
69
-
70
-
71
-
72
-
73
-
74
-
75
-
76
-
77
-
78
-
79
-
80
-
81
-
82
-
83
-
84
-
85
-
86
-
87
-
88
-
89
-
90
 |
 |
