Sharp XG-P25X XG-P25X Operation Manual - Page 66
Connect the power - projector lamp replacement
 |
View all Sharp XG-P25X manuals
Add to My Manuals
Save this manual to your list of manuals |
Page 66 highlights
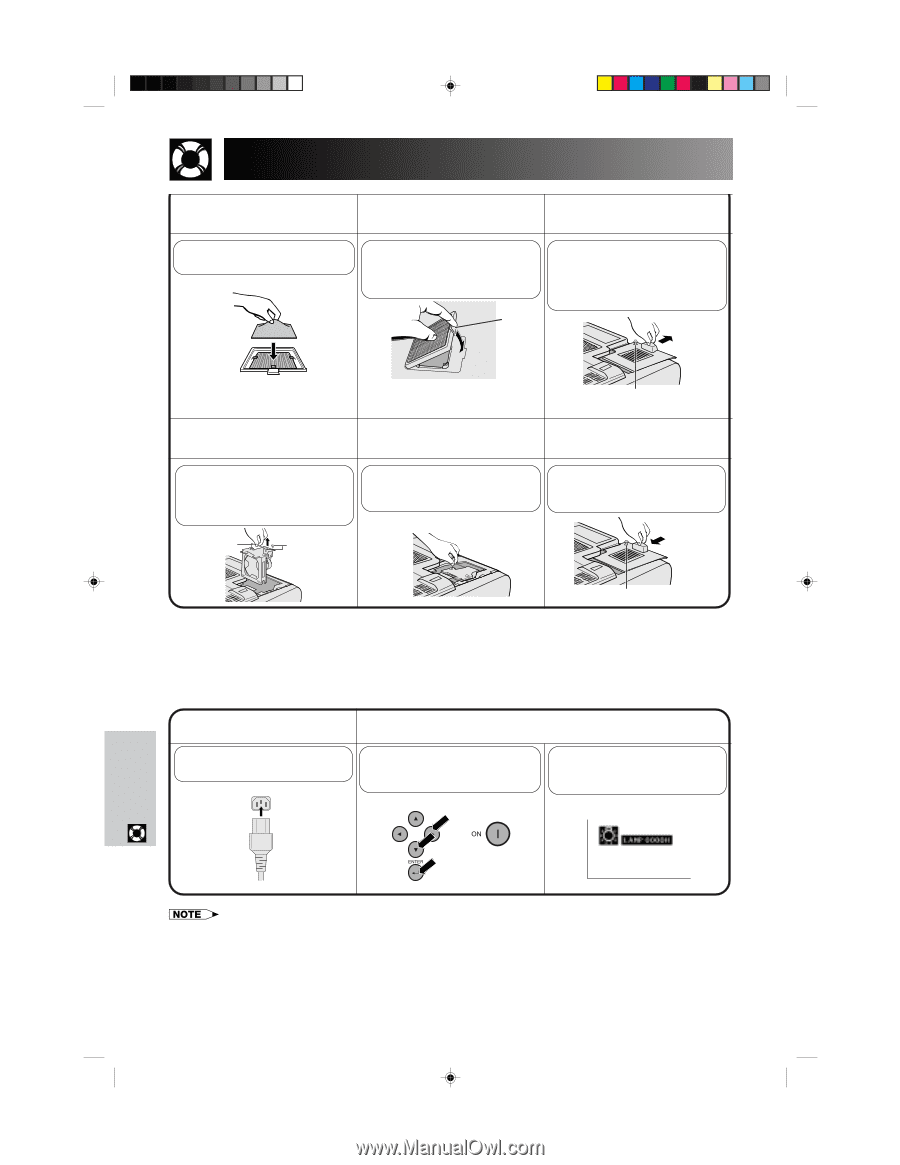
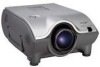
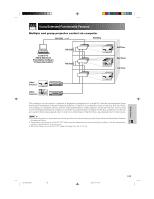
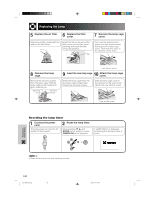
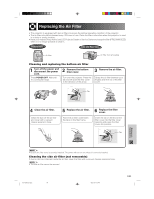
Replacing the Lamp 5 Replace the air filter. 6 Replace the filter cover. Place the air filter underneath the tabs on the filter frame. Insert the tab on the end of the filter cover into the filter cover opening and press the filter cover into position. Tab 7 Remove the lamp cage cover. Turn over the projector and loosen the user service screw that secures the lamp cage cover. Then slide the cover in the direction of the arrow. 8 Remove the lamp cage. Remove the securing screws from the lamp cage. Hold the lamp cage by the handle and pull it towards you. Securing screw Securing screws User service screw 9 10 Insert the new lamp cage. Attach the lamp cage cover. Press the lamp cage firmly into the lamp cage compartment. Fasten the securing screws. Slide the lamp cage cover in the direction of the arrow. Then tighten the user service screw. User service screw Resetting the lamp timer 1 Connect the power cord. Plug the power cord into the AC socket of the projector. 2 Reset the lamp timer. While pressing ƒ, © and ENTER on the projector, press POWER ON on the projector. "LAMP 0000H" is displayed, indicating that the lamp timer is reset. Ł • Reset the lamp timer only after replacing the lamp. Maintenance & Troubleshooting E-63 XG-P25X/CD (E)-g 63 02.3.19, 7:12 PM
-
 1
1 -
2
-
3
-
4
-
5
-
6
-
7
-
8
-
9
-
10
-
11
-
12
-
13
-
14
-
15
-
16
-
17
-
18
-
19
-
20
-
21
-
22
-
23
-
24
-
25
-
26
-
27
-
28
-
29
-
30
-
31
-
32
-
33
-
34
-
35
-
36
-
37
-
38
-
39
-
40
-
41
-
42
-
43
-
44
-
45
-
46
-
47
-
48
-
49
-
50
-
51
-
52
-
53
-
54
-
55
-
56
-
57
-
58
-
59
-
60
-
 61
61 -
 62
62 -
 63
63 -
 64
64 -
 65
65 -
 66
66 -
 67
67 -
 68
68 -
 69
69 -
 70
70 -
 71
71 -
72
-
73
-
74
-
75
-
76
-
77
-
78
-
79
-
80
 |
 |