Sharp ZQ160 Operation Manual - Page 14
Anniversary
 |
View all Sharp ZQ160 manuals
Add to My Manuals
Save this manual to your list of manuals |
Page 14 highlights
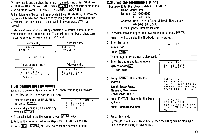
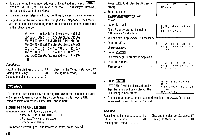
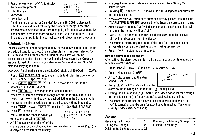
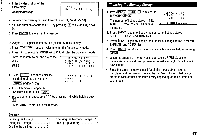
(1) Enter the desired date in Calendar mode Enter the following data. "Lunch with Tom" from 11:30 AM to 1:00 PM on June 24, 2000. 1. Press I2ndI SCHEDULE in Calendar mode to display the calendar for the current date (April 12, 2000). 2. Press NEXT I NEXT E E to move the cursor to June 24, 2000. 3. Press SCHEDULE to change to the Schedule mode. SAT JUN 24,2000 TIME Time entry prompt for June 24, 2000 is displayed. 4. Enter the starting and ending time. 1130 AM 01 PM (For the 24-hour clock, press 1130 E 13 LI .) "DESCRIPTION ?" is displayed. • ":00" will be entered automatically. • You can enter schedule details without the ending time. Press ENTER (or I]) after entering the starting time to display the "DESCRIPTION ?" prompt. • You can also enter schedule details without a specified time, except details starting with a number. Skip entering time and start to enter letters for the details as described in step 5. • The hour and minute should each consist of 2 digits. • The time can be set using either the 12-hour or 24-hour format. When you move the cursor to the next entry field, the time is displayed in the format selected in the Time System of the MENU functions. • If an attempt is made to store an invalid time, you cannot move the cursor to the next entry field. Enter the correct time and follow the next procedure. 12 5. Enter the schedule detail. Lunch with Tom • To switch between upper- and lowercase letters, press CAPS 6. Press ENTER to store the listing. 7. Now, press SCHEDULE to check if the listing is stored in the memory. SAT JUN.24 , 2000 1 1 : 30AM- 1 :00PM Lunch wi th Tom_ a 00 1 2 3 6 4 5 6 7 8 9 10 11 12 13 14 15 16 17 18 19 20 21 22 23 W 25 26 27 28 29 30 • Notice the tag ( • ) on the right of "24". It indicates a scheduled item fo that date: 24._Anniversary Schedule items beginning in the morning or ▪ schedule items without a specified time items ▪` Schedule items beginning in the afternoon (2) Enter the desired date with NEXT (or PREV ) This is a convenient way of entering a nearby date. Press NEXT (or PREV ) and change the display day by day until the desired date appears. Enter a schedule listing on April 17, 2000. 1. Press SCHEDULE once or twice to display the Schedule mode screen. 2. Press 2nd SCHEDULE to display the time entry prompt for the current date (April 12, 2000). 3. Press NEXT repeatedly until the time entry prompt for April 17, 2000 appears. Enter the time and detail following the procedure for "(1) Enter the desired date in Calendar mode" (from step 4) on this page. (3) Enter the desired date directly When the date is not close to the currently displayed date, the following method is more convenient than the previous 2 ways. Enter a schedule listing on June 26, 2001.
-
 1
1 -
2
-
3
-
4
-
5
-
6
-
7
-
8
-
 9
9 -
 10
10 -
 11
11 -
 12
12 -
 13
13 -
 14
14 -
 15
15 -
 16
16 -
 17
17 -
 18
18 -
 19
19 -
20
-
21
-
22
-
23
-
24
-
25
-
26
-
27
-
28
-
29
-
30
-
31
-
32
-
33
 |
 |
