Sharp ZQ160 Operation Manual - Page 7
Home/World
 |
View all Sharp ZQ160 manuals
Add to My Manuals
Save this manual to your list of manuals |
Page 7 highlights
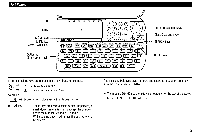
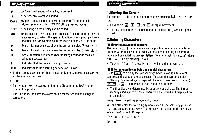
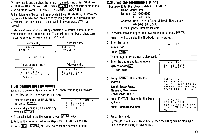
3.Making Corrections Move the cursor to the number or letter to be corrected. Enter the correct number or letter to replace the previous one. (1) Inserting characters Move the cursor and press I1 to change the cursor from " I " to " 1 " You can now insert new characters at the cursor position. Press INS again to change the cursor from " I " to " I". (2) Deleting characters Press DEL to delete the character at the cursor position. Press E to delete the character to the left of the cursor. • DEL and ri will not operate in some cases such as when you input the time in Schedule mode or you are in Calculator mode. In these cases, press C9CE and reenter. • Press C•CE to clear all characters on the current display. Note on the Description of the MENU Key Operations This Organizer offers a variety of functions which you choose from the 4 kinds of menus (see the following table). To switch or scroll the menu screens displayed by pressing MENU , press D NEXT (or El) to move to the next screen, or PREV (or to move to the previous screen. In this manual, the procedures with which you choose each menu are described with NEXT and PREV . Take care to press these two patterns of key combinations properly. In addition, the shortcut keys are assigned to some of the MENU key operations (see the table on page 28), so that you have 3 choices of key combinations according to the menu kinds. Menu Editing the Listings Displaying the Index of the Listing Deleting the Listings Designating the File Names Checking the Memory Storage Adjusting the LCD Contrast Using the Secret Function Designating the Listings as Secret Setting the Schedule Alarm Summarizing the Expense Report Freeing Up Memory Transferring the Data Setting the Home/World Clock Selecting the Time System Selecting the Date Format Setting Up the Backlight Turning the Key Sound On and Off Turning the Alarm Sound On and Off See page... 20 19 21 9 17 2 24 25 13 15 18 26 6 8 8 2 2 13 5
-
 1
1 -
 2
2 -
 3
3 -
 4
4 -
 5
5 -
 6
6 -
 7
7 -
 8
8 -
 9
9 -
 10
10 -
 11
11 -
 12
12 -
13
-
14
-
15
-
16
-
17
-
18
-
19
-
20
-
21
-
22
-
23
-
24
-
25
-
26
-
27
-
28
-
29
-
30
-
31
-
32
-
33
 |
 |
