Sony DCR-TRV480E User Manual - Page 79
Using The Menu, Lcd Bright, Lcd Bl Level, Lcd Color, Lcd Set, Dv Out
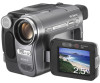 |
View all Sony DCR-TRV480E manuals
Add to My Manuals
Save this manual to your list of manuals |
Page 79 highlights
Using the Menu LCD SET b Notes • You cannot adjust sound recorded in 16 bit audio mode. • Only the originally recorded sound will be heard when you disconnect the power source from your camcorder for more than 5 minutes. • You cannot adjust the balance for tapes recorded on other devices in the Hi8 /standard 8 mm system. The recorded picture will not be affected by this setting. LCD BRIGHT See page 18 for details. LCD BL LEVEL You can adjust the brightness of the LCD screen's backlight. GNORMAL BRIGHT Standard brightness. Select to brighten the LCD screen. b Notes • When you connect your camcorder to outside power sources, [BRIGHT] is automatically selected for the setting. • When you select [BRIGHT], battery life is reduced by about 10 percent during recording. LCD COLOR Touch / to adjust the color on the LCD screen. Low intensity High intensity A/V c DV OUT You can connect a digital device and an analog device to your camcorder and convert the signal transmitted from the connected devices to the appropriate signal on your camcorder. GOFF ON ( Select when not using the Digital convert function. ) To output analog images and sound in digital format using your camcorder. The analog signal input to the A/V jack of your camcorder will be converted and output from the DV Interface of your camcorder. For details, refer to "Connecting an analog VCR to the computer via your camcorder" (p. 114). ,continued Using the Menu 79
-
 1
1 -
2
-
3
-
4
-
5
-
6
-
7
-
8
-
9
-
10
-
11
-
12
-
13
-
14
-
15
-
16
-
17
-
18
-
19
-
20
-
21
-
22
-
23
-
24
-
25
-
26
-
27
-
28
-
29
-
30
-
31
-
32
-
33
-
34
-
35
-
36
-
37
-
38
-
39
-
40
-
41
-
42
-
43
-
44
-
45
-
46
-
47
-
48
-
49
-
50
-
51
-
52
-
53
-
54
-
55
-
56
-
57
-
58
-
59
-
60
-
61
-
62
-
63
-
64
-
65
-
66
-
67
-
68
-
69
-
70
-
71
-
72
-
73
-
 74
74 -
 75
75 -
 76
76 -
 77
77 -
 78
78 -
 79
79 -
 80
80 -
 81
81 -
 82
82 -
 83
83 -
 84
84 -
85
-
86
-
87
-
88
-
89
-
90
-
91
-
92
-
93
-
94
-
95
-
96
-
97
-
98
-
99
-
100
-
101
-
102
-
103
-
104
-
105
-
106
-
107
-
108
-
109
-
110
-
111
-
112
-
113
-
114
-
115
-
116
-
117
-
118
-
119
-
120
-
121
-
122
-
123
-
124
-
125
-
126
-
127
-
128
-
129
-
130
-
131
-
132
-
133
-
134
-
135
-
136
-
137
-
138
-
139
-
140
-
141
-
142
-
143
-
144
-
145
-
146
-
147
-
148
-
149
-
150
-
151
-
152
-
153
-
154
-
155
-
156
 |
 |
