TP-Link TL-R460 User Guide - Page 75
TL-R460, Step 2, Forwarding, Virtual, Servers
 |
UPC - 845973040031
View all TP-Link TL-R460 manuals
Add to My Manuals
Save this manual to your list of manuals |
Page 75 highlights
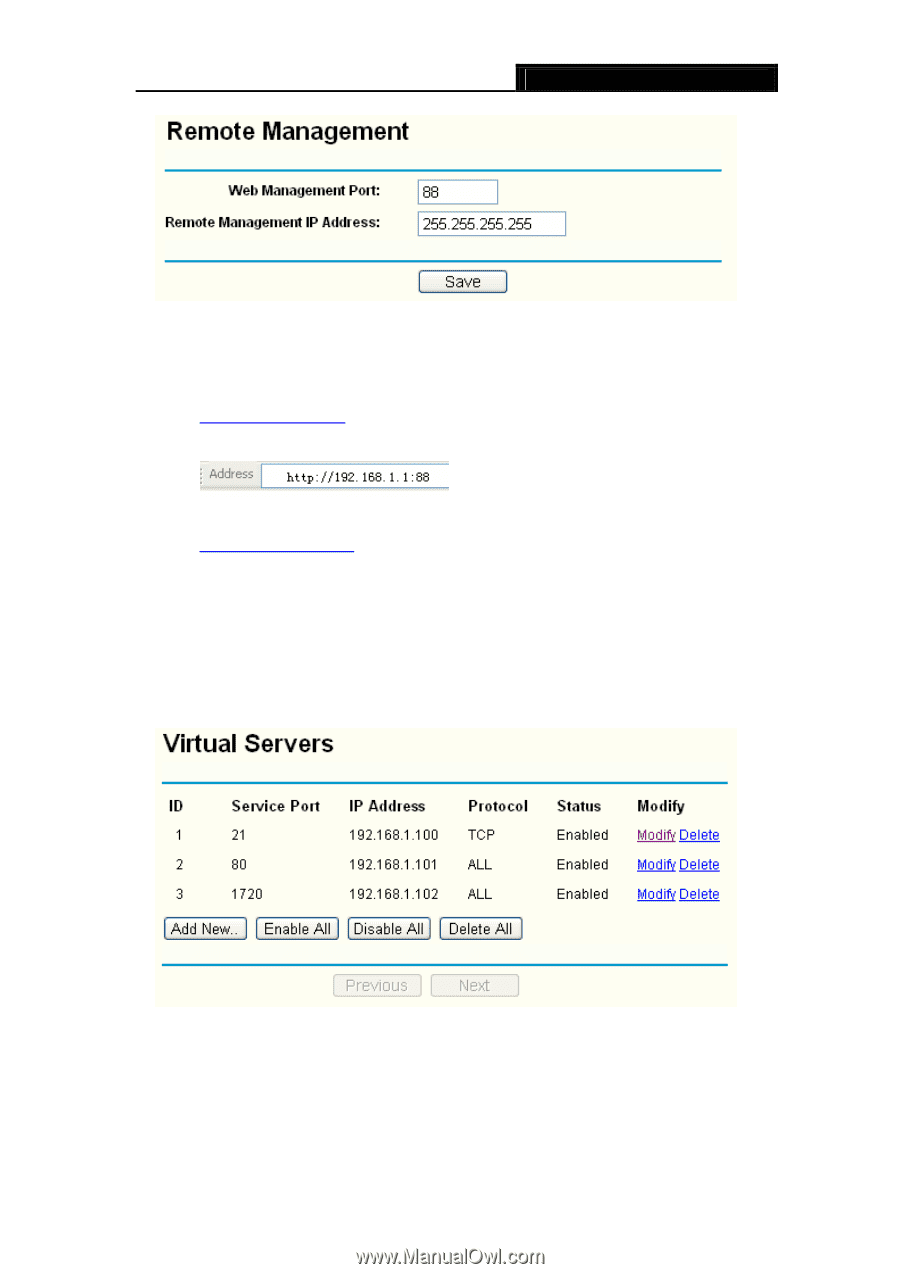
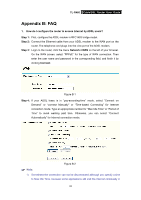
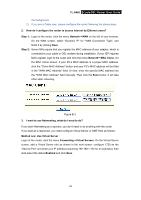
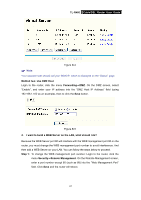
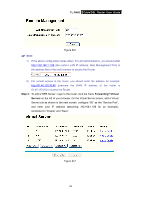
TL-R460 Cable/DSL Router User Guide Figure B-6 ) Note: 1) If the above configuration takes effect, for LAN administrators, you should enter http://192.168.1.1:88 (the router's LAN IP address: Web Management Port) in the address field of the web browser to access the Router. 2) For remote access to the router, you should enter the address for example: http://61.45.120.20:88 (presume the WAN IP address of the router is 61.45.120.20) to access the Router. Step 2: To add a WEB Server: Login to the router, click the menu Forwarding→Virtual Servers on the left of your browser, On the Virtual Server screen, add a Virtual Server rule as shown in the next screen: configure "80" as the "Service Port", and enter your IP address (assuming 192.168.1.188 for an example), remember to "Enable" and "Save". Figure B-7 68
-
 1
1 -
2
-
3
-
4
-
5
-
6
-
7
-
8
-
9
-
10
-
11
-
12
-
13
-
14
-
15
-
16
-
17
-
18
-
19
-
20
-
21
-
22
-
23
-
24
-
25
-
26
-
27
-
28
-
29
-
30
-
31
-
32
-
33
-
34
-
35
-
36
-
37
-
38
-
39
-
40
-
41
-
42
-
43
-
44
-
45
-
46
-
47
-
48
-
49
-
50
-
51
-
52
-
53
-
54
-
55
-
56
-
57
-
58
-
59
-
60
-
61
-
62
-
63
-
64
-
65
-
66
-
67
-
68
-
69
-
 70
70 -
 71
71 -
 72
72 -
 73
73 -
 74
74 -
 75
75 -
 76
76
 |
 |