Toshiba 42HL196 Operation Guide
Toshiba 42HL196 - 42" LCD TV Manual
 |
UPC - 022265240755
View all Toshiba 42HL196 manuals
Add to My Manuals
Save this manual to your list of manuals |
Toshiba 42HL196 manual content summary:
- Toshiba 42HL196 | Operation Guide - Page 1
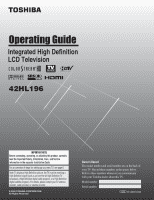
LCD Television HIGH-DEFINITION TELEVISION 42HL196 IMPORTANT NOTE Before connecting, operating, or adjusting this product, carefully read the Important Safety, Installation, Care, and Service information in the separate Installation Guide. For an overview of steps for setting up your new TV - Toshiba 42HL196 | Operation Guide - Page 2
to operate this equipment. Important notes about your LCD TV The following symptoms are technical limitations of LCD Display technology and are not an indication of malfunction; therefore, Toshiba is not responsible for perceived issues resulting from these symptoms. 1) An afterimage (ghost) may - Toshiba 42HL196 | Operation Guide - Page 3
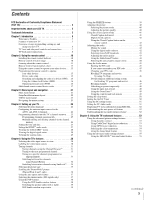
LCD TV 2 Trademark Information 2 Chapter 1: Introduction 5 Welcome to Toshiba 5 Features of your new TV 5 Overview of steps for installing, setting up, and using your new TV 6 TV front and side panel controls and connections 7 TV back panel connections 8 Chapter 2: Using the remote control - Toshiba 42HL196 | Operation Guide - Page 4
e-mail 72 Sample request e-mails 73 Receiving an e-mail from the TV 74 Modifying an existing recording or reminder 74 Chapter 8: Troubleshooting 75 General troubleshooting 75 Home network troubleshooting 77 LED indications 79 Chapter 9: Appendix 80 Specifications 80 Limited United States - Toshiba 42HL196 | Operation Guide - Page 5
digital converter set-top box (in most cases). • TV Guide On Screen™ no-fee interactive program guide (- TV Guide On Screen™ Interactive Program Guide). • Digital CableCARD™ slot for viewing encrypted digital Cable TV programs (- Installation Guide). • Two HDMI™ digital, high-definition multimedia - Toshiba 42HL196 | Operation Guide - Page 6
. 11 AFTER connecting all cables and devices, plug in the power cords for your TV and other devices. The red LED will blink until the TV goes into standby mode. When the TV is in standby mode, press POWER on the TV control panel or remote control to turn on the TV. If the TV stops responding to the - Toshiba 42HL196 | Operation Guide - Page 7
). 2 Blue and Red LEDs See "LED indications" on page 79 for additional information. 3 POWER - Press to turn the TV on and off. If the TV stops responding to the controls on the remote control or TV control panel and you cannot turn off the TV, press and hold the POWER button on the TV control panel - Toshiba 42HL196 | Operation Guide - Page 8
cable types and connections, see the Installation Guide. 2 3 TV back 1 4 Power cord Cable Clamper 1 VIDEO 1 IN - Composite video and analog audio inputs plus optional as a Toshiba DVD player with ColorStream®. Note: Component video cables carry only video information; separate audio cables are - Toshiba 42HL196 | Operation Guide - Page 9
the enclosed IR blaster/ G-LINK™ cable to enable the TV Guide On Screen™ recording features (- Installation Guide). 9 Digital Audio OUT - Installation Guide and Chapter 7 for details. 11 CableCARD™ slot - For use with a digital security card and digital cable TV service (provided by your local cable - Toshiba 42HL196 | Operation Guide - Page 10
back of the remote control. Remote control effective range For optimum performance, aim the remote control directly at the TV remote sensor. Make sure there are no obstructions between the remote control and the TV. Point remote control toward remote sensor on front of TV. 2 Install two "AA" size - Toshiba 42HL196 | Operation Guide - Page 11
2 POWER turns the TV on and off. When the TV is on, the blue LED indicator on the TV front will be illuminated. 3 MODE SELECT sets the four remote control device modes: TV, CABLE/SAT, DVD, and VCR/PVR. Press TV until the keypad blinks 3 times to control the TV. The selected MODE key blinks each time - Toshiba 42HL196 | Operation Guide - Page 12
2: Using the remote control 16 EXIT closes on-screen menus and the TV Guide On Screen™ system. 17 INFO provides detailed information on highlighted items in the TV Guide On Screen™ system (- TV Guide On Screen™ Interactive Program Guide). 18 MUTE reduces or turns off the sound (- page 42). 19 CH - Toshiba 42HL196 | Operation Guide - Page 13
Chapter 2: Using the remote control Remote Control functional key chart REMOTE CONTROL KEY Toshiba TV (TV) CABLE SAT (satellite) MODE SELECT SLEEP POWER 1 2 3 4 5 6 7 8 9 0 100/-/+10 INPUT PIC SIZE MENU FAV BROWSER/ SET UP THINC/ TOP MENU TV GUIDE INFO ENTER B b C3 #c EXIT/ DVD CLEAR PAGE +/- - Toshiba 42HL196 | Operation Guide - Page 14
Chapter 2: Using the remote control REMOTE CONTROL KEY Toshiba TV (TV) CABLE CH RTN/ DVD RTN RECALL MUTE SLOW SKIP z SKIP Z REW PAUSE/STEP PLAY FF C.CAPTION TV/VCR DISC/AM/FM STOP REC CH B b POP FREEZE Previous channel On-screen display Sound mute Slow FWD* Slow REW* DAY+ DAY- Rewind* Pause* - Toshiba 42HL196 | Operation Guide - Page 15
other devices Your TV remote control has one dedicated TV mode and three programmable multi-brand modes: CABLE/SAT, DVD, and VCR/PVR. The default device modes and programmable device modes are listed below. Note: The TV remote control is preprogrammed to operate most Toshiba devices. To operate - Toshiba 42HL196 | Operation Guide - Page 16
2 Press Z. The CABLE/SAT mode select button will blink four times (unlocked). Operational feature reset (8900) This feature clears all programmed remote control features not related to "Device code setup" and resets the volume lock to the "TV" device mode. To reset the remote control: While holding - Toshiba 42HL196 | Operation Guide - Page 17
Multi-brand remote control device codes TVs Brand Toshiba Code 1524 Cable boxes Brand ABC Americast Bell South Clearmaster Media Works AMW Apex Digital Aspire Digital Audiovox Axion B & K Blaupunkt Blue Parade Broksonic California Audio Labs Cinea CineVision Citizen Coby Craig Curtis Mathes - Toshiba 42HL196 | Operation Guide - Page 18
Chapter 2: Using the remote control JBL JSI JVC jWin Kawasaki Kenwood KLH Konka Koss Landel Lasonic Lecson Lenoxx LG LiteOn Loewe Magnavox Malata Marantz McIntosh Memorex Microsoft Mintek Mitsubishi Momitsu NAD NEC Nesa Next Base NexxTech Norcent Onkyo Oritron Panasonic Philips PianoDisc Pioneer - Toshiba 42HL196 | Operation Guide - Page 19
Shogun Chapter 2: Using the remote control 0043, 0061, 0067, 0075 Blue Sony Stack 9 Systemax Tagar Systems Tivo Toshiba Touch Viewsonic Voodoo ZT Group 1972 1972 1972 1972 0616 0618, 0739 0880 0614, 0616 0614, 0616 0636, 1972 1972 1972 1972 0618, 0636, 0739 1008, 1972 1972 1972 1972 1972 Cable - Toshiba 42HL196 | Operation Guide - Page 20
0435, 0626 0029 0083 0000 0157 0083 20 Chapter 2: Using the remote control MTC NAD NEC Nikko NSM Onkyo Optimus Panasonic Parasound Philips Pioneer Polk Sansui Sanyo Sharp Sherwood Sirius Sony Stereophonics Sunfire Teac Technics Thorens Toshiba Venturer Wards XM Yamaha 1801 0110, 0189, 0891, 1289 - Toshiba 42HL196 | Operation Guide - Page 21
the Channel Browser™] S [Opens the TV Guide On Screen™ option] S [Launches the ATSC Digital CC Selector] (This option is not available if you are not on a digital channel). S Dynamic list of items provided by Cable company. (This option is not available if a CableCARD™ is not inserted.) S [Opens the - Toshiba 42HL196 | Operation Guide - Page 22
and navigation Setup/Installation menu layout The Installation menu contains the Terrestrial, Network, TV Guide On Screen™ Setup, Time and Date, and System Status menus (as described below). To open the Installation menu (illustrated below), press Y on the remote control or TV control panel, open - Toshiba 42HL196 | Operation Guide - Page 23
Screen features. The THINC menu is not part of the main menu system. You can only view the THINC menu by pressing C on the remote control. THINC Applications Picture Viewer Audio Player Channel Browser Favorites Browser TV Guide On Screen * Toshiba Home Interactive Network Connection. Navigating the - Toshiba 42HL196 | Operation Guide - Page 24
Y and open the Setup menu. 2 Highlight Installation and press T. Setup Installation Sleep Timer On/Off Timer PC Settings PC Audio HDMI 1 Audio Slide Show input source (Cable or Antenna) for the ANT 1 input on the TV. Note: If a cable box is connected to the ANT 1 input during TV Guide On Screen™ - Toshiba 42HL196 | Operation Guide - Page 25
process again unless your Cable TV service lineup changes significantly. • If you have a CableCARD™ inserted, channel programming for the ANT 1 input is disabled because the CableCARD™ automatically loads the Cable channel list into the TV's channel memory. See the Installation Guide for details on - Toshiba 42HL196 | Operation Guide - Page 26
add digital subchannels on a physical channel: Use the Channel Numbers and the Dash (=) on the remote control to enter the channel number (for example, 56-1). If the channel is found, the number will be added to the list and the box will be checked. If the channel is not found, a message will appear - Toshiba 42HL196 | Operation Guide - Page 27
will lose the time and date settings when the power is restored. • If you manually set the time and date and then perform TV Guide On Screen™ setup, the manual time and date settings will be overridden by the TV Guide On Screen™ settings. Setup Installation Sleep Timer On/Off Timer PC Settings PC - Toshiba 42HL196 | Operation Guide - Page 28
channels. See "Connecting a digital CableCARD™" (- Installation Guide) for connection and subscription information. Note: Connecting your TV directly to the Audio/Video output of your set-top-box may provide a more vivid picture. After the CableCARD™ is inserted, a CableCARD™ option appears in the - Toshiba 42HL196 | Operation Guide - Page 29
Installation Sleep Timer On/Off Timer Brand: Toshiba Model: 42HL196 System TV will turn off automatically after a few seconds. After the TV turns off, unplug the TV power cord and then plug it in again to complete the reset process. System Information Press YES to confirm. After the TV turns - Toshiba 42HL196 | Operation Guide - Page 30
remote control or TV control panel. 2 Press 0-8 to select the input source you want to view: a) You can select the video input, which will depend on the input terminals you used to connect your devices (see Installation Guide 2 DVD Cable Video Recorder Hide DTV Satellite/DSS --- Reset Done 4 - Toshiba 42HL196 | Operation Guide - Page 31
VIDEO 1, Cable TV to VIDEO 2, a video recorder to ColorStream Highlight Reset and lists. If you add a new picture when the total =32, the oldest thumbnail will be deleted. One thumbnail is counted only once against the total no matter how many times it appears in various lists. • Turning off the TV - Toshiba 42HL196 | Operation Guide - Page 32
Reset and press T. Note: Cable Box List and Satellite Box List will be grayed out and set to Off by default. They will remain this way until a Cable Box and/or Satellite Box is configured from the TV Guide setup. To open the Channel Browser™ banner: • Press 3 C, # c, or n on the remote control - Toshiba 42HL196 | Operation Guide - Page 33
is tuned. • If History List in the Channel Browser Setup is set to "Power Off Clear (On)," turning off the TV will clear the channel History. Tuning to the next programmed channel To tune to the next programmed channel: Press < or , on the remote control or TV control panel. Note: This feature - Toshiba 42HL196 | Operation Guide - Page 34
channel using the Channel Number buttons (and the dash (=) button if selecting a digital channel). 3 Press R on the remote control. The previous channel will be tuned. Each time you press R, the TV will switch back and forth between the last two channels that were tuned. Note: If you press R from - Toshiba 42HL196 | Operation Guide - Page 35
can be saved for each input on your TV. To select the picture size: 1 Press I on the remote control. 2 While the Picture Size screen is open Theater Settings Picture Size Picture Scroll Cinema Mode Auto Aspect Ratio Reset Natural -- Film On Done Using these functions to change the picture - Toshiba 42HL196 | Operation Guide - Page 36
Chapter 5: Using the TV's features Full picture size (for 16:9 [480i, 480p] source programs only) • If Size Picture Scroll Cinema Mode Auto Aspect Ratio TheaterWide 2 -5 Film On Reset Done 6 To save the new settings, highlight Done and press T. To revert to the factory defaults, highlight - Toshiba 42HL196 | Operation Guide - Page 37
feature is not applicable to antenna or cable input sources. To turn on the auto aspect ratio feature: to the factory defaults, highlight Reset and press T. To turn off the auto aspect ratio -2 (component video), or HDMI inputs on the TV, smoother motion can be obtained by setting the Cinema - Toshiba 42HL196 | Operation Guide - Page 38
source displays in red. Left window time, the active window will remain as a normal picture on the screen. Notes about recording: • If the POP window is open and you attempt to start recording, the POP window will close before recording starts. • If you use the TV's remote control to start recording - Toshiba 42HL196 | Operation Guide - Page 39
(left or right) While the POP window is open, press C or c to switch the audio (left or right) that is output from the TV speakers. The window with the active sound is outlined with a green border. Example: Press Example: Press Using the FREEZE feature To use the FREEZE feature: 1 When viewing the - Toshiba 42HL196 | Operation Guide - Page 40
Chapter 5: Using the TV's features Adjusting the picture Selecting the picture mode You Mode field, select the picture mode you prefer. Picture Settings Mode Contrast Back Light Brightness Color Tint Sharpness Reset Mode: Sports Sports 100 100 50 50 0 50 Done Picture Settings Mode: Standard - Toshiba 42HL196 | Operation Guide - Page 41
options: • Captions-An on-screen display of the dialogue, narration, and sound effects of TV programs and videos that are closed captioned (usually marked "CC" in program guides Reset Red, Green, Blue, Yellow, Magenta, Cyan Auto, Black, White, Red, Green, Blue to Off. • To turn off the Closed Caption - Toshiba 42HL196 | Operation Guide - Page 42
TV Guide On Screen Digital CC/Audio Selector CableCARD Navigate ENTER Select CH RTN Back EXIT Exit 3 Press B or b to select Closed Caption, and then press C or c to select the desired service. 4 Press O. Closed Caption Audio CC 1 None Using the Closed Caption button on the remote control - Toshiba 42HL196 | Operation Guide - Page 43
4 To save the new settings, highlight Done and press T. To reset the settings to the factory defaults, highlight Reset and press T. Note: • You can typically leave the TV in Stereo mode, because it will automatically output the type of sound being broadcast (stereo or monaural). • If the stereo - Toshiba 42HL196 | Operation Guide - Page 44
RESET function returns your audio adjustments to the following factory settings: Bass center (50) Treble center (50) Balance center (0) StableSound. . . Off To turn Optical Audio Out terminal on the TV (- "Connecting a digital audio system" in the Installation Guide). To select the optical audio - Toshiba 42HL196 | Operation Guide - Page 45
TV's features Using the Locks menu The Locks menu includes the Enable Rating Blocking, Edit Rating Limits, Channels Block, Input Lock, Front (control Front Panel Lock Off Game Timer Off New PIN Code Navigate screen is displayed, press E four times within five seconds. The PIN code will - Toshiba 42HL196 | Operation Guide - Page 46
TV, which supports the U.S. V-Chip system only. To block and unblock TV Timer downloaded one time. You will not be able to download any updates to the rating system should such updates become available. • The additional rating system is not designed, transmitted, or controlled by the TV or Toshiba - Toshiba 42HL196 | Operation Guide - Page 47
in this category are designated TV-Y7FV.) TV-Y All Children (This program of the program you are watching, press E on the remote control. If it is rated "None," the word "NONE" the rating limits (ANT1, or ANT2) and press T. A list of the channels available for that input will be displayed along - Toshiba 42HL196 | Operation Guide - Page 48
disabled until the TV is turned off, and will be enabled when the TV is turned on again. Locks you play video tapes via an ANT input. • When a CableCARD™ is inserted, Video+ will not lock channels 3 and Block Input Lock Off Front Panel Lock Off Game Timer Off New PIN Code Off Video Video + - Toshiba 42HL196 | Operation Guide - Page 49
power with time remaining on the GameTimer, when power is restored the TV will enter Input Lock mode (as if the GameTimer had expired) and you will have to deactivate the Input Lock (as described above). Using the control panel lock feature You can lock the control panel to prevent your settings - Toshiba 42HL196 | Operation Guide - Page 50
of time you set in the TV ON Duration field. Note: • When a power failure occurs, the On/Off Timer settings may be cleared. • To display the On/Off Timer setting, press E. To turn off the On/Off Timer: Select Not Set in step 3 above. On/Off Timer Turn TV ON: Day Not Set Reset Cancel Done - Toshiba 42HL196 | Operation Guide - Page 51
Reset Guide) To set the PC Audio: 1 Press Y and open the Setup menu. 2 Highlight PC Audio. 3 Press c and then press b to select No or Yes. Yes: Outputs the sound from your PC. No: Mutes the sound from your PC, and outputs the sound from the HDMI connection. Setup Installation No Sleep Timer - Toshiba 42HL196 | Operation Guide - Page 52
status • Picture size • Video resolution STEREO NC-17 Sleep Timer: 18 min. Natural 480i ANT 1 CABLE 81-1 Sample RECALL screen To close the RECALL screen: Press E again. Understanding the auto power off feature The TV will automatically turn itself off after approximately 15 minutes if it is - Toshiba 42HL196 | Operation Guide - Page 53
interference in your TV picture. This may be useful when receiving a broadcast with a weak signal (especially a Cable channel) or Advanced Picture Settings Dynamic Contrast CableClear MPEG Noise Reduction Color Temperature Game Mode Reset On Auto Low Cool Off Done ANT 1 Note: • If the current - Toshiba 42HL196 | Operation Guide - Page 54
Chapter 6: Using the TV's advanced features Using MPEG noise reduction The MPEG noise To revert to the factory defaults, highlight Reset and press T. Selecting the color temperature You can change the quality of the picture by selecting from three preset color temperatures (cool, medium, and - Toshiba 42HL196 | Operation Guide - Page 55
Temperature Game Mode Reset On Auto Low Cool On Done Video 1 To turn off Game Mode: Select Off in step 3 above, change the video input, or turn the TV off and then on again. You can change the video input in any of the following ways: • Pressing + on the remote control (- page 30). • Changing - Toshiba 42HL196 | Operation Guide - Page 56
States and/or other countries. A. Connecting the TV to your home network 1 Connect the TV to your home network via the TV's RJ-45 (Ethernet) port. See Installation Guide for connection instructions. 2 If you want to use file sharing only and do not have Internet service in your home: Go to section - Toshiba 42HL196 | Operation Guide - Page 57
mail Scheduling Setup Home File Server Setup Software Upgrade Navigate ENTER Select CH RTN Back EXIT Exit cables for your home network are securely connected. b) Make sure your home network is set up properly. See the Installation Guide for TV connection information. Also consult the owner's manuals - Toshiba 42HL196 | Operation Guide - Page 58
, go to "Manually setting up the network address." For home network troubleshooting tips, see Chapter 8. 58 C. Setting up file sharing on your PC Compatible operating systems The following operating systems are compatible for file sharing with the TV: • Microsoft® Windows® XP Service Pack 2 (Home - Toshiba 42HL196 | Operation Guide - Page 59
"Add..." and then select the user to be given sharing privileges.* *This user must match the user stored in the TV's "Home File Server Setup" menu. b) Click to check "Allow" next to "Full Control." c) Click "Apply." d) Click "OK" to close the window. 4 Go to section D, "Set up file sharing on the - Toshiba 42HL196 | Operation Guide - Page 60
up file sharing on the TV 1 Press Y and open the Setup menu. 2 Highlight Installation and press T. The Installation menu will appear. Open TV" at right. For home network troubleshooting tips, see Chapter 8. Network Basic Network Setup E-mail Scheduling Setup Home File Server Setup Software Upgrade - Toshiba 42HL196 | Operation Guide - Page 61
time /play on the TV. Note: Make download updated software to your television from a shared folder on your home network. If you experience any difficulties that can only be resolved by a software update, your TACP/TCL customer service representative will provide you with the appropriate upgrade - Toshiba 42HL196 | Operation Guide - Page 62
files with this TV. Toshiba will not compensate for any lost data or recording(s) caused by the use of such PCs or data. • The technical criteria set out in this manual are meant as a guide only. • You must obtain any required permission from copyright owners to download or use copyrighted content - Toshiba 42HL196 | Operation Guide - Page 63
obtain any required permission from copyright owners to download or use copyrighted content. Toshiba cannot and does not grant such permission. Accessing JPEG files stored on a networked PC 1 Make sure you have correctly set up your home network and file sharing (- Installation Guide and pages 56-60 - Toshiba 42HL196 | Operation Guide - Page 64
menu sidebar (2, 5, 10, 15, or 20 seconds). Setup Installation Sleep Timer On/Off Timer PC Settings PC Audio HDMI 1 Audio Slide Show Interval No Auto Picture Viewer: Press O to close the Picture Viewer and return to the regular TV screen. During the slide show: • To stop on an image during the - Toshiba 42HL196 | Operation Guide - Page 65
time. • You must obtain any required permission from copyright owners to download or use copyrighted content. Toshiba cannot and does not grant such permission. Accessing MP3 files stored on a networked PC 1 Make sure you have correctly set up your home network and file sharing (- Installation Guide - Toshiba 42HL196 | Operation Guide - Page 66
already done so, follow the instructions in sections A and B (- page 56), before proceeding. • Before you can schedule recordings, the time and date in the TV Guide On Screen feature must be set (- "Setting the time and date" on page 27). Required information and services Before you can set up the - Toshiba 42HL196 | Operation Guide - Page 67
on setting up the TV Guide On Screen™ system. If you experience any issues with e-mail scheduling, please contact the following: • In the U.S., call TACP Consumer Solutions at 1-800-631-3811 or visit http://www.tacp.com/customersupport/contact.asp. • In Canada, call TCL Customer Service at 1-800-268 - Toshiba 42HL196 | Operation Guide - Page 68
your TV e-mail scheduler. SSL / TLS are currently not supported. Basic 3 Enter the data in the fields as you did in step 5 of "Setting up E-mail Scheduling." The fields and their descriptions are as follows: SMTP Authentication: This field controls the SMTP authentication feature. This is turned - Toshiba 42HL196 | Operation Guide - Page 69
). -"IP," "Netmask," "Gateway," and "DNS" settings (applicable if you manually set up the network address). • Make sure all cables are connected properly and securely. • Check your router hardware/settings to make sure your Internet service is currently available (especially if the e-mail test takes - Toshiba 42HL196 | Operation Guide - Page 70
mail Scheduling Setup" window For instructions on entering data in these for the TV to receive e-mails from any PC to remotely schedule and modify recordings and reminders. that hosts the TV's e-mail account. Note: The TV does not support encrypted e-mail troubleshooting tips, see Chapter 8. 70 - Toshiba 42HL196 | Operation Guide - Page 71
default settings. To help prevent the TV from receiving or sending unwanted e-mails (including e-mails that contain information about the programs the TV is set to record), it is recommended that you not change these settings unless you need to diagnose a problem or deal with a unique user situation - Toshiba 42HL196 | Operation Guide - Page 72
(- page 66), before proceeding. When a recording is scheduled via e-mail, the recording device used will be the VCR connected to the TV's analog A/V OUT terminals (see item 4 on page 8 for the location of the A/V OUT terminals; see the separate Installation Guide for various VCR connection examples - Toshiba 42HL196 | Operation Guide - Page 73
TIME START DURATION DUR TYPE Data formats [6- to 16-character alphanumeric code] MyID1234 ... MYID1234 ... myid1234 ADD DELETE ... DEL GET HELP ANT1 ... ANT-1 ... Antenna-1 ANT2 ... ANT-2 ... Antenna-2 CABLE the TV, you will receive a reply e-mail that lists all currently scheduled recordings and/ - Toshiba 42HL196 | Operation Guide - Page 74
• TYPE Sample DELETE request e-mail to delete an existing recording: To: [TV's email address] Subject: [this can be left blank] ID MYID1234* COMMAND DELETE INPUT ANT-1 CHANNEL 102-1 DATE 06/10/2005 START TIME 7 PM DURATION 2H15M TYPE REC Sample DELETE request e-mail to delete an existing reminder - Toshiba 42HL196 | Operation Guide - Page 75
29). TV will not turn on • Make sure the power cord is plugged in, and then press p. • The remote control batteries may be dead. Replace the batteries or try the control panel buttons. Picture problems General picture problems • Check the antenna/cable connections (- Installation Guide). • Press - Toshiba 42HL196 | Operation Guide - Page 76
screen is displayed, press E four times within 5 seconds. The PIN code you previously stored will be cleared (- page 45). • The V-Chip feature is available for the U.S. V-Chip system only (- page 46). Recording problems • If you use the TV's remote control to start recording, you will not be able to - Toshiba 42HL196 | Operation Guide - Page 77
modem's operation with this manual. • Make sure your network address and e-mail account are set up correctly (- Chapter 7). No network connection • The Ethernet cables are not connected properly or at all. Connect all cables(- Installation Guide). • Make sure the modem's power cord is plugged in - Toshiba 42HL196 | Operation Guide - Page 78
/DSL modem or contact your ISP for Internet service issues. Manual setup fails • The Ethernet cables are not connected properly or at all. Connect all cables (- Installation Guide). • The TV IP address is the same as the networked PC's. The TV IP address must be different from the PC's IP address - Toshiba 42HL196 | Operation Guide - Page 79
power is restored, the red LED will blink while the TV is booting until the remote control is usable. This is normal and is not a sign of malfunction. TV front Blue LED Red LED LED Indication 1) Blue is ON (solid). 2) Red is ON (solid). 3) Red blinks three times. 4) Blue blinks slowly. 5) Blue - Toshiba 42HL196 | Operation Guide - Page 80
95ºF (0ºC-35ºC) Humidity: 20-80% (no moisture condition) Supplied Accessories • Remote control with two size "AA" alkaline batteries • Dual-wand IR blaster cable • Installation Guide • Operating Guide (this book) • TV Guide On Screen™ Interactive Program Guide • Lead clip Use this clip to attach the - Toshiba 42HL196 | Operation Guide - Page 81
. DURING THIS PERIOD, TACP WILL, AT TACP'S OPTION, REPAIR OR REPLACE A DEFECTIVE PART WITH A NEW OR REFURBISHED PART WITHOUT CHARGE TO YOU. Owner's Manual and Product Registration Card Read this owner's manual thoroughly before operating this LCD Television. Complete and mail the enclosed product - Toshiba 42HL196 | Operation Guide - Page 82
, TCL WILL, AT TCL'S OPTION, REPAIR OR REPLACE A DEFECTIVE PART WITH A NEW OR REFURBISHED PART WITHOUT CHARGE TO YOU FOR PARTS OR LABOR. a) FOR LCD TVs UNDER 37": To receive warranty service, you must return the LCD TV to a TCL Authorized Service Depot. b) FOR LCD TVs 37" AND LARGER: During this - Toshiba 42HL196 | Operation Guide - Page 83
in this product may be obtained by contacting Toshiba Consumer Solutions at (800)631-3811. There OF SUBSTITUTE GOODS OR SERVICES; LOSS OF USE, DATA Netscapes SSL. This library is free for commercial and noncommercial use given attribution as the author of the parts of the library used. This can be - Toshiba 42HL196 | Operation Guide - Page 84
sharing 58 Side panel control 7 Sleep timer 50 Slide show 64 Specifications 80 StableSound 44 Stereo sound 43 SurfLock 34 System status 29 T TheaterWide® picture size 35 THINC button 11 THINC™ system 9 Time and date setting 27 Troubleshooting 75 TV GUIDE button 11 V V-Chip blocking - Toshiba 42HL196 | Operation Guide - Page 85
Notes 85 - Toshiba 42HL196 | Operation Guide - Page 86
Corporate Headquarters: 82 TOTOWA ROAD, WAYNE, NJ 07470, U.S.A. NATIONAL SERVICE DIVISION: 1420-B TOSHIBA DRIVE, LEBANON, TN 37087, U.S.A. HEAD OFFICE: 191 McNABB STREET, MARKHAM, ONTARIO, L3R 8H2, CANADA - TEL: (905) 470-5400 SERVICE CENTERS: TORONTO: 191 McNABB STREET, MARKHAM, ONTARIO L3R 8H2,
-
 1
1 -
 2
2 -
 3
3 -
 4
4 -
 5
5 -
 6
6 -
 7
7 -
8
-
9
-
10
-
11
-
12
-
13
-
14
-
15
-
16
-
17
-
18
-
19
-
20
-
21
-
22
-
23
-
24
-
25
-
26
-
27
-
28
-
29
-
30
-
31
-
32
-
33
-
34
-
35
-
36
-
37
-
38
-
39
-
40
-
41
-
42
-
43
-
44
-
45
-
46
-
47
-
48
-
49
-
50
-
51
-
52
-
53
-
54
-
55
-
56
-
57
-
58
-
59
-
60
-
61
-
62
-
63
-
64
-
65
-
66
-
67
-
68
-
69
-
70
-
71
-
72
-
73
-
74
-
75
-
76
-
77
-
78
-
79
-
80
-
81
-
82
-
83
-
84
-
85
-
86
 |
 |
HIGH
-DEFINITION TELEVISION
42HL196
YC/M
VX1A00010400
Integrated High Definition
LCD Television
© 2006 TOSHIBA CORPORATION
All Rights Reserved
Owner’s Record
The model number and serial number are on the back of
your TV. Record these numbers in the spaces below.
Refer to these numbers whenever you communicate
with your Toshiba dealer about this TV.
Model number:
Serial number:
For an overview of steps for setting up your new TV, see page 6.
Note: To display a High Definition picture, the TV must be receiving a
High Definition signal (such as an over-the-air High Definition TV
broadcast, a High Definition digital cable program, or a High Definition
digital satellite program). For details, please contact your TV antenna
installer, cable provider, or satellite provider.
IMPORTANT NOTE
Before connecting, operating, or adjusting this product, carefully
read the Important Safety, Installation, Care, and Service
information in the separate
Installation Guide
.