Toshiba P47LSB User Manual - Page 40
C: ¥ gm1601FW ¥ ISP ¥ Batch -- FlashRom_8.txt
 |
View all Toshiba P47LSB manuals
Add to My Manuals
Save this manual to your list of manuals |
Page 40 highlights
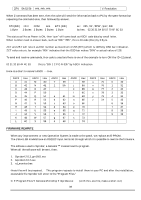
( ¥ = back-slash ) Then it might be convenient to prepare these sub-directory and file location. C: ¥ gm1601FW ¥ ISP ¥ Batch --- FlashRom_8.txt C: ¥ LCD Holder --- rd_monitor_LHA_42&47.hex --- rd_monitor_LSA_27&32.hex --- rd_monitor_LSA+_42&47.hex When the new firmware is prepared, only one of these, such as 'rd_monitor_LSA+_42&47.hex' will be sent. The rewrite software needs to place a file by 'txt' format, thus received file needs to rewrite its file name. Rd_monitor_LSA+_42&47.hex FlashRom_8.txt After rewriting the file name, then this file needs to be placed into the sub-directly of: C: ¥ gm1601FW ¥ ISP ¥ Batch - - - FlashRom_8.txt Since the program always look for the file name of 'FlashRom_8.txt'. When different set need to write, such as LSA_27&32, this new file should be copied under this sub-directly And be re-named, then the FlashRom_8.txt will be over-written by the new information. Copy 'rd_monitor_LSA_27&32.hex re-name to FlashRom_8.txt place this under C:¥ - - -¥ Batch Note: The old inside, LSA+_42&47 will be gone and new LSA_27&32 is replaced and becomes active. To rewrite, turn on the monitor, connect RS232C cable operate Firmware confirmation as, by using the [left]-[right] button on the wireless remote, push L-L-R-R-L-R to display firmware version on the screen. This operation changes the Speed setting of RS232C to the right 115200 baud. double click the 'Gprobe.exe' short-cut software will start Select 'Option' at pull-down menu finish 'Connection Set-up (F10)' such as Protect: Serial 1, Port: Com 1 (example), speed: 115200 OK Look for 'Commands' at pull-down menu and click at bottom, Select: Batch look for file of 'FlashRom_8' OK then, rewrite will start. When several E-PROM need to rewrite i.e., E-PROM need to remove and insert, then insert the new E-PROM before selecting Batch file with the power ON condition. After rewrite, turn OFF the power and remove E-PROM. Then turn ON again without placing E-PROM, press UP cursor key and insert E-PROM, then click OK. After rewrite, confirm the firmware number if it is correctly written or not. To confirm the firmware version, use wireless remote and press Left/Right arrow button by the sequence of L-L-R-R-L-R then the version number is indicated in small black OSD area. When this black small OSD with the firmware number indicated, this is the indication that the RS232C Speed is set to 115200 baud so that PC, RS232C control which is possibly 9600 baud will not be shake-hand. To return the RS232C speed back and also erase this small black-box OSD, shut-off main power by Rocker Switch, wireless remote will not work in this condition, then, turn it ON again, with the RGB connected and signal supplied. Without RGB-HV signal, the monitor enters to its self TEST mode, displaying flat field, solid color of red, green, blue etc. and continue until shut-off. DISASSEMBLE 40
-
 1
1 -
2
-
3
-
4
-
5
-
6
-
7
-
8
-
9
-
10
-
11
-
12
-
13
-
14
-
15
-
16
-
17
-
18
-
19
-
20
-
21
-
22
-
23
-
24
-
25
-
26
-
27
-
28
-
29
-
30
-
31
-
32
-
33
-
34
-
 35
35 -
 36
36 -
 37
37 -
 38
38 -
 39
39 -
 40
40 -
 41
41 -
 42
42 -
 43
43 -
 44
44 -
 45
45 -
46
 |
 |
