Toshiba Satellite A300 Maintenance Manual - Page 114
Optical Disk Drive Troubleshooting, Procedure 1, Diagnostic Test Program Execution Check
 |
View all Toshiba Satellite A300 manuals
Add to My Manuals
Save this manual to your list of manuals |
Page 114 highlights
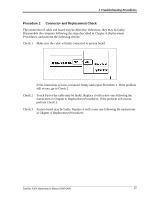
Troubleshooting Procedures 2.10 Optical Disk Drive Troubleshooting To check if optical disk drive is malfunctioning or not, follow the troubleshooting procedures below as instructed. Procedure 1: Diagnostic Test Program Execution Check Procedure 2: Connector Check and Replacement Check Procedure 1 Diagnostic Test Program Execution Check Execute the CD-ROM/DVD-ROM Test in the Diagnostic Program. Refer to Chapter 3, Tests and Diagnostics for more information on how to perform the test program. Prepare the tools before the test. If any error is detected by the test, go to Procedure 2. Procedure 2 Connector Check and Replacement Check The connection of optical disk drive and system board may be defective. Otherwise, they may be faulty. Disassemble the computer following the steps described in Chapter 4 and perform the following checks: Check 1 Make sure optical disk drive is firmly connected to the connector on system board. If the connection is loose, reconnect it firmly and return to Procedure 2. If the problem still occurs, perform Check 2. Check 2 Optical disk drive may be faulty. Replace it with a new one following the steps in Chapter 4. If the problem still occurs, perform Check 3. Check 3 System board may be faulty. Replace it with new one following the instructions in Chapter 4. Satellite A300 Maintenance Manual (960-Q08) 38
-
 1
1 -
2
-
3
-
4
-
5
-
6
-
7
-
8
-
9
-
10
-
11
-
12
-
13
-
14
-
15
-
16
-
17
-
18
-
19
-
20
-
21
-
22
-
23
-
24
-
25
-
26
-
27
-
28
-
29
-
30
-
31
-
32
-
33
-
34
-
35
-
36
-
37
-
38
-
39
-
40
-
41
-
42
-
43
-
44
-
45
-
46
-
47
-
48
-
49
-
50
-
51
-
52
-
53
-
54
-
55
-
56
-
57
-
58
-
59
-
60
-
61
-
62
-
63
-
64
-
65
-
66
-
67
-
68
-
69
-
70
-
71
-
72
-
73
-
74
-
75
-
76
-
77
-
78
-
79
-
80
-
81
-
82
-
83
-
84
-
85
-
86
-
87
-
88
-
89
-
90
-
91
-
92
-
93
-
94
-
95
-
96
-
97
-
98
-
99
-
100
-
101
-
102
-
103
-
104
-
105
-
106
-
107
-
108
-
 109
109 -
 110
110 -
 111
111 -
 112
112 -
 113
113 -
 114
114 -
 115
115 -
 116
116 -
 117
117 -
 118
118 -
 119
119 -
120
-
121
-
122
-
123
-
124
-
125
-
126
-
127
-
128
-
129
-
130
-
131
-
132
-
133
-
134
-
135
-
136
-
137
-
138
-
139
-
140
-
141
-
142
-
143
-
144
-
145
-
146
-
147
-
148
-
149
-
150
-
151
-
152
-
153
-
154
-
155
-
156
-
157
-
158
-
159
-
160
-
161
-
162
-
163
-
164
-
165
-
166
-
167
-
168
-
169
-
170
-
171
-
172
-
173
-
174
-
175
-
176
-
177
-
178
-
179
-
180
-
181
-
182
-
183
-
184
-
185
-
186
-
187
-
188
-
189
-
190
-
191
-
192
-
193
-
194
-
195
-
196
-
197
-
198
-
199
-
200
-
201
-
202
-
203
-
204
-
205
-
206
-
207
-
208
-
209
-
210
-
211
-
212
-
213
-
214
-
215
-
216
-
217
-
218
-
219
-
220
-
221
-
222
-
223
-
224
-
225
-
226
-
227
-
228
-
229
-
230
-
231
-
232
-
233
-
234
-
235
-
236
-
237
-
238
-
239
-
240
-
241
-
242
-
243
-
244
-
245
-
246
-
247
-
248
-
249
-
250
-
251
-
252
-
253
-
254
-
255
-
256
-
257
-
258
-
259
-
260
-
261
-
262
-
263
 |
 |
