Xerox 2218 Systems Administration Guide
Xerox 2218 - FaxCentre B/W Laser Manual
 |
UPC - 095205233940
View all Xerox 2218 manuals
Add to My Manuals
Save this manual to your list of manuals |
Xerox 2218 manual content summary:
- Xerox 2218 | Systems Administration Guide - Page 1
WorkCentre 4118 and FaxCentre 2218 System Administration Guide 705N00020B - Xerox 2218 | Systems Administration Guide - Page 2
Welwyn Garden City Hertfordshire AL7 1BU ENGLAND ©2006 by Xerox Corporation. All rights reserved. Copyright protection claimed includes , such as icons, screen displays, looks etc. Xerox® and all Xerox product Names are trademarks of XEROX CORPORATION. AppleTalk is a trademark of Apple Computer Inc - Xerox 2218 | Systems Administration Guide - Page 3
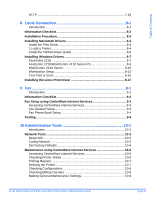
Information Checklist 3-2 NetWare Environments 3-3 IP NDPS Printing 3-4 4 Print Driver Installation for Networked Printers 4-1 Introduction 4-1 Information Checklist 4-2 Workstation Setup 4-3 Windows XP (TCP/IP 4-4 Xerox WorkCentre 4118 and FaxCentre 2218 System Administration Guide Page i - Xerox 2218 | Systems Administration Guide - Page 4
7-3 Introduction 7-3 Accessing CentreWare Internet Services 7-4 Configuring the Network 7-5 Ethernet 7-6 AppleTalk 7-7 TCP/IP ...7-9 SNMP...7-11 SSDP ...7-13 LPR/LPD 7-14 Raw TCP/IP Printing 7-16 IPP ...7-18 Page ii Xerox WorkCentre 4118 and FaxCentre 2218 System Administration Guide - Xerox 2218 | Systems Administration Guide - Page 5
CentreWare Internet Services 10-6 Checking Printer Status 10-6 Printing Reports 10-7 Defining the Printer 10-7 Checking Configurations 10-8 Checking Billing Counters 10-9 Making General Maintenance Settings 10-9 Xerox WorkCentre 4118 and FaxCentre 2218 System Administration Guide Page iii - Xerox 2218 | Systems Administration Guide - Page 6
Table of Contents Upgrading Firmware 10-10 Obtaining Assistance 10-11 11 Problem Solving 11-1 Introduction 11-1 Problem Solving Procedure 11-2 12 Glossary 12-1 Page iv Xerox WorkCentre 4118 and FaxCentre 2218 System Administration Guide - Xerox 2218 | Systems Administration Guide - Page 7
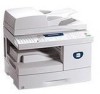
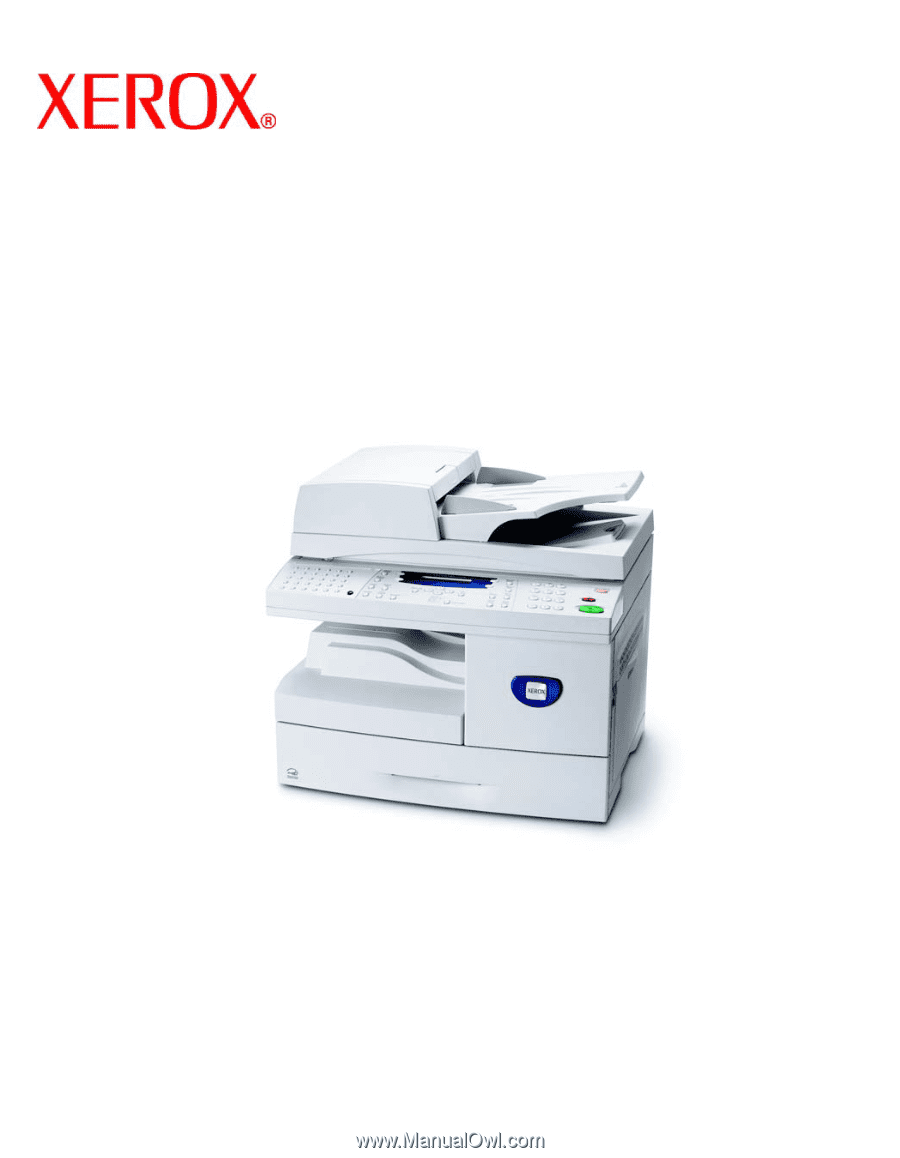
FaxCentre 2218. These products have been designed for ease of use, but to use your machine to its fullest potential take some time to read the User Guide. ¾ Introduction 1-2 ¾ About This Guide 1-3 ¾ Related Information Sources 1-4 ¾ Customer Support 1-5 Xerox WorkCentre 4118 and FaxCentre 2218 - Xerox 2218 | Systems Administration Guide - Page 8
Paper Tray, Foreign Interface, Stand and the Network Kit. The Network Kit enables network printing, including a driver compatible with PostScript®3TM. The kit also includes Macintosh and Linux print and scan drivers. Page 1-2 Xerox WorkCentre 4118 and FaxCentre 2218 System Administration Guide - Xerox 2218 | Systems Administration Guide - Page 9
[Paper Supply]. Located in the margins and used to provide additional or useful information about a function or feature. z For instructions on loading media, refer to "Loading Paper" in the User Guide. Provides more in-depth specification information relating to L the machine. For full - Xerox 2218 | Systems Administration Guide - Page 10
for the products consists of: - This System Administration Guide - The Quick Use Guide - The Quick Install Sheets - The User Guide - The Xerox website www.xerox.com - The Network Quick Setup Guide - The Reference Poster Page 1-4 Xerox WorkCentre 4118 and FaxCentre 2218 System Administration - Xerox 2218 | Systems Administration Guide - Page 11
space below to make a note of the machine serial number: To access the serial number open the side cover using the release latch and then open the front door. The serial number is located on the panel above the Toner Cartridge. The Xerox Welcome Center or local representative telephone number is - Xerox 2218 | Systems Administration Guide - Page 12
Welcome Page 1-6 Xerox WorkCentre 4118 and FaxCentre 2218 System Administration Guide - Xerox 2218 | Systems Administration Guide - Page 13
2218 on a network. The physical connection is Ethernet and the addressing protocols are provided by TCP/IP. The following information is provided: ¾ Information Checklist 2-2 ¾ Ethernet Port 2-3 ¾ Basic TCP/IP Settings 2-5 Xerox WorkCentre 4118 and FaxCentre 2218 System Administration Guide - Xerox 2218 | Systems Administration Guide - Page 14
WorkCentre 4118 / FaxCentre 2218 print drivers. Xerox If problems are encountered during the WorkCentre 4118 / FaxCentre 2218 installation, refer to the Problem Solving chapter for assistance. CAUTION: Do not connect the network cable to the WorkCentre 4118 / FaxCentre 2218 until instructed to do - Xerox 2218 | Systems Administration Guide - Page 15
Admin Tools have been passcode protected, type in the password and press [Enter]. 4 ¾ Press or until Network Setup displays and press [Enter]. System Admin Tools [Passcode Protect] System Admin Tools [Network Setup] Xerox WorkCentre 4118 and FaxCentre 2218 System Administration Guide Page 2-3 - Xerox 2218 | Systems Administration Guide - Page 16
Configure Network displays and press [Enter]. Network Setup [Config. Network] 6 ¾ Press or until Ethernet displays and press [Enter]. Config. Network TCP/IP addresses (see "Basic TCP/IP Settings" on page 2-5). Page 2-4 Xerox WorkCentre 4118 and FaxCentre 2218 System Administration Guide - Xerox 2218 | Systems Administration Guide - Page 17
or entered manually. To enter the addresses manually, you need to obtain the following: ¾ TCP/IP Address ¾ Gateway Address ¾ Subnet Mask Address ¾ Primary DNS Server Address Installation Procedure There are three stages required to install the WorkCentre 4118 / FaxCentre 2218 in a TCP/IP networking - Xerox 2218 | Systems Administration Guide - Page 18
Network Setup displays and press [Enter]. System Admin Tools [Passcode Protect] System Admin Tools [Network Setup] 4 ¾ Press or until Configure Network displays and press [Enter]. Network Setup [Config. Network] Page 2-6 Xerox WorkCentre 4118 and FaxCentre 2218 System Administration Guide - Xerox 2218 | Systems Administration Guide - Page 19
[Setup] Network Communication Setup Automatically setting TCP/IP Addresses At the WorkCentre 4118 / FaxCentre 2218, perform these steps: 1 ¾ Ensure the Ethernet Port has been configured (see "Ethernet Port" on page 2-3). 2 ¾ Press the [Machine Status] button. Machine Setup Fax Setup 3 ¾ Press - Xerox 2218 | Systems Administration Guide - Page 20
[Enter]. Config Network [TCP/IP] TCP/IP [DHCP] After a short period of time, the network will allocate the required addresses. 8 Print a System Data sheet to check the addresses (see the User Guide for printing reports). Page 2-8 Xerox WorkCentre 4118 and FaxCentre 2218 System Administration - Xerox 2218 | Systems Administration Guide - Page 21
setting TCP/IP Addresses At the WorkCentre 4118 / FaxCentre 2218, perform these steps: HINT: Xerox CentreWare Internet Services can also be used to configure the WorkCentre 4118 / FaxCentre 2218, refer to the CentreWare Internet Services chapter for instructions. When manually making the TCP - Xerox 2218 | Systems Administration Guide - Page 22
displays and press [Enter]. 8 ¾ For each address, press or until the required setting displays and press [Enter]. Network Setup [Config. Network] Config Network [TCP/IP] Config Network [Manual] Manual [IP Address] Page 2-10 Xerox WorkCentre 4118 and FaxCentre 2218 System Administration Guide - Xerox 2218 | Systems Administration Guide - Page 23
fields, use to correct mistakes. IP Address [xxx.xxx.xxx.xxx] NOTE: If required, subnet mask, Gateway address and DNS address can be set up using the same steps. 10 ¾ Continue with Workstation Setup on page 2-12. Xerox WorkCentre 4118 and FaxCentre 2218 System Administration Guide Page 2-11 - Xerox 2218 | Systems Administration Guide - Page 24
4118 / FaxCentre 2218 perform the following steps: 1 ¾ At the client workstation, install print drivers and map to the printer (see Workstation Setup 4-3). 2 ¾ Continue with Test Print, see Test Print 8-16. Page 2-12 Xerox WorkCentre 4118 and FaxCentre 2218 System Administration Guide - Xerox 2218 | Systems Administration Guide - Page 25
explains how to install the WorkCentre 4118 / FaxCentre 2218 on the various NetWare networks. The following information is provided: ¾ Information Checklist 3-2 ¾ NetWare Environments 3-3 ¾ IP NDPS Printing 3-4 Xerox WorkCentre 4118 and FaxCentre 2218 System Administration Guide Page 3-1 - Xerox 2218 | Systems Administration Guide - Page 26
" on page 6-3 for configuration instructions. Customer Test the WorkCentre 4118 / FaxCentre 2218 to ensure it is installed fully and functioning correctly. Customer WorkCentre 4118 / FaxCentre 2218 print and fax drivers. Xerox Xerox NDPS Gateway. Xerox If problems are encountered during the - Xerox 2218 | Systems Administration Guide - Page 27
protocol. The NetWare versions and protocols supported in this chapter are as follows: ¾ NetWare Versions supported: NetWare 4.x, 5.x and 6.x ¾ Network Protocols supported: IP (IP printing is supported via LPR/LPD only) Xerox WorkCentre 4118 and FaxCentre 2218 System Administration Guide Page 3-3 - Xerox 2218 | Systems Administration Guide - Page 28
then select [Next]. - Enter the IP Address (or host name if appropriate) of the WorkCentre 4118 / FaxCentre 2218. NOTE: The Printer Name can be left at the default. - Select [Finish]. The new Printer Agent will load on the relevant server. - You can select print drivers at this point if you wish - Xerox 2218 | Systems Administration Guide - Page 29
Driver Installation for Networked Printers Introduction This chapter explains how to install the print drivers for networked printers. The following information is provided: ¾ Information Checklist 4-2 ¾ Workstation Setup 4-3 Xerox WorkCentre 4118 and FaxCentre 2218 System Administration Guide - Xerox 2218 | Systems Administration Guide - Page 30
performed: Item By The printer has been installed on the network. Customer WorkCentre 4118 / FaxCentre 2218 print drivers are available on CD. Xerox If problems are encountered during the WorkCentre 4118 / FaxCentre 2218 installation, refer to the Problem Solving chapter for assistance. Page - Xerox 2218 | Systems Administration Guide - Page 31
Ensure you have the correct drivers CD (part number 705N00017 for PCL or 705N00021 for the driver compatible with PostScript®3TM) prior to starting the above procedures. 2 ¾ Continue with Test Print, see Test Print 8-16. Xerox WorkCentre 4118 and FaxCentre 2218 System Administration Guide Page 4-3 - Xerox 2218 | Systems Administration Guide - Page 32
the correct drivers CD (part number 705N00017 for PCL or 705N00021 for the driver compatible with PostScript®3TM) prior to starting this procedure. Use the Add Printer Wizard to add the WorkCentre 4118 / FaxCentre 2218 to the network. 1 ¾ Select [Start], select [Printers and Faxes]. Double-click - Xerox 2218 | Systems Administration Guide - Page 33
the IP Address of the printer in the [Name or address of printer] field (you can optionally enter a friendly name for the printer port you are creating or use the default name created). Then select [Next] to continue. Xerox WorkCentre 4118 and FaxCentre 2218 System Administration Guide Page 4-5 - Xerox 2218 | Systems Administration Guide - Page 34
[Next] again and the WorkCentre 4118 / FaxCentre 2218 driver will be loaded onto the workstation. Enter the Printer Name and select [Next]. 5 ¾ If you wish to share the printer over the network select [Shared]. You may also wish to install printer drivers for other operating systems that will - Xerox 2218 | Systems Administration Guide - Page 35
Print Driver Installation for Networked Printers Windows NT V4.0 (TCP/IP) NOTE: TCP/IP Print Services must be installed and running on the workstation. Use the Add Printer Wizard to add the WorkCentre 4118 / FaxCentre 2218 to the network. 1 ¾ At the Windows NT workstation, select [Start], - Xerox 2218 | Systems Administration Guide - Page 36
Print Driver Installation for Networked Printers Select [Next], and select [Next] again and the WorkCentre 4118 / FaxCentre 2218 driver will be loaded onto the workstation. 5 ¾ Enter the Printer Name and select [Next]. Select [Shared], select all the Windows NT V4.0 choices for the operating - Xerox 2218 | Systems Administration Guide - Page 37
Print Driver Installation for Networked Printers Windows XP (Internet Printing Protocol) NOTE: Windows XP supports printing via IPP as standard when TCP/IP is installed on a Windows XP Workstation. Use the Add Printer Wizard to add the WorkCentre 4118 / FaxCentre 2218 to the network. 1 ¾ Select - Xerox 2218 | Systems Administration Guide - Page 38
Print Driver Installation for Networked Printers Windows 2000 (Internet Printing Protocol) NOTE: Windows 2000 supports printing via IPP as standard when TCP/IP is installed on a Windows 2000 Workstation. Use the Add Printer Wizard to add the WorkCentre 4118 / FaxCentre 2218 to the network. 1 ¾ - Xerox 2218 | Systems Administration Guide - Page 39
for Networked Printers Apple Mac OSX with Bonjour 1 ¾ Ensure LPR/LPD is enabled on the WorkCentre 4118 / FaxCentre 2218. 2 ¾ Insert the Drivers CD (compatible with PostScript®3TM , Macintosh, Linux) part number 705N00021. 3 ¾ Double click on [Mac Installer] and follow the instructions - Xerox 2218 | Systems Administration Guide - Page 40
Print Driver Installation for Networked Printers Apple Mac OSX with AppleTalk NOTE: These instructions assume the print driver is already installed. To use AppleTalk, it must be enabled on your workstation and on the WorkCentre 4118 / FaxCentre 2218. For instructions on enabling AppleTalk on the - Xerox 2218 | Systems Administration Guide - Page 41
Select IP Printer. 5 ¾ Select Internet Printing Protocol from the Protocol drop-down menu. 6 ¾ Enter the IP Address of the WorkCentre 4118 / FaxCentre 2218 in Address. 7 ¾ Select [Xerox] from the Print Using drop-down menu. ¾ Select [Xerox WorkCentre 4118 PS] or [Xerox FaxCentre 2218 PS] from - Xerox 2218 | Systems Administration Guide - Page 42
Print Driver Installation for Networked Printers Page 4-14 Xerox WorkCentre 4118 and FaxCentre 2218 System Administration Guide - Xerox 2218 | Systems Administration Guide - Page 43
explains how to install the WorkCentre 4118 / FaxCentre 2218 on an AppleTalk network. The following information is provided: ¾ Information Checklist 5-2 ¾ AppleTalk Installation 5-3 ¾ Printer Driver Installation 5-6 Xerox WorkCentre 4118 and FaxCentre 2218 System Administration Guide Page 5-1 - Xerox 2218 | Systems Administration Guide - Page 44
WorkCentre 4118 / FaxCentre 2218 Macintosh print and fax driver or Xerox PPD. If problems are encountered during the WorkCentre 4118 / FaxCentre 2218 installation, refer to the Problem Solving chapter for assistance. Page 5-2 Xerox WorkCentre 4118 and FaxCentre 2218 System Administration Guide - Xerox 2218 | Systems Administration Guide - Page 45
4118 / FaxCentre 2218, refer to the CentreWare Internet Services chapter for instructions. 1 ¾ Connect the device to the network outlet or cable. 2 ¾ Press the [Machine Status] button. Machine Setup Fax Setup Xerox WorkCentre 4118 and FaxCentre 2218 System Administration Guide Page 5-3 - Xerox 2218 | Systems Administration Guide - Page 46
until the required setting, [On] or [Off] displays and press [Enter]. System Admin Tools [Passcode Protect] System Admin Tools [Network Setup] Network Setup [Config. Network] Config. Network [AppleTalk] AppleTalk [On] Page 5-4 Xerox WorkCentre 4118 and FaxCentre 2218 System Administration Guide - Xerox 2218 | Systems Administration Guide - Page 47
AppleTalk NOTE: The WorkCentre 4118 / FaxCentre 2218 will attach itself to the default zone of the local segment where it is connected. 8 ¾ Install the Printer Driver (see "Printer Driver Installation" on page 5-6). Xerox WorkCentre 4118 and FaxCentre 2218 System Administration Guide Page 5-5 - Xerox 2218 | Systems Administration Guide - Page 48
. The printer driver controls the functions of this machine based on the information in the PPD file. 1 ¾ Ensure the printer is on and that AppleTalk has been enabled (see "Network Communication Setup" on page 5-3). Page 5-6 Xerox WorkCentre 4118 and FaxCentre 2218 System Administration Guide - Xerox 2218 | Systems Administration Guide - Page 49
2 ¾ On the Apple menu select [Mac Print Utility]. This automatically searches for the printer. 3 ¾ Select [Appletalk]. 4 ¾ Choose the WorkCentre 4118 / FaxCentre 2218 driver. 5 ¾ Close the Mac Print Utility. Xerox WorkCentre 4118 and FaxCentre 2218 System Administration Guide Page 5-7 - Xerox 2218 | Systems Administration Guide - Page 50
AppleTalk Page 5-8 Xerox WorkCentre 4118 and FaxCentre 2218 System Administration Guide - Xerox 2218 | Systems Administration Guide - Page 51
for your specific network requirements. The following information is provided: ¾ Information Checklist 6-2 ¾ Enabling/Disabling LPR/LPD 6-3 ¾ Enabling/Disabling Raw TCP/IP Printing 6-6 ¾ Enabling/Disabling HTTP 6-9 Xerox WorkCentre 4118 and FaxCentre 2218 System Administration Guide Page 6-1 - Xerox 2218 | Systems Administration Guide - Page 52
. WorkCentre 4118 / FaxCentre 2218 print drivers. By Customer Customer Xerox If problems are encountered during the WorkCentre 4118 / FaxCentre 2218 installation, refer to the Problem Solving chapter for assistance. Page 6-2 Xerox WorkCentre 4118 and FaxCentre 2218 System Administration Guide - Xerox 2218 | Systems Administration Guide - Page 53
Admin Tools have been passcode protected, type in the password and press [Enter]. 4 ¾ Press or until Network Setup displays and press [Enter]. System Admin Tools [Passcode Protect] System Admin Tools [Network Setup] Xerox WorkCentre 4118 and FaxCentre 2218 System Administration Guide Page 6-3 - Xerox 2218 | Systems Administration Guide - Page 54
[Enter]. 7 ¾ Press or until Manual displays and press [Enter]. 8 ¾ Press or until LPR/LPD displays and press [Enter]. Network Setup [Config. Network] Config Network [TCP/IP] TCP/IP [Manual] Manual [LPR/LPD] Page 6-4 Xerox WorkCentre 4118 and FaxCentre 2218 System Administration Guide - Xerox 2218 | Systems Administration Guide - Page 55
caution as most LPR spoolers are set to send print jobs to the default port number, 515. To change Port number see "Using CentreWare Internet Services" on page 7-3. Xerox WorkCentre 4118 and FaxCentre 2218 System Administration Guide Page 6-5 - Xerox 2218 | Systems Administration Guide - Page 56
CentreWare Internet Services" on page 7-3. To enable the Raw Printing port, at the WorkCentre 4118 / FaxCentre 2218, perform these steps: 1 ¾ Ensure the basic TCP/IP settings have been made (see "Basic TCP/IP Settings" on page 2-5). 2 ¾ Press the [Machine Status] button. Machine Setup Fax Setup - Xerox 2218 | Systems Administration Guide - Page 57
¾ Press or until TCP/IP displays and press [Enter]. 7 ¾ Press or until Manual displays and press [Enter]. System Admin Tools [Network Setup] Network Setup [Config. Network] Config Network [TCP/IP] TCP/IP [Manual] Xerox WorkCentre 4118 and FaxCentre 2218 System Administration Guide Page 6-7 - Xerox 2218 | Systems Administration Guide - Page 58
, [Enable] or [Disable] displays and press [Enter]. 10 ¾ If the protocol is enabled, enter the port number using the keypad and press [Enter]. Manual [Raw Printing] Raw Printing [Enable] Enter Port No. [0-65535]>9100 Page 6-8 Xerox WorkCentre 4118 and FaxCentre 2218 System Administration Guide - Xerox 2218 | Systems Administration Guide - Page 59
Admin Tools have been passcode protected, type in the password and press [Enter]. 4 ¾ Press or until Network Setup displays and press [Enter]. System Admin Tools [Passcode Protect] System Admin Tools [Network Setup] Xerox WorkCentre 4118 and FaxCentre 2218 System Administration Guide Page 6-9 - Xerox 2218 | Systems Administration Guide - Page 60
Network [TCP/IP] TCP/IP [Manual] 8 ¾ Press or until HTTP displays and press [Enter]. Manual [HTTP] 9 ¾ To enable or disable HTTP, press or until the required setting, [Enable] or [Disable] displays and press [Enter]. HTTP [Enable] Page 6-10 Xerox WorkCentre 4118 and FaxCentre 2218 System - Xerox 2218 | Systems Administration Guide - Page 61
4118 / FaxCentre 2218 on the network. The following information is provided: ¾ Information Checklist 7-2 ¾ Using CentreWare Internet Services 7-3 ¾ Accessing CentreWare Internet Services 7-4 ¾ Configuring the Network 7-5 Xerox WorkCentre 4118 and FaxCentre 2218 System Administration Guide Page - Xerox 2218 | Systems Administration Guide - Page 62
for additional information on the Gateway Address and Subnet Mask, if needed. Customer Test the WorkCentre 4118 / FaxCentre 2218 to ensure it is installed fully and functioning correctly. Customer Xerox CentreWare Internet Services. Xerox If problems are encountered during the WorkCentre 4118 - Xerox 2218 | Systems Administration Guide - Page 63
4118 / FaxCentre 2218. ¾ A valid IP Address is defined for the WorkCentre 4118 / FaxCentre 2218. NOTE: When making more than one configuration change please complete all the changes in one go and then carry out a reboot. Xerox WorkCentre 4118 and FaxCentre 2218 System Administration Guide Page 7-3 - Xerox 2218 | Systems Administration Guide - Page 64
enter http:// followed by the IP Address of the WorkCentre 4118 / FaxCentre 2218. Then select the [Enter] key. Example: If the IP Address is 192.168.100.100, enter the following in the URL field: http://192.168.100.100 Page 7-4 Xerox WorkCentre 4118 and FaxCentre 2218 System Administration Guide - Xerox 2218 | Systems Administration Guide - Page 65
appropriate instructions for the network being used: ¾ Ethernet - page 7-6 ¾ AppleTalk - page 7-7 ¾ TCP/IP - page 7-9 ¾ SNMP - page 7-11 ¾ SSDP - page 7-13 ¾ LPR/LPD - page 7-14 ¾ Raw TCP/IP Printing - page 7-16 ¾ IPP - page 7-18 ¾ HTTP - page 7-19 Xerox WorkCentre 4118 and FaxCentre 2218 System - Xerox 2218 | Systems Administration Guide - Page 66
Using CentreWare Internet Services Ethernet Use these instructions to set the rated speed for Ethernet using CentreWare Internet Services: To complete the installation of the WorkCentre 4118 / FaxCentre 2218, perform these steps: 1 ¾ Open CentreWare Internet Services (see Accessing CentreWare - Xerox 2218 | Systems Administration Guide - Page 67
AppleTalk. Enter the [Printer Name]. Use a meaningful name, such as the location of the device. Choose the Zone where the printer resides from the drop-down menu. 7 ¾ Click the [Apply] button to implement any changes. Xerox WorkCentre 4118 and FaxCentre 2218 System Administration Guide Page 7-7 - Xerox 2218 | Systems Administration Guide - Page 68
to cancel any changes made and return to the previous values. 8 ¾ Select the [Status] tab and then select [Reboot Machine] to enable the selections to take effect. 9 ¾ Continue with Test Print, see Test Print 8-16. Page 7-8 Xerox WorkCentre 4118 and FaxCentre 2218 System Administration Guide - Xerox 2218 | Systems Administration Guide - Page 69
are incorrect then enter the correct information. 5 ¾ In the Physical Connection field, Ethernet will be the default setting. Enter the [Host Name]. Choose the [IP Address Resolution] required. Xerox WorkCentre 4118 and FaxCentre 2218 System Administration Guide Page 7-9 - Xerox 2218 | Systems Administration Guide - Page 70
to cancel any changes made and return to the previous values. 9 ¾ Select the [Status] tab and then select [Reboot Machine] to enable the selections to take effect. 10 ¾ Continue with Test Print, see Test Print 8-16. Page 7-10 Xerox WorkCentre 4118 and FaxCentre 2218 System Administration Guide - Xerox 2218 | Systems Administration Guide - Page 71
address. You can Enable Authentication Failure Generic Traps to generate a trap for every SNMP request received by the machine that contains an invalid community name. ¾ Click the [Apply] button to implement any changes and return to the first screen. Xerox WorkCentre 4118 and FaxCentre 2218 - Xerox 2218 | Systems Administration Guide - Page 72
changes. NOTE: Click the [Undo] button to cancel any changes made and return to the previous values. 9 ¾ Select the [Status] tab and then select [Reboot Machine] to enable the selections to take effect. Page 7-12 Xerox WorkCentre 4118 and FaxCentre 2218 System Administration Guide - Xerox 2218 | Systems Administration Guide - Page 73
changes. NOTE: Click the [Undo] button to cancel any changes made and return to the previous values. 7 ¾ Select the [Status] tab and then select [Reboot Machine] to enable the selections to take effect. Xerox WorkCentre 4118 and FaxCentre 2218 System Administration Guide Page 7-13 - Xerox 2218 | Systems Administration Guide - Page 74
/LPD Use these instructions to enable or disable LPR/LPD using CentreWare Internet Services. Installation Procedure There are two stages required to install the device on a LPR/LPD network using CentreWare Internet Services: ¾ Configure the WorkCentre 4118 / FaxCentre 2218 This procedure explains - Xerox 2218 | Systems Administration Guide - Page 75
[Reboot Machine] to enable the selections to take effect. 8 ¾ Using the procedure located in Section 4, Print Driver Installation for Networked Printers, install the driver for the workstation. 9 ¾ Continue with Test Print, see Test Print 8-16. Xerox WorkCentre 4118 and FaxCentre 2218 System - Xerox 2218 | Systems Administration Guide - Page 76
the installation of the WorkCentre 4118 / FaxCentre 2218, perform these steps: 1 ¾ Open CentreWare Internet Services (see Accessing CentreWare Internet Services on page 7-4). 2 ¾ At the CentreWare Internet Services Home Page for the WorkCentre 4118 / FaxCentre 2218, select the [Properties] tab - Xerox 2218 | Systems Administration Guide - Page 77
Network Installation Using CentreWare Internet Services 6 ¾ Select the [Status] tab and then select [Reboot Machine] to enable the selections to take effect. 7 ¾ Continue with Test Print, see Test Print 8-16. Xerox WorkCentre 4118 and FaxCentre 2218 System Administration Guide Page 7-17 - Xerox 2218 | Systems Administration Guide - Page 78
to cancel any changes made and return to the previous values. 6 ¾ Select the [Status] tab and then select [Reboot Machine] to enable the selections to take effect. 7 ¾ Continue with Test Print, see Test Print 8-16. Page 7-18 Xerox WorkCentre 4118 and FaxCentre 2218 System Administration Guide - Xerox 2218 | Systems Administration Guide - Page 79
to cancel any changes made and return to the previous values. 7 ¾ Select the [Status] tab and then select [Reboot Machine] to enable the selections to take effect. 8 ¾ Continue with Test Print, see Test Print 8-16. Xerox WorkCentre 4118 and FaxCentre 2218 System Administration Guide Page 7-19 - Xerox 2218 | Systems Administration Guide - Page 80
Network Installation Using CentreWare Internet Services Page 7-20 Xerox WorkCentre 4118 and FaxCentre 2218 System Administration Guide - Xerox 2218 | Systems Administration Guide - Page 81
/ FaxCentre 2218. The following information is provided: ¾ Information Checklist 8-2 ¾ Installation Procedure 8-3 ¾ Installing Macintosh Drivers 8-4 ¾ Installing Windows Drivers 8-7 ¾ Installing the Linux Print Driver 8-17 Xerox WorkCentre 4118 and FaxCentre 2218 System Administration Guide - Xerox 2218 | Systems Administration Guide - Page 82
is installed fully and functioning correctly. WorkCentre 4118 / FaxCentre 2218 drivers. By Customer Xerox Customer Xerox If problems are encountered during the WorkCentre 4118 / FaxCentre 2218 installation, refer to the Problem Solving chapter for assistance. NOTE: The installation procedures will - Xerox 2218 | Systems Administration Guide - Page 83
that you require at the same time. NOTE: The drivers will be installed to the local port. For network connections, it is recommended that you use the instructions relevant to the specific network requirements. The WorkCentre 4118 / FaxCentre 2218 can be connected directly to the parallel port or USB - Xerox 2218 | Systems Administration Guide - Page 84
the workstation and the printer. 2 ¾ Insert the driver CD supplied with your PostScript®3TM/Network kit. 3 ¾ Double- Printer 1 ¾ Select Go. 2 ¾ Select [Utilities]. 3 ¾ Select [Printer Setup Utility] and select [Add]. Page 8-4 Xerox WorkCentre 4118 and FaxCentre 2218 System Administration Guide - Xerox 2218 | Systems Administration Guide - Page 85
¾ Select Xerox WorkCentre 4118 series or FaxCentre 2218 Series. 5 ¾ The driver will be located automatically. If it is not, choose the WorkCentre 4118 or FaxCentre 2218 driver from the [Print Using] list. Select [Add]. Xerox WorkCentre 4118 and FaxCentre 2218 System Administration Guide Page 8-5 - Xerox 2218 | Systems Administration Guide - Page 86
Installer window opens. Click [Continue]. 9 ¾ Select [Install] to install the driver. 10 ¾ Click [Quit] to finish. 11 ¾ Select your preferred image editing program. ¾ Select the WorkCentre 4118 / FaxCentre 2218 for importing documents. Page 8-6 Xerox WorkCentre 4118 and FaxCentre 2218 System - Xerox 2218 | Systems Administration Guide - Page 87
you will need to install a driver. The procedure will install the driver and configure it for the local port. FaxCentre 2218 1 ¾ Insert the Xerox Drivers CD into the CD drive. Within a few seconds, the CD should start automatically and present you with the opening screen. If this does not happen - Xerox 2218 | Systems Administration Guide - Page 88
Parallel or USB cable between the workstation and the printer. 7 ¾ Switch on the printer. 8 ¾ Windows will automatically detect new hardware and install the appropriate driver. 9 ¾ Continue with Workstation Setup. Page 8-8 Xerox WorkCentre 4118 and FaxCentre 2218 System Administration Guide - Xerox 2218 | Systems Administration Guide - Page 89
Local Connection FaxCentre 2218/WorkCentre 4118 Series PS 1 ¾ Insert the Xerox Drivers CD into the CD drive. Within a few seconds, the CD should start automatically and present you with the opening screen. If this does not happen, go to the [Start] menu, choose [Run] and browse to the CD drive. - Xerox 2218 | Systems Administration Guide - Page 90
on the printer. 8 ¾ Windows will automatically detect new hardware and install the appropriate driver. 9 ¾ Continue with Workstation Setup. WorkCentre 4118 Series 1 ¾ Insert the Xerox Drivers CD into the CD drive. Page 8-10 Xerox WorkCentre 4118 and FaxCentre 2218 System Administration Guide - Xerox 2218 | Systems Administration Guide - Page 91
[Run] and browse to the CD drive. Select setup.exe and click [Open]. Click [OK] to start the installation procedure. 2 ¾ When the language selection as many drivers as you want by checking the appropriate boxes. Xerox WorkCentre 4118 and FaxCentre 2218 System Administration Guide Page 8-11 - Xerox 2218 | Systems Administration Guide - Page 92
Parallel or USB cable between the workstation and the printer. 8 ¾ Switch on the printer. 9 ¾ Windows will automatically detect new hardware and install the appropriate driver. 10 ¾ Continue with Workstation Setup. Page 8-12 Xerox WorkCentre 4118 and FaxCentre 2218 System Administration Guide - Xerox 2218 | Systems Administration Guide - Page 93
appearance according to the operating system of the workstation. The window shown is from a Windows XP operating system. 2 ¾ Click on the printer and choose Properties from the File menu or the right mouse menu. Xerox WorkCentre 4118 and FaxCentre 2218 System Administration Guide Page 8-13 - Xerox 2218 | Systems Administration Guide - Page 94
: This window will have a different appearance according to the operating system of the workstation and the type of driver installed. The window shown is from a Windows XP operating system. 3 ¾ Click on the [Ports] tab. Page 8-14 Xerox WorkCentre 4118 and FaxCentre 2218 System Administration Guide - Xerox 2218 | Systems Administration Guide - Page 95
on the configuration of the workstation. This is usually LPT1. For a USB connection, check the USB box. 5 ¾ Click [OK]. 6 ¾ Continue with Test Print or Scan. Xerox WorkCentre 4118 and FaxCentre 2218 System Administration Guide Page 8-15 - Xerox 2218 | Systems Administration Guide - Page 96
print fails, refer to the Problem Solving chapter for trouble-shooting procedures. Test Scan 1 ¾ Open the TWAIN compliant application used to scan documents. 2 ¾ Place a document in the WorkCentre 4118 / FaxCentre 2218. 3 ¾ Follow the instructions supplied by the scanning application and verify - Xerox 2218 | Systems Administration Guide - Page 97
the device location and description. ¾ Click [Next]. 7 ¾ Choose Test Printer to verify the install. 8 ¾ Select [Finish] when complete. A 2218 or 4118 series icon should now display in the Unified Driver Configurator. Xerox WorkCentre 4118 and FaxCentre 2218 System Administration Guide Page 8-17 - Xerox 2218 | Systems Administration Guide - Page 98
Local Connection Page 8-18 Xerox WorkCentre 4118 and FaxCentre 2218 System Administration Guide - Xerox 2218 | Systems Administration Guide - Page 99
9 Fax Introduction This chapter explains how to setup the Fax option. The following information is provided: ¾ Information Checklist 9-2 ¾ Fax Setup using CentreWare Internet Services 9-3 ¾ Testing 9-5 Xerox WorkCentre 4118 and FaxCentre 2218 System Administration Guide Page 9-1 - Xerox 2218 | Systems Administration Guide - Page 100
4118 / FaxCentre 2218 is connected to the telephone line. By Customer Customer If problems are encountered during the WorkCentre 4118 / FaxCentre 2218 installation, refer to the Problem Solving chapter for assistance. Page 9-2 Xerox WorkCentre 4118 and FaxCentre 2218 System Administration Guide - Xerox 2218 | Systems Administration Guide - Page 101
4118 / FaxCentre 2218. Then select the [Enter] key. Example: If the IP Address is 192.168.100.100, enter the following in the URL field: http://192.168.100.100 Fax General Setup Use these instructions to set up fax using CentreWare Internet Services. 1 ¾ Open CentreWare Internet Services (see - Xerox 2218 | Systems Administration Guide - Page 102
Phone Book Setup Use these instructions to set up the fax phonebook using CentreWare Internet Services. 1 ¾ Open CentreWare Internet Services (see "Accessing CentreWare Internet Services" on page 9-3). 2 ¾ At the CentreWare Internet Services Home Page for the WorkCentre 4118 / FaxCentre 2218 - Xerox 2218 | Systems Administration Guide - Page 103
to scan the original. If you loaded an original on the Document Glass, you will be asked if you want to scan another page. If the test job fails, refer to the Problem Solving chapter for trouble-shooting procedures. Xerox WorkCentre 4118 and FaxCentre 2218 System Administration Guide Page 9-5 - Xerox 2218 | Systems Administration Guide - Page 104
Fax Page 9-6 Xerox WorkCentre 4118 and FaxCentre 2218 System Administration Guide - Xerox 2218 | Systems Administration Guide - Page 105
how to configure or use the various administration tools found in the WorkCentre 4118 / FaxCentre 2218. The following information is provided: ¾ Network Tools 10-2 ¾ Maintenance using CentreWare Internet Services10-6 Xerox WorkCentre 4118 and FaxCentre 2218 System Administration Guide Page 10-1 - Xerox 2218 | Systems Administration Guide - Page 106
has already been passcode protected, type in the password and press [Enter]. 3 ¾ Press or until Network Setup displays and press [Enter]. System Admin Tools [Passcode Protect] System Admin Tools [Network Setup] Page 10-2 Xerox WorkCentre 4118 and FaxCentre 2218 System Administration Guide - Xerox 2218 | Systems Administration Guide - Page 107
password and press [Enter]. 3 ¾ Press or until Network Setup displays and press [Enter]. Network Setup [Reset NIC] Machine Setup [Fax Setup] System Admin Tools [Passcode Protect] System Admin Tools [Network Setup] Xerox WorkCentre 4118 and FaxCentre 2218 System Administration Guide Page 10-3 - Xerox 2218 | Systems Administration Guide - Page 108
has already been passcode protected, type in the password and press [Enter]. 3 ¾ Press or until Network Setup displays and press [Enter]. System Admin Tools [Passcode Protect] System Admin Tools [Network Setup] Page 10-4 Xerox WorkCentre 4118 and FaxCentre 2218 System Administration Guide - Xerox 2218 | Systems Administration Guide - Page 109
Administration Tools 4 ¾ Press or until Factory Default displays and press [Enter]. ¾ Choose [Yes] to return to factory default settings Network Setup [Factory Defaults] Xerox WorkCentre 4118 and FaxCentre 2218 System Administration Guide Page 10-5 - Xerox 2218 | Systems Administration Guide - Page 110
://192.168.100.100 Checking Printer Status Use these instructions to check the status of the WorkCentre 4118 / FaxCentre 2218, the paper trays and consumables. To check the status, perform these steps: 1 ¾ Open CentreWare Internet Services (see "Accessing CentreWare Internet Services" on page 10 - Xerox 2218 | Systems Administration Guide - Page 111
these instructions to change the printer's name and location. To define the printer, perform these steps: 1 ¾ Open CentreWare Internet Services (see "Accessing CentreWare Internet Services" on page 10-6). 2 ¾ At the CentreWare Internet Services Home Page for the WorkCentre 4118 / FaxCentre 2218 - Xerox 2218 | Systems Administration Guide - Page 112
then select [Reboot Machine] to enable the selection to take effect. Checking Configurations Use these instructions to check the configuration settings of the WorkCentre 4118 / FaxCentre 2218. To check the configuration, perform these steps: 1 ¾ Open CentreWare Internet Services (see "Accessing - Xerox 2218 | Systems Administration Guide - Page 113
perform these steps: 1 ¾ Open CentreWare Internet Services (see "Accessing CentreWare Internet Services" on page 10-6). 2 ¾ At the CentreWare Internet Services Home Page for the WorkCentre 4118 / FaxCentre 2218, select the [Maintenance] tab. Enter your [Admin User Name] and [Password]. 3 ¾ In - Xerox 2218 | Systems Administration Guide - Page 114
. Upgrading Firmware Firmware upgrades may be supplied on a CD or as a download from the internet. Use these instructions to install firmware upgrades in the WorkCentre 4118 / FaxCentre 2218. To upgrade the firmware, perform these steps: 1 ¾ Open CentreWare Internet Services (see "Accessing - Xerox 2218 | Systems Administration Guide - Page 115
instructions to obtain internet assistance and to record local assistance information for the WorkCentre 4118 / FaxCentre 2218. To obtain assistance and to edit the local settings, perform these steps: 1 ¾ Open CentreWare Internet Services (see "Accessing CentreWare Internet Services [Xerox Support - Xerox 2218 | Systems Administration Guide - Page 116
Administration Tools Page 10-12 Xerox WorkCentre 4118 and FaxCentre 2218 System Administration Guide - Xerox 2218 | Systems Administration Guide - Page 117
11 Problem Solving Introduction This chapter explains the problem solving procedure and how to seek further assistance. ¾ Problem Solving Procedure 11-2 Xerox WorkCentre 4118 and FaxCentre 2218 System Administration Guide Page 11-1 - Xerox 2218 | Systems Administration Guide - Page 118
first. Perform the corrective action that is recommended by the User Guide. Do not attempt to resolve a network problem if the local copier and fax functions are not operating correctly. 2 ¾ Check that the WorkCentre 4118 / FaxCentre 2218 has power and it is turned on. 3 ¾ Check that the - Xerox 2218 | Systems Administration Guide - Page 119
expressed as hexadecimal numbers with the bytes separated by colons. (Example: 00:00:08:D4:05:14) See Driver. A network environment in which the nodes communicate with a file server, and not directly with other nodes. Xerox WorkCentre 4118 and FaxCentre 2218 System Administration Guide Page 12-1 - Xerox 2218 | Systems Administration Guide - Page 120
language, such as PostScript®3TM, that is used to describe output to a printer or a display device, which then uses the instructions from the PDL to construct text and graphics and create the required page image. Page 12-2 Xerox WorkCentre 4118 and FaxCentre 2218 System Administration Guide - Xerox 2218 | Systems Administration Guide - Page 121
protocols that is supported by a variety of computer platforms. TCP controls the data transfer and IP controls the routing of the data. The IP Address is a unique address that identifies a device in a network. The IP Address has to be set in the WorkCentre 4118 / FaxCentre 2218 by the System - Xerox 2218 | Systems Administration Guide - Page 122
Glossary Page 12-4 Xerox WorkCentre 4118 and FaxCentre 2218 System Administration Guide - Xerox 2218 | Systems Administration Guide - Page 123
F Fax 9-1 Information Checklist 9-2 Setup using Internet Services 9-3 Testing 9-5 G Glossary 12-1 H HTTP Configuration 7-19 HTTP Enabling/Disabling 6-9 I Information Sources 1-4 Internet Services 7-1 AppleTalk Configuration 7-7 Xerox WorkCentre 4118 and FaxCentre 2218 System Administration Guide - Xerox 2218 | Systems Administration Guide - Page 124
Manually setting TCP/IP Addresses 2-9 N NetWare 3-1 Information Checklist 3-2 IP NDPS Printing 3-4 NetWare Environments 3-3 Network Tools Reset NIC 10-2, 10-3 Set Factory Defaults 10-4 Networked Printer Driver 7-9 Index-2 Xerox WorkCentre 4118 and FaxCentre 2218 System Administration Guide - Xerox 2218 | Systems Administration Guide - Page 125
Mac OSX (with IPP) 4-13 Windows 2000 (IPP) 4-10 Upgrading Firmware Using Internet Services 10-10 Windows 2000 (TCP/IP) 4-5 W Windows 98/me AppleTalk) 4-12 Xerox Welcome Center 1-5 Apple Mac OSX (with Bonjour) 4-11 Xerox WorkCentre 4118 and FaxCentre 2218 System Administration Guide Index-3
-
 1
1 -
 2
2 -
 3
3 -
 4
4 -
 5
5 -
 6
6 -
 7
7 -
8
-
9
-
10
-
11
-
12
-
13
-
14
-
15
-
16
-
17
-
18
-
19
-
20
-
21
-
22
-
23
-
24
-
25
-
26
-
27
-
28
-
29
-
30
-
31
-
32
-
33
-
34
-
35
-
36
-
37
-
38
-
39
-
40
-
41
-
42
-
43
-
44
-
45
-
46
-
47
-
48
-
49
-
50
-
51
-
52
-
53
-
54
-
55
-
56
-
57
-
58
-
59
-
60
-
61
-
62
-
63
-
64
-
65
-
66
-
67
-
68
-
69
-
70
-
71
-
72
-
73
-
74
-
75
-
76
-
77
-
78
-
79
-
80
-
81
-
82
-
83
-
84
-
85
-
86
-
87
-
88
-
89
-
90
-
91
-
92
-
93
-
94
-
95
-
96
-
97
-
98
-
99
-
100
-
101
-
102
-
103
-
104
-
105
-
106
-
107
-
108
-
109
-
110
-
111
-
112
-
113
-
114
-
115
-
116
-
117
-
118
-
119
-
120
-
121
-
122
-
123
-
124
-
125
 |
 |
WorkCentre 4118 and FaxCentre 2218
System Administration Guide
705N00020B