2011 Kawasaki Concours 14 ABS Owners Manual - Page 213
2011 Kawasaki Concours 14 ABS Manual

Page 213 highlights
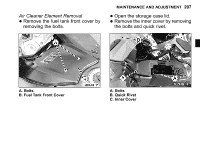
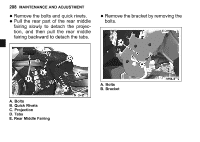
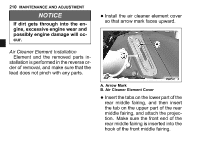
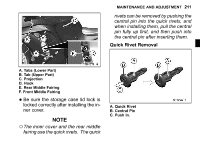
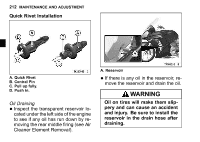
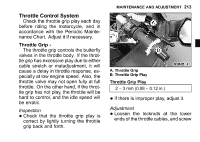
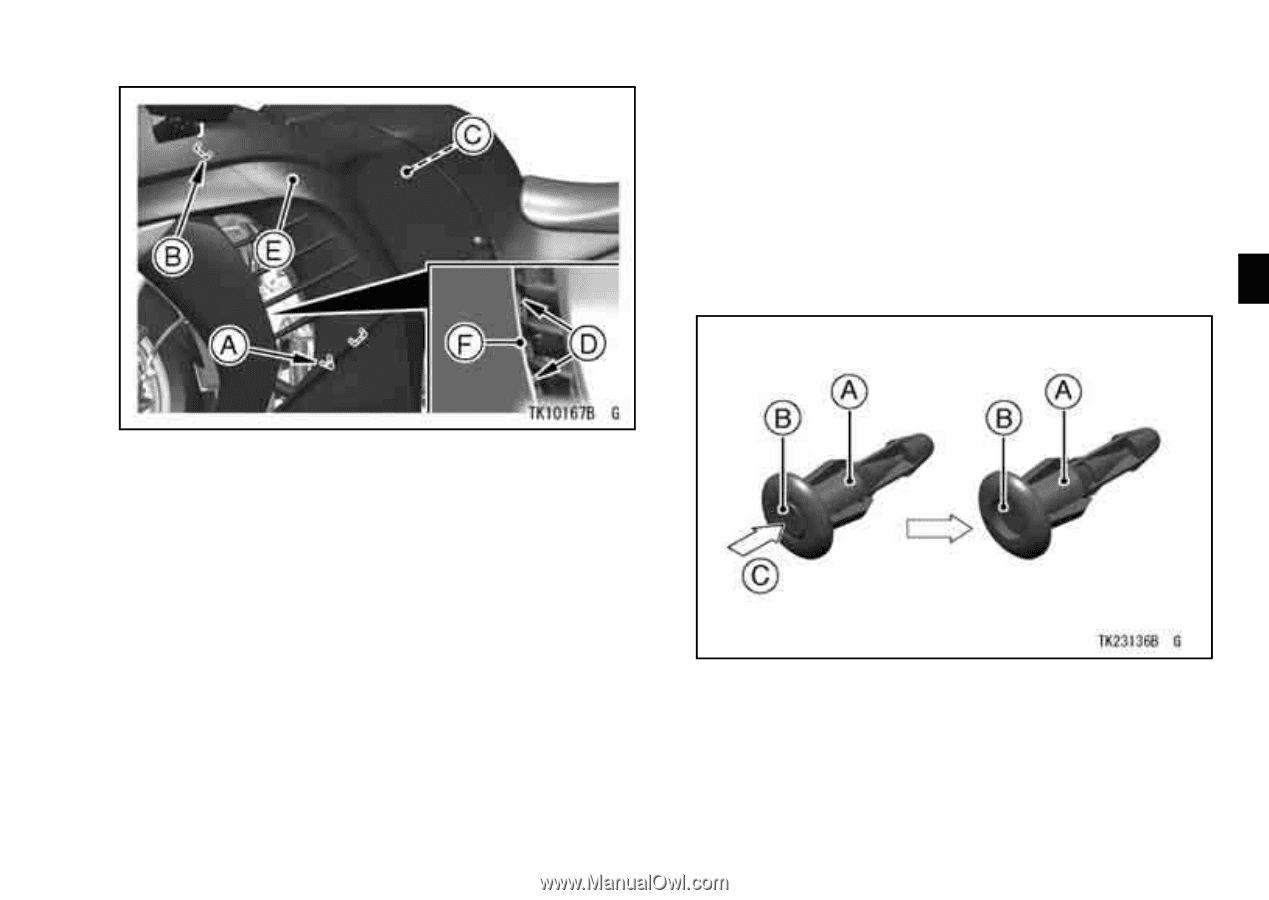
MAINTENANCE AND ADJUSTMENT 211 rivets can be removed by pushing the central pin into the quick rivets, and when installing them, pull the central pin fully up first, and then push into the central pin after inserting them. Quick Rivet Removal A. Tabs (Lower Part) B. Tab (Upper Part) C. Projection D. Hook E. Rear Middle Fairing F. Front Middle Fairing sure the storage case lid lock is • Be locked correctly after installing the inner cover. A. Quick Rivet B. Central Pin C. Push in. NOTE żThe inner cover and the rear middle fairing use the quick rivets. The quick
-
 1
1 -
2
-
3
-
4
-
5
-
6
-
7
-
8
-
9
-
10
-
11
-
12
-
13
-
14
-
15
-
16
-
17
-
18
-
19
-
20
-
21
-
22
-
23
-
24
-
25
-
26
-
27
-
28
-
29
-
30
-
31
-
32
-
33
-
34
-
35
-
36
-
37
-
38
-
39
-
40
-
41
-
42
-
43
-
44
-
45
-
46
-
47
-
48
-
49
-
50
-
51
-
52
-
53
-
54
-
55
-
56
-
57
-
58
-
59
-
60
-
61
-
62
-
63
-
64
-
65
-
66
-
67
-
68
-
69
-
70
-
71
-
72
-
73
-
74
-
75
-
76
-
77
-
78
-
79
-
80
-
81
-
82
-
83
-
84
-
85
-
86
-
87
-
88
-
89
-
90
-
91
-
92
-
93
-
94
-
95
-
96
-
97
-
98
-
99
-
100
-
101
-
102
-
103
-
104
-
105
-
106
-
107
-
108
-
109
-
110
-
111
-
112
-
113
-
114
-
115
-
116
-
117
-
118
-
119
-
120
-
121
-
122
-
123
-
124
-
125
-
126
-
127
-
128
-
129
-
130
-
131
-
132
-
133
-
134
-
135
-
136
-
137
-
138
-
139
-
140
-
141
-
142
-
143
-
144
-
145
-
146
-
147
-
148
-
149
-
150
-
151
-
152
-
153
-
154
-
155
-
156
-
157
-
158
-
159
-
160
-
161
-
162
-
163
-
164
-
165
-
166
-
167
-
168
-
169
-
170
-
171
-
172
-
173
-
174
-
175
-
176
-
177
-
178
-
179
-
180
-
181
-
182
-
183
-
184
-
185
-
186
-
187
-
188
-
189
-
190
-
191
-
192
-
193
-
194
-
195
-
196
-
197
-
198
-
199
-
200
-
201
-
202
-
203
-
204
-
205
-
206
-
207
-
 208
208 -
 209
209 -
 210
210 -
 211
211 -
 212
212 -
 213
213 -
 214
214 -
 215
215 -
 216
216 -
 217
217 -
 218
218 -
219
-
220
-
221
-
222
-
223
-
224
-
225
-
226
-
227
-
228
-
229
-
230
-
231
-
232
-
233
-
234
-
235
-
236
-
237
-
238
-
239
-
240
-
241
-
242
-
243
-
244
-
245
-
246
-
247
-
248
-
249
-
250
-
251
-
252
-
253
-
254
-
255
-
256
-
257
-
258
-
259
-
260
-
261
-
262
-
263
-
264
-
265
-
266
-
267
-
268
-
269
-
270
-
271
-
272
-
273
-
274
-
275
-
276
-
277
-
278
-
279
-
280
-
281
-
282
-
283
-
284
-
285
-
286
-
287
-
288
-
289
-
290
-
291
-
292
 |
 |
MAINTENANCE AND ADJUSTMENT
211
A. Tabs (Lower Part)
B. Tab (Upper Part)
C. Projection
D. Hook
E. Rear Middle Fairing
F. Front Middle Fairing
•
Be sure the storage case lid lock is
locked correctly after installing the in-
ner cover.
NOTE
°
The inner cover and the rear middle
fairing use the quick rivets. The quick
rivets can be removed by pushing the
central pin into the quick rivets, and
when installing them, pull the central
pin fully up first, and then push into
the central pin after inserting them.
Quick Rivet Removal
A. Quick Rivet
B. Central Pin
C. Push in.