2015 Kawasaki Vulcan 1700 Voyager ABS Owners Manual - Page 207
2015 Kawasaki Vulcan 1700 Voyager ABS Manual

Page 207 highlights
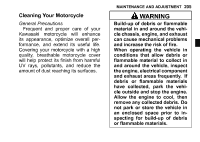
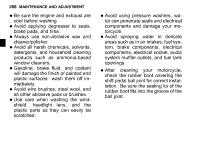
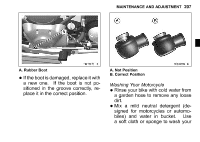
206 MAINTENANCE AND ADJUSTMENT sure the engine and exhaust are • Be cool before washing. applying degreaser to seals, • Avoid brake pads, and tires. use non-abrasive wax and • Always cleaner/polisher. all harsh chemicals, solvents, • Avoid detergents, and household cleaning using pressure washers; wa• Avoid ter can penetrate seals and electrical • • • • products such as ammonia-based window cleaners. Gasoline, brake fluid, and coolant will damage the finish of painted and plastic surfaces: wash them off immediately. Avoid wire brushes, steel wool, and all other abrasive pads or brushes. Use care when washing the windshield, headlight lens, and the plastic parts as they can easily be scratched. cleaning your motorcycle, • After check the rubber boot covering the shift pedal ball joint for correct installation. Be sure the sealing lip of the rubber boot fits into the groove of the ball joint. components and damage your motorcycle. Avoid spraying water in delicate areas such as in air intakes, fuel system, brake components, electrical components, electrical socket, audio system muffler outlets, and fuel tank openings.
-
 1
1 -
2
-
3
-
4
-
5
-
6
-
7
-
8
-
9
-
10
-
11
-
12
-
13
-
14
-
15
-
16
-
17
-
18
-
19
-
20
-
21
-
22
-
23
-
24
-
25
-
26
-
27
-
28
-
29
-
30
-
31
-
32
-
33
-
34
-
35
-
36
-
37
-
38
-
39
-
40
-
41
-
42
-
43
-
44
-
45
-
46
-
47
-
48
-
49
-
50
-
51
-
52
-
53
-
54
-
55
-
56
-
57
-
58
-
59
-
60
-
61
-
62
-
63
-
64
-
65
-
66
-
67
-
68
-
69
-
70
-
71
-
72
-
73
-
74
-
75
-
76
-
77
-
78
-
79
-
80
-
81
-
82
-
83
-
84
-
85
-
86
-
87
-
88
-
89
-
90
-
91
-
92
-
93
-
94
-
95
-
96
-
97
-
98
-
99
-
100
-
101
-
102
-
103
-
104
-
105
-
106
-
107
-
108
-
109
-
110
-
111
-
112
-
113
-
114
-
115
-
116
-
117
-
118
-
119
-
120
-
121
-
122
-
123
-
124
-
125
-
126
-
127
-
128
-
129
-
130
-
131
-
132
-
133
-
134
-
135
-
136
-
137
-
138
-
139
-
140
-
141
-
142
-
143
-
144
-
145
-
146
-
147
-
148
-
149
-
150
-
151
-
152
-
153
-
154
-
155
-
156
-
157
-
158
-
159
-
160
-
161
-
162
-
163
-
164
-
165
-
166
-
167
-
168
-
169
-
170
-
171
-
172
-
173
-
174
-
175
-
176
-
177
-
178
-
179
-
180
-
181
-
182
-
183
-
184
-
185
-
186
-
187
-
188
-
189
-
190
-
191
-
192
-
193
-
194
-
195
-
196
-
197
-
198
-
199
-
200
-
201
-
 202
202 -
 203
203 -
 204
204 -
 205
205 -
 206
206 -
 207
207 -
 208
208 -
 209
209 -
 210
210 -
 211
211 -
 212
212 -
213
-
214
-
215
-
216
-
217
-
218
-
219
-
220
-
221
-
222
-
223
-
224
-
225
-
226
-
227
-
228
-
229
-
230
-
231
-
232
-
233
-
234
-
235
-
236
-
237
-
238
-
239
-
240
-
241
-
242
-
243
-
244
 |
 |