3Ware 9650SE-8LPML-SGL Installation Guide - Page 37
removed in step 1 into the plastic post, and tighten it gently
 |
UPC - 693494600087
View all 3Ware 9650SE-8LPML-SGL manuals
Add to My Manuals
Save this manual to your list of manuals |
Page 37 highlights
Installation Instructions 3 Press down gently until the BBU is seated. Figure 26. BBU control module connected to the controller 4 Turn the controller over, insert the plastic screw head that you removed in step 1 into the plastic post, and tighten it gently but firmly. (Do not over-tighten!) Warning! To avoid possible damage to the controller and the motherboard, make sure the module is connected in the proper orientation, and that the plastic post is attached. When the plastic post and the connector are attached correctly, the module is in the correct orientation. www.3ware.com 33
-
 1
1 -
2
-
3
-
4
-
5
-
6
-
7
-
8
-
9
-
10
-
11
-
12
-
13
-
14
-
15
-
16
-
17
-
18
-
19
-
20
-
21
-
22
-
23
-
24
-
25
-
26
-
27
-
28
-
29
-
30
-
31
-
 32
32 -
 33
33 -
 34
34 -
 35
35 -
 36
36 -
 37
37 -
 38
38 -
 39
39 -
 40
40 -
 41
41 -
 42
42 -
43
-
44
-
45
 |
 |
Installation Instructions
www.3ware.com
33
3
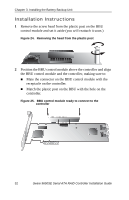
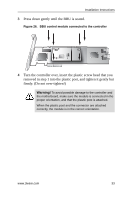
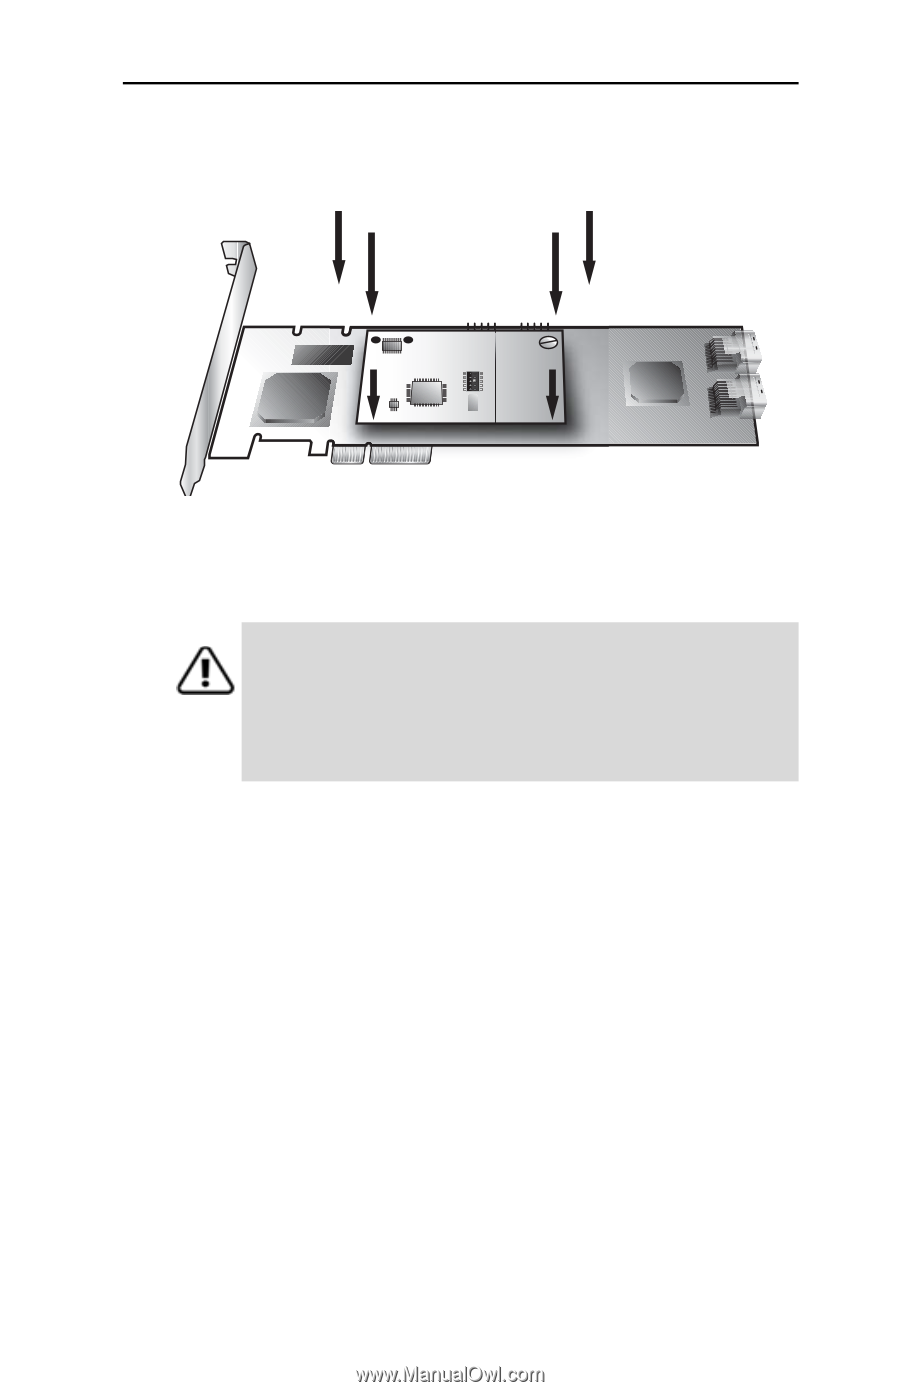
Press down gently until the BBU is seated.
Figure 26.
BBU control module connected to the controller
4
Turn the controller over, insert the plastic screw head that you
removed in step 1 into the plastic post, and tighten it gently but
firmly. (Do not over-tighten!)
Warning!
To avoid possible damage to the controller and
the motherboard, make sure the module is connected in the
proper orientation, and that the plastic post is attached.
When the plastic post and the connector are attached
correctly, the module is in the correct orientation.