3Ware 9650SE-8LPML-SGL Installation Guide - Page 43
ware Serial ATA RAID Controller User Guide, restart it. - cli
 |
UPC - 693494600087
View all 3Ware 9650SE-8LPML-SGL manuals
Add to My Manuals
Save this manual to your list of manuals |
Page 43 highlights
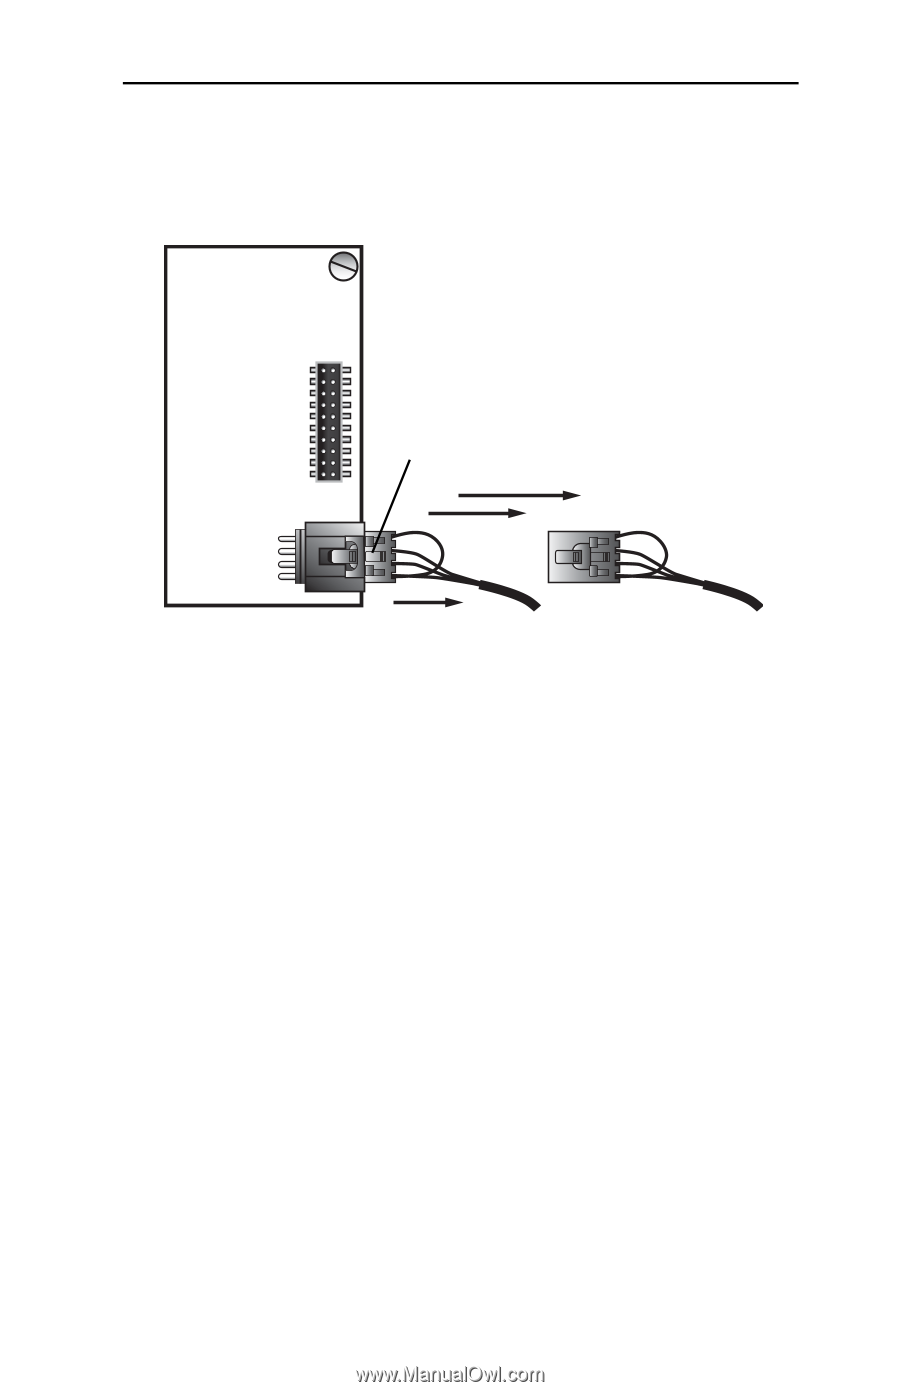
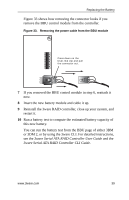
Replacing the Battery Figure 33 shows how removing the connector looks if you remove the BBU control module from the controller. Figure 33. Removing the power cable from the BBU module Press down on the lever-like clip and pull the connector out. 7 If you removed the BBU control module in step 6, reattach it now. 8 Insert the new battery module and cable it up. 9 Reinstall the 3ware RAID controller, close up your system, and restart it. 10 Run a battery test to compute the estimated battery capacity of this new battery. You can run the battery test from the BBU page of either 3BM or 3DM 2, or by using the 3ware CLI. For detailed instructions, see the 3ware Serial ATA RAID Controller User Guide and the 3ware Serial ATA RAID Controller CLI Guide. www.3ware.com 39
-
 1
1 -
2
-
3
-
4
-
5
-
6
-
7
-
8
-
9
-
10
-
11
-
12
-
13
-
14
-
15
-
16
-
17
-
18
-
19
-
20
-
21
-
22
-
23
-
24
-
25
-
26
-
27
-
28
-
29
-
30
-
31
-
32
-
33
-
34
-
35
-
36
-
37
-
 38
38 -
 39
39 -
 40
40 -
 41
41 -
 42
42 -
 43
43 -
 44
44 -
 45
45
 |
 |