Acer DA220HQL User Manual - Page 24
On-screen display (OSD), Displaying HDMI input, Returning to Android - android pc
 |
View all Acer DA220HQL manuals
Add to My Manuals
Save this manual to your list of manuals |
Page 24 highlights
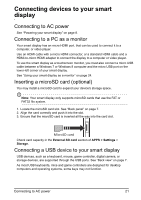
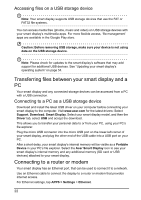
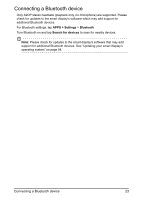
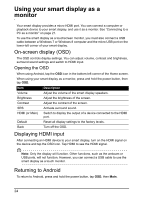
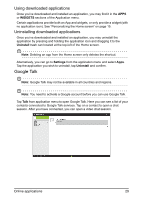
Using your smart display as a monitor Your smart display provides a micro HDMI port. You can connect a computer or playback device to your smart display, and use it as a monitor. See "Connecting to a PC as a monitor" on page 21. To use the smart display as a touchscreen monitor, you must also connect a USB cable between a Windows 7 or Windows 8 computer and the micro USB port on the lower-left corner of your smart display. On-screen display (OSD) The OSD controls display settings. You can adjust volume, contrast and brightness, surround sound settings and switch to HDMI input. Opening the OSD When using Android, tap the OSD icon in the bottom-left corner of the Home screen. When using your smart display as a monitor, press and hold the power button, then tap OSD. Item Description Volume Adjust the volume of the smart display speakers. Brightness Adjust the brightness of the screen. Contrast Adjust the contract of the screen. SRS Activate surround sound. HDMI (or Main) Switch to display the output of a device connected to the HDMI port. Default Reset all display settings to the factory levels. Back Turn off the OSD. Displaying HDMI input After connecting an HDMI device to your smart display, turn on the HDMI signal on the device and tap the OSD icon. Tap HDMI to see the HDMI signal. Note: Only the display will function. Other functions, such as the webcam or USB ports, will not function. However, you can connect a USB cable to use the smart display as a touch monitor. Returning to Android To return to Android, press and hold the power button, tap OSD, then Main. 24
-
 1
1 -
2
-
3
-
4
-
5
-
6
-
7
-
8
-
9
-
10
-
11
-
12
-
13
-
14
-
15
-
16
-
17
-
18
-
 19
19 -
 20
20 -
 21
21 -
 22
22 -
 23
23 -
 24
24 -
 25
25 -
 26
26 -
 27
27 -
 28
28 -
 29
29 -
30
-
31
-
32
-
33
-
34
-
35
-
36
-
37
-
38
-
39
-
40
-
41
-
42
-
43
-
44
-
45
-
46
-
47
-
48
-
49
-
50
-
51
-
52
-
53
-
54
-
55
-
56
-
57
-
58
-
59
-
60
-
61
 |
 |