Acer INTPJ-STK1 User Manual - Page 10
Automatic calibration
 |
View all Acer INTPJ-STK1 manuals
Add to My Manuals
Save this manual to your list of manuals |
Page 10 highlights
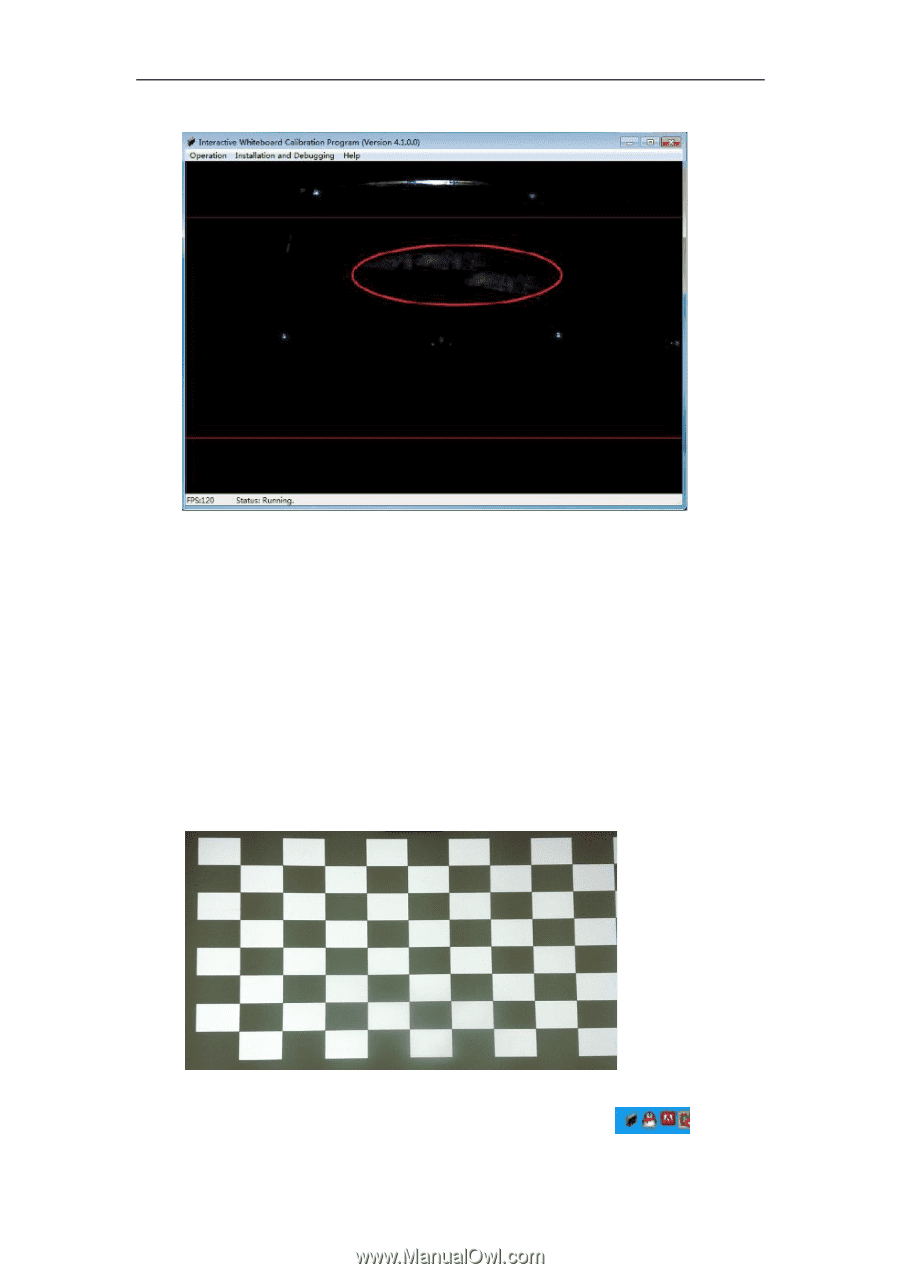
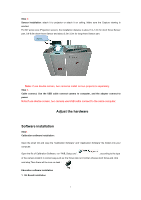
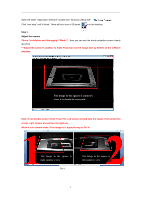
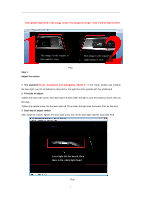
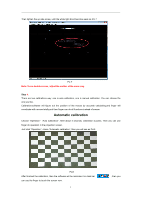
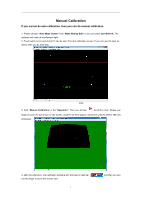
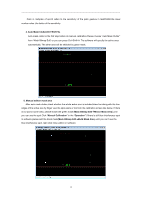
Then tighten the up side screw, until the white light bond become weak as Pic 7 Pic 7 Note: If use double screen, adjust the emitter at the same way. Step 4. There are two calibrations way: one is auto calibration, one is manual calibration. You can choose the one you like. Calibration:software will figure out the position of the mouse by accurate calculating,and finger will coordinate with mouse totally,and then finger can do all functions instead of mouse. Automatic calibration Choose "Operation"- "Auto Calibration". After about 4 seconds, calibration success. Then you can use finger do operation in the projection screen. Just click "Operation", chose "Automatic calibration", then you will see as Pic8: Pic8 After finished the calibration, then the software will be minimize it on task bar can use the finger to touch the screen now. 8 , then you
-
 1
1 -
2
-
3
-
4
-
 5
5 -
 6
6 -
 7
7 -
 8
8 -
 9
9 -
 10
10 -
 11
11 -
 12
12 -
 13
13 -
 14
14 -
 15
15 -
16
-
17
-
18
-
19
-
20
-
21
-
22
-
23
-
24
 |
 |