Acer INTPJ-STK1 User Manual - Page 9
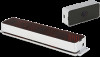
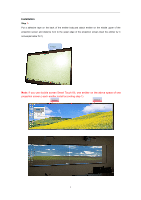
Laser light hit the board, then, there is the white light band
 |
View all Acer INTPJ-STK1 manuals
Add to My Manuals
Save this manual to your list of manuals |
Page 9 highlights
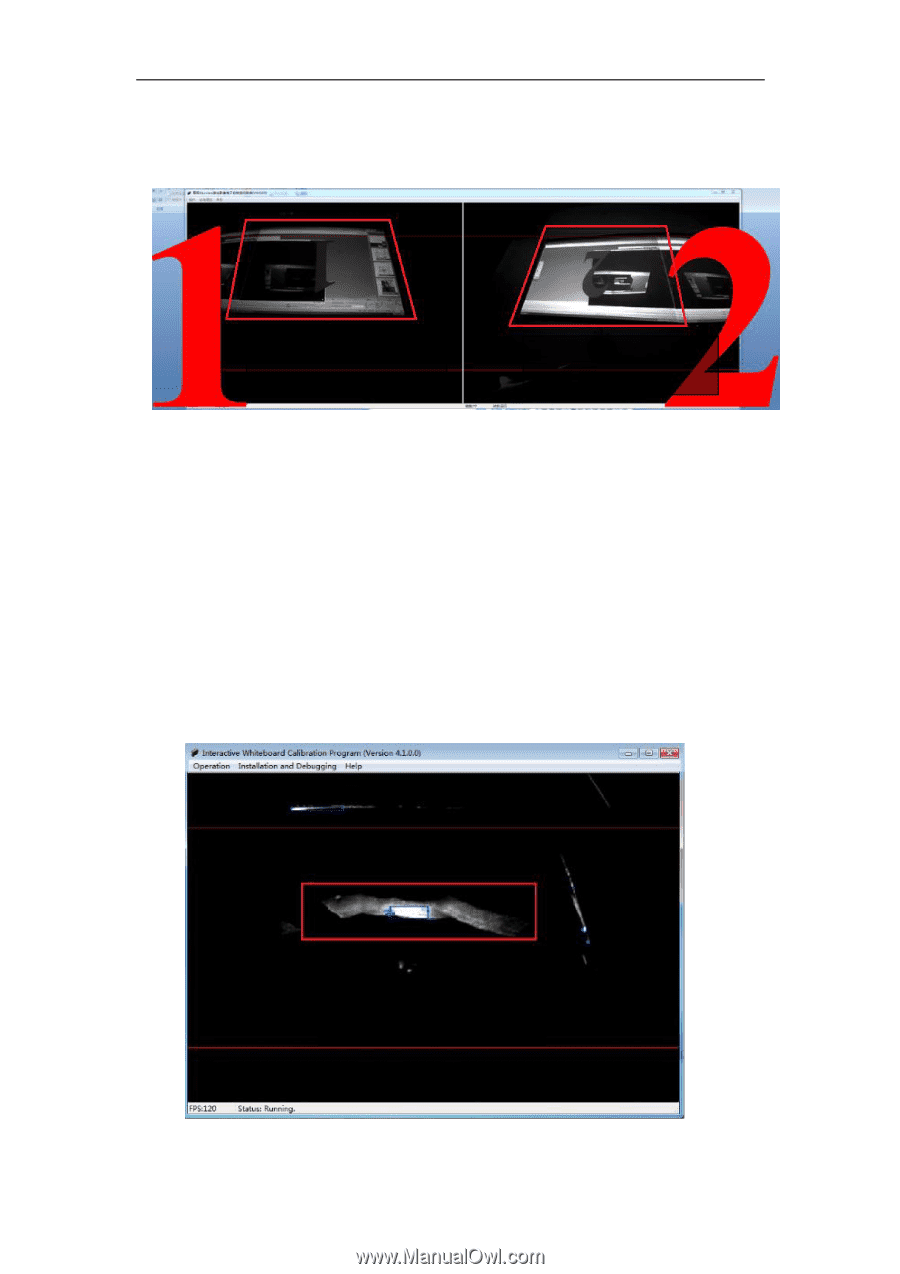
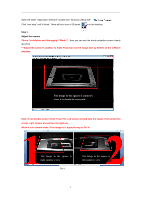
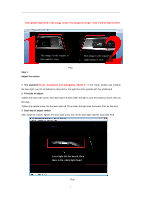
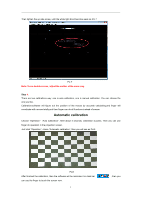
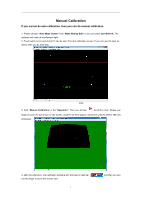
Then please right click in the image, chose "exchange the image", then it will be right as Pic5: The image in the square is left camera's view The image in the square is right camera's view Pic5 Step 3. Adjust the emitter 1. The standard:Chose "Installation and debugging"-"Mode 2". In this mode, emitter cast invisible the laser light over the whiteboard is about 5mm, the light should be parallel with the whiteboard. 2. Principle of adjust: Tighten the down-side screw, then laser light Tilt down.when the light is over the board too much, then do this step . Tighten the upside screw, the the laser light will Tilt up.when the light heat the board, then do this step. 3. Best way of adjust emitter After install the emitter, tighten the down side screw first, let the laser light heat the board like Pic6 Laser light hit the board, then there is the white light band Pic6 7
-
 1
1 -
2
-
3
-
 4
4 -
 5
5 -
 6
6 -
 7
7 -
 8
8 -
 9
9 -
 10
10 -
 11
11 -
 12
12 -
 13
13 -
 14
14 -
15
-
16
-
17
-
18
-
19
-
20
-
21
-
22
-
23
-
24
 |
 |