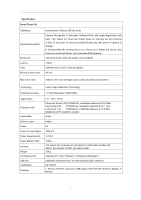
Acer INTPJ-STK1 User Manual - Page 5
Hardware Installation
 |
View all Acer INTPJ-STK1 manuals
Add to My Manuals
Save this manual to your list of manuals |
Page 5 highlights
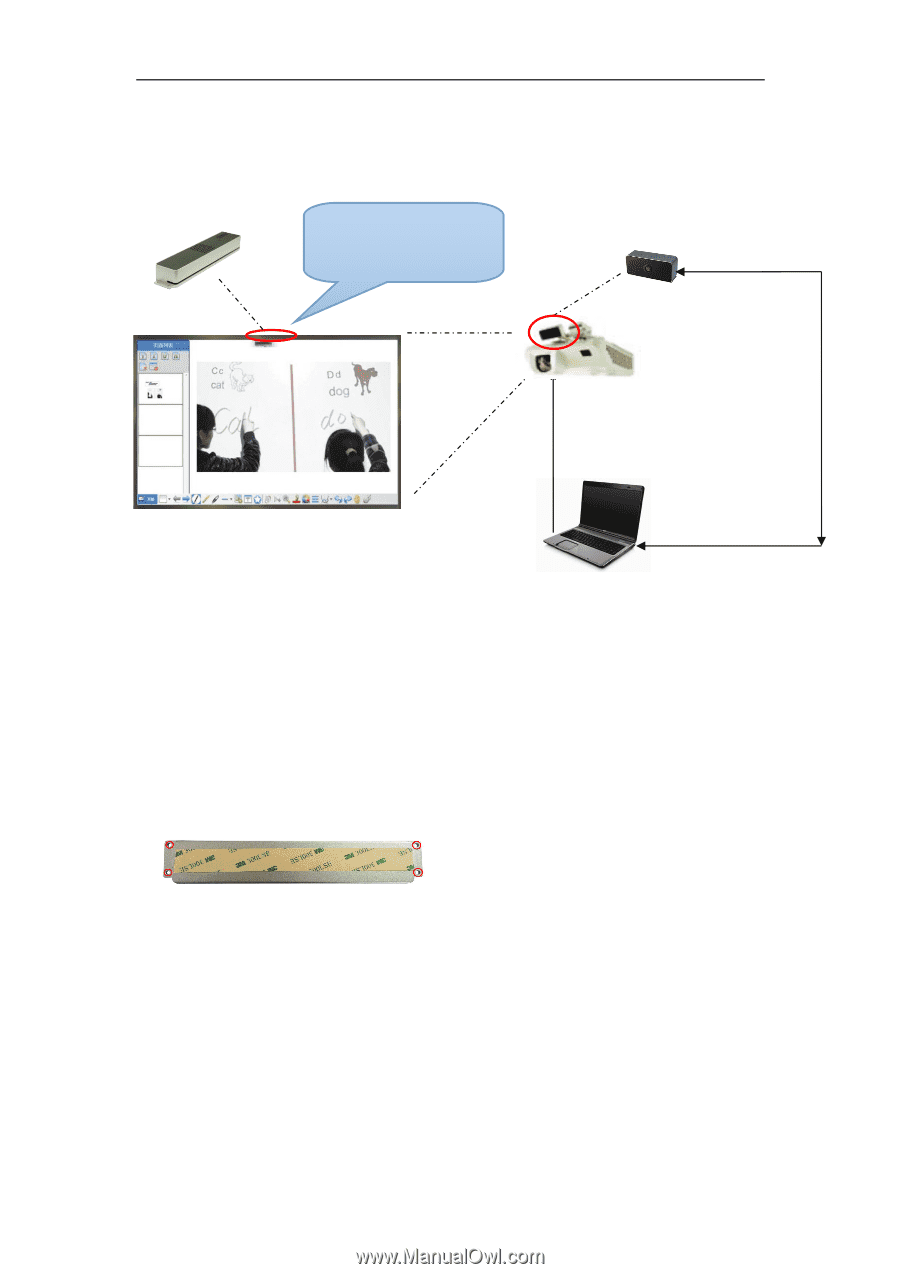
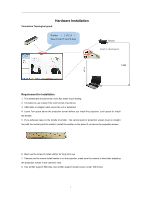
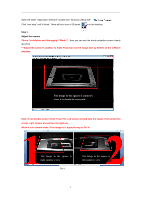
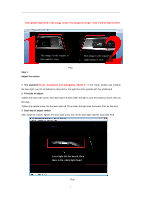
Hardware Installation Connection Topological graph: Emitter ( 3.3V,2A ) Size:3.5cm*17cm*2.4cm Sensor Attach to the projector USB VGA Requirement for installation 1. The whiteboard should be flat, more flat, better touch feeling. 2. It is better to use curtain if the room be full of sunshine. 3. USB cable or adapter cable cannot be cut or extended. 4. Leave 7cm space above the projection screen before you install the projection, such space for install the emitter. 5. Put a adhesive tape on the middle of emitter(the central point of projection screen must on straight line with the central point the emitter) ,install the emitter on the board 3 cm above the projection screen. 6. Must use the screw to install emitter for long-term use 7. Camera use the mount install beside or on the projector, make sure the camera is fixed after adjusting the projection screen in the camera's view. 8. One emitter support 90inches, two emitter support double screen under 180 inches. 3
-
 1
1 -
 2
2 -
 3
3 -
 4
4 -
 5
5 -
 6
6 -
 7
7 -
 8
8 -
 9
9 -
 10
10 -
 11
11 -
12
-
13
-
14
-
15
-
16
-
17
-
18
-
19
-
20
-
21
-
22
-
23
-
24
 |
 |