Acer INTPJ-STK1 User Manual - Page 8
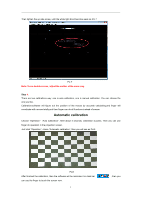
The image in the square is camera's, view, it is should be trapezoid
 |
View all Acer INTPJ-STK1 manuals
Add to My Manuals
Save this manual to your list of manuals |
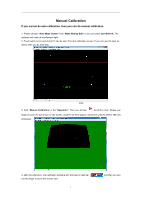
Page 8 highlights
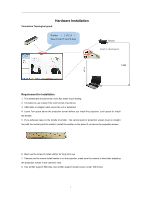
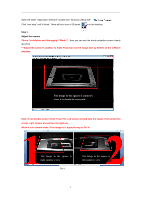
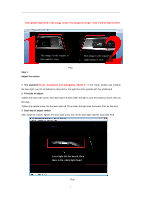
Open the folder "Application Software'',double click "GLboard_Setup.exe" Click "next step" until it fished. There will be a icon of GLboard on the desktop. Step 2. Adjust the camera Chose "Installation and debugging"-"Mode 1", then you can see the whole projection screen clearly (As Pic3). ***Adjust the camera's position to make Projection screen image take up 60-80% of the software interface. The image in the square is camera's view, it is should be trapezoid Note: If use double screen Smart Touch Kit, Left camera should take the image of left projection screen, right camera should take the right one. When it is in camera mode, if the image is in opposite way as Pic 4: The image in the square is right camera's view Pic 4 The image in the square is left camera's view 6
-
 1
1 -
2
-
 3
3 -
 4
4 -
 5
5 -
 6
6 -
 7
7 -
 8
8 -
 9
9 -
 10
10 -
 11
11 -
 12
12 -
 13
13 -
14
-
15
-
16
-
17
-
18
-
19
-
20
-
21
-
22
-
23
-
24
 |
 |
