Acer TravelMate 310 User Guide
Acer TravelMate 310 Manual
 |
View all Acer TravelMate 310 manuals
Add to My Manuals
Save this manual to your list of manuals |
Acer TravelMate 310 manual content summary:
- Acer TravelMate 310 | User Guide - Page 1
book Page i Tuesday, October 27, 1998 5:17 PM Copyright © 1998 Acer Incorporated All Rights Reserved - Printed in Taiwan TravelMate 310 Series Notebook Computer User's Guide Part No. 49.42B01.011 Original Issue: June 1998 Changes may be made periodically to the information in this publication. Such - Acer TravelMate 310 | User Guide - Page 2
310-e.book Page ii Tuesday, October 27, 1998 5:17 PM ii - Acer TravelMate 310 | User Guide - Page 3
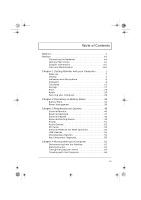
xvi Support Information xvii Care and Maintenance xviii Chapter 1 Getting Familiar with your Computer 1 Features 2 Display 4 Indicators and Microphone 6 Keyboard 8 Touchpad 15 Storage 17 Ports 19 Audio 26 Securing your Computer 28 Chapter 2 Operating on Battery Power 31 Battery Pack - Acer TravelMate 310 | User Guide - Page 4
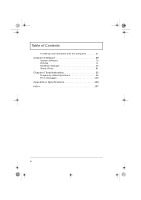
, 1998 5:17 PM Table of Contents Traveling Internationally with the Computer 67 Chapter 5 Software 69 System Software 70 PhDISK 71 Notebook Manager 72 Setup Utility 81 Chapter 6 Troubleshooting 95 Frequently-Asked Questions 96 Error Messages 100 Appendix A Specifications 103 Index 107 iv - Acer TravelMate 310 | User Guide - Page 5
"NSTL Hardware Tested Year 2000 Compliant" logo. The Travelmate 310 series notebook computer has been tested both by Acer's internal test labs and NSTL's YMARK2000 certification test. These tests certify that the Travelmate 310 series notebook computer will successfully make the year 2000 transition - Acer TravelMate 310 | User Guide - Page 6
in a particular installation. If this device does cause harmful interference to radio or television reception, which can be determined by turning the device off and on, the user is encouraged to try to correct the interference by one or more of the following measures: 1. Reorient or relocate the - Acer TravelMate 310 | User Guide - Page 7
310-e.book Page vii Tuesday, October 27, 1998 5:17 PM Notices Caution Changes or modifications not expressly approved by the manufacturer could void the user's authority, which is granted by the Federal Communications Commission, to operate this computer. Use Conditions This part complies with Part - Acer TravelMate 310 | User Guide - Page 8
310-e.book Page viii Tuesday, October 27, 1998 5:17 PM Notices Important Safety Instructions 1. Read these instructions carefully. Save these instructions for future reference. 2. Follow all warnings and instructions damage to the product. 6. Slots and openings in the cabinet and the back or bottom - Acer TravelMate 310 | User Guide - Page 9
this product through cabinet slots as they may touch dangerous voltage points or short out parts that could result in a fire or electric shock. Never spill liquid of any kind on the product. 11.Do not attempt to service this product yourself, as opening or removing covers may expose you to dangerous - Acer TravelMate 310 | User Guide - Page 10
310-e.book Page x Tuesday, October 27, 1998 5:17 PM Notices 15.Use only the proper type of power supply cord set (provided in your accessories box) for this unit. It should be a detachable type: UL listed/CSA certified, type SPT-2, rated 7A 125V minimum, VDE approved or its equivalent. Maximum - Acer TravelMate 310 | User Guide - Page 11
310-e.book Page xi Tuesday, October 27, 1998 5:17 PM Notices Lithium Battery Statement CAUTION Danger of explosion if battery is incorrectly replaced. Replace only with the same or equivalent type recommended by the manufacturer. Discard used batteries according to the manufacturer's instructions. - Acer TravelMate 310 | User Guide - Page 12
310-e.book Page xii Tuesday, October 27, 1998 5:17 PM xii - Acer TravelMate 310 | User Guide - Page 13
book Page xiii Tuesday, October 27, 1998 5:17 PM Preface This manual describes features of the TravelMate 310 Series notebook computers. The TravelMate series computers incorporate such features as CardBus, 16-bit stereo audio, Fast Infrared, internal pointing device, and Universal Serial Bus. This - Acer TravelMate 310 | User Guide - Page 14
into the computer (c) and then lock the battery in place (d). a b c d Note: When using a battery pack for the first time, fully recharge the battery, then disconnect the adapter to use up the battery before recharging again. You only need to do this once with a new battery. xiv User's Guide - Acer TravelMate 310 | User Guide - Page 15
-in port on the computer's rear panel and the other end to a properly grounded power outlet. 3. Open the display cover and slide the power switch towards the rear of the computer then release it to turn on the power. The POST (Power On Self-Test) routine executes and Windows begins loading. Note: To - Acer TravelMate 310 | User Guide - Page 16
310-e.book Page xvi Tuesday, October 27, 1998 5:17 PM Preface Getting Help Online This user's guide provides clear and concise information about the notebook, so read it thoroughly. To provide you with help when traveling, the notebook also comes with a comprehensive online help. Accessing Online - Acer TravelMate 310 | User Guide - Page 17
310-e.book Page xvii Tuesday, October 27, 1998 5:17 PM Preface Support Information Your notebook is backed by an International Traveler's Warranty (ITW) that gives you security and peace of mind when traveling. Our worldwide network of service centers are there to give you a helping hand. An ITW - Acer TravelMate 310 | User Guide - Page 18
objects on top of the notebook to avoid damaging the notebook. u Never place the notebook on uneven surfaces. Taking Care of your AC Adapter Here are some ways to take care of your AC adapter: u Do not connect the adapter to any other device. u Do not step on the power cord or place heavy - Acer TravelMate 310 | User Guide - Page 19
310-e.book Page xix Tuesday, October 27, Turn the power off before removing or replacing batteries. u Do not tamper with batteries. Keep them away from children. u Dispose of used batteries according to local regulations. Recycle if at all possible. Cleaning and Servicing When cleaning the notebook - Acer TravelMate 310 | User Guide - Page 20
310-e.book Page xx Tuesday, October 27, 1998 5:17 PM xx User's Guide - Acer TravelMate 310 | User Guide - Page 21
310-e.book Page 1 Tuesday, October 27, 1998 5:17 PM 1 Getting Familiar with your Computer This computer combines high-performance, versatility, power management features and multimedia capabilities with a unique style and ergonomic design. Work with unmatched productivity and reliability with your - Acer TravelMate 310 | User Guide - Page 22
ROM drive (optional) u High-capacity, enhanced-IDE hard disk u Lithium-Ion battery pack u Heuristic power management system with standby and hibernation power saving modes Multimedia u 16-bit high-fidelity stereo audio with 3-D sound u Built-in speaker u Built-in microphone Connectivity u High-speed - Acer TravelMate 310 | User Guide - Page 23
310-e.book Page 3 Tuesday, October 27, 1998 5:17 PM Features u Wide and curved palm rest u Ergonomically-centered touchpad pointing device Expansion u CardBus PC card (formerly PCMCIA) slots (two type II/I or one type III) with ZV (Zoomed Video) port support u Upgradeable memory and hard disk - Acer TravelMate 310 | User Guide - Page 24
. Opening and Closing the Display To open the display, slide the display lid latch to the left and lift up the lid. Then tilt it to a comfortable viewing position. The computer employs a microswitch that turns off the display (and enters standby mode) to conserve power when 4 User's Guide - Acer TravelMate 310 | User Guide - Page 25
310-e.book Page 5 Tuesday, October 27, 1998 5:17 PM Display you close the display cover, and turns it back on when you open the display cover. Note: If an external monitor is connected, the computer turns off the display (but does not enter standby mode) when you close the display cover. To close - Acer TravelMate 310 | User Guide - Page 26
an internal microphone for multimedia purposes. Icon Function Description Power Lights when the computer is on. Standby Media Activity Lights when the computer enters Standby mode. Lights when the hard disk is active. Battery Charge Lights when the battery is being charged. 6 User's Guide - Acer TravelMate 310 | User Guide - Page 27
310-e.book Page 7 Tuesday, October 27, 1998 5:17 PM Indicators and Microphone Icon Function Caps Lock Num Lock Microphone Description Lights when Caps Lock is activated Lights when Numeric Lock is activated Use for sound input Chapter 1 Getting Familiar with your Computer 7 - Acer TravelMate 310 | User Guide - Page 28
310-e.book Page 8 Tuesday, October 27, 1998 5:17 PM Keyboard Keyboard The keyboard be to connect an external keypad. Scroll Lock When Scroll Lock is on, the screen moves one line up or down when you press ↑ or ↓ respectively. Scroll lock does not work with some applications. 8 User's Guide - Acer TravelMate 310 | User Guide - Page 29
310-e.book Page 9 Tuesday, October 27, 1998 5:17 PM Embedded Keypad Keyboard The embedded keypad functions like a desktop numeric keypad. It is indicated by small characters - Acer TravelMate 310 | User Guide - Page 30
310-e.book Page 10 Tuesday, October 27, 1998 5:17 PM Keyboard Windows Keys The keyboard has three keys that perform Windows specific All) Shift + ÿ + M (Undo Minimize All) ÿ + R (Display Run dialog box) Application key Opens the application's context menu (same as right-click). 10 User's Guide - Acer TravelMate 310 | User Guide - Page 31
to access most of the computer's controls like screen contrast and brightness, volume output and the BIOS setup utility. Hot Key Icon Function Description Fn-F1 Help Displays a list of the hotkeys and their functions. Fn-F2 Fn-F3 Fn-F4 Notebook Manager Standby Hibernation Access the - Acer TravelMate 310 | User Guide - Page 32
Fn-↓ Contrast down Contrast up PgUp Page Up PgDn Page Down Decreases the screen contrast (available only for models with STN displays). Increases the screen contrast (available only for models with STN displays). Scrolls the screen one page up. Scrolls the screen one page down. 12 User's Guide - Acer TravelMate 310 | User Guide - Page 33
310-e.book Page 13 Tuesday, October 27, 1998 5:17 PM Keyboard Hot Key Icon Function Description Fn-→ End End Go to the end of the screen. Fn-← Home Home Go to the beginning of the screen. Fn-D Screen blank Turns the display screen backlight off to save power. Press any key to return. - Acer TravelMate 310 | User Guide - Page 34
310-e.book Page 14 Tuesday, October 27, 1998 5:17 PM Keyboard Keyboard Ergonomics Located below the keyboard, the wide and curved palm rest gives you a place to rest your hands while you type. 14 User's Guide - Acer TravelMate 310 | User Guide - Page 35
310-e.book Page 15 Tuesday, October 27, 1998 5:17 PM Touchpad Touchpad The finger on the surface of the touchpad. The central location on the palm rest provides ample comfort and support. Note: Connecting an external PS/2 mouse to the computer will automatically disable the touchpad. Touchpad Basics - Acer TravelMate 310 | User Guide - Page 36
310-e.book Page 16 Tuesday, October 27, 1998 5:17 PM Touchpad Function Execution Left Button Right the touchpad dry and clean.The touchpad is sensitive to finger movements. Hence, the lighter the touch, the better the response. Tapping too hard will not increase the touchpad's responsiveness. 16 - Acer TravelMate 310 | User Guide - Page 37
310-e.book Page 17 Tuesday, October 27, 1998 5:17 PM Storage Storage This computer comes with a high-capacity Enhanced-IDE hard disk. You can also connect - Acer TravelMate 310 | User Guide - Page 38
310-e.book Page 18 Tuesday, October 27, 1998 5:17 PM Storage Connecting an External Floppy Drive Connect the larger on the external floppy drive. Note: The external floppy drive is hot-pluggable. You do not need to turn off the computer to connect and use the floppy drive. 18 User's Guide - Acer TravelMate 310 | User Guide - Page 39
310-e.book Page 19 Tuesday, October 27, 1998 5:17 PM Ports Ports Ports allow you to connect peripheral devices to your computer as you would with a desktop PC. Note: See Chapter 3 on how to connect external devices to the computer. Rear Ports Caution: When opening the rear port cover, carefully - Acer TravelMate 310 | User Guide - Page 40
310-e.book Page 20 Tuesday, October 27, 1998 5:17 PM Ports # Icon 3 4 5 1024x768 resolution, 64K-colors) USB Port USB devices DC-in jack AC adapter and power outlet Fast Infrared The computer's fast infrared (FIR) port allows you to do at a distance of up to one meter. 20 User's Guide - Acer TravelMate 310 | User Guide - Page 41
310-e.book Page 21 Tuesday, October 27, 1998 5:17 PM Ports To use FIR, position two IR-aware devices such that their IR ports are no - Acer TravelMate 310 | User Guide - Page 42
or headphones Modem jack Phone line PC Card slots 16-bit PC Cards and 32-bit CardBus PC Cards (Only the lower PC Card socket supports ZV PC Cards) Security Lock a Kensington-compatible key-based computer security lock 22 User's Guide - Acer TravelMate 310 | User Guide - Page 43
310-e.book Page 23 Tuesday, October 27, 1998 5:17 PM Ports Fax/Data Modem cable from the modem port to a telephone jack. Start your communications software program. See your communications manual for instructions. PC Card Slots There are two type II/I or one type III CardBus PC Card slots found on - Acer TravelMate 310 | User Guide - Page 44
310-e.book Page 24 Tuesday, October 27, 1998 5:17 PM Ports ZV (Zoomed Video) port support allows your computer to support hardware MPEG in the form of a ZV PC card. Only the lower PC Card socket supports ZV PC cards. Note: Refer to your card's manual for details on how to install and use the card - Acer TravelMate 310 | User Guide - Page 45
310-e.book Page 25 Tuesday, October 27, 1998 5:17 PM Ports Then press the slot eject button to eject the card. Chapter 1 Getting Familiar with your Computer 25 - Acer TravelMate 310 | User Guide - Page 46
for excellent sound output. Speaker For TFT Display Type Model Speaker For STN Display Type Model Besides the built-in speaker, there is an audio port on the right panel of the computer. See "Audio Devices" on page 52 for more information on connecting external audio devices. 26 User's Guide - Acer TravelMate 310 | User Guide - Page 47
310-e.book Page 27 Tuesday, October 27, 1998 5:17 PM Audio Controlling Volume The volume of the computer is easily controlled using hotkeys. Press Fn-F7 to decrease the speaker's volume level or press Fn-F8 - Acer TravelMate 310 | User Guide - Page 48
310-e.book Page 28 Tuesday, October 27, 1998 5:17 object such as a table or locked drawer handle. Insert the lock into the notch and turn the key to secure the lock. Passwords A two-level password scheme protects your computer from Setup Utility" on page 81 for details. 28 User's Guide - Acer TravelMate 310 | User Guide - Page 49
310-e.book Page 29 Tuesday, October 27, 1998 5:17 PM Securing your Computer u User Password secures your computer against unauthorized use. Important: Do not forget your password! If you forget your password, you need to contact your dealer. Note: - Acer TravelMate 310 | User Guide - Page 50
310-e.book Page 30 Tuesday, October 27, 1998 5:17 PM 30 User's Guide - Acer TravelMate 310 | User Guide - Page 51
310-e.book Page 31 Tuesday, October 27, 1998 5:17 PM 2 Operating on Battery Power The computer operates on AC or battery power. This chapter contains the information you need to know to operate the computer on battery power. It also includes information on how your computer manages and saves power. - Acer TravelMate 310 | User Guide - Page 52
flashes at regular intervals. This tells the user that the battery power is critically low. You can correct this situation by recharging the battery pack. Whenever possible, use the AC adapter. The battery will come in handy when you travel or during a power failure. It is advisable to have an - Acer TravelMate 310 | User Guide - Page 53
below 0ºC (32ºF) or above 60ºC (140ºF). This may adversely affect the battery pack. Installing and Removing the Battery Pack Before removing the battery pack, make sure that you have an AC adapter connected to the computer; otherwise turn off the computer. Follow these steps: 1. Slide down the cover - Acer TravelMate 310 | User Guide - Page 54
pack inside the battery compartment and plug the AC adapter into the computer and an electrical outlet. Charging Modes The adapter has three charging modes: u Rapid mode The computer uses rapid charging when power is turned off and a powered AC adapter is connected to it. In rapid 34 User's Guide - Acer TravelMate 310 | User Guide - Page 55
using the Windows battery gauge. Using the Windows Battery Meter The Windows battery meter indicates the present battery level. Simply rest your cursor on the battery gauge (or AC plug) icon on the taskbar to see the present charge level of your battery. Chapter 2 Operating on Battery Power 35 - Acer TravelMate 310 | User Guide - Page 56
temperature, the faster the battery pack self-discharges. u The batteries can be recharged about 300 times when used as directed. Excess recharging decreases battery life. u Take care of your battery pack and AC adapter. See "Care and Maintenance" on page xviii of the Preface. 36 User's Guide - Acer TravelMate 310 | User Guide - Page 57
short beeps every minute, if you enabled the Battery-low Warning Beep parameter in Setup u The power indicator flashes at regular intervals until battery power is depleted When you receive a battery-low warning, you have around three minutes to save your work. If you do not connect the AC adapter - Acer TravelMate 310 | User Guide - Page 58
. 2. Enter Hibernation mode. 3. Install the extra battery pack. 4. Resume from Hibernation mode. AC adapter or power outlet not available 1. Save all necessary files. 2. Exit the application. 3. Power off the computer. or 1. Save all necessary files. 2. Enter Hibernation mode. 38 User's Guide - Acer TravelMate 310 | User Guide - Page 59
310-e.book Page 39 Tuesday, October 27, 1998 5:17 PM Power Management Power Management This computer has a built-in power management Note: We recommend you enable power management to prolong your battery life. Power Management Modes Display Standby Mode Screen activity is determined by the keyboard - Acer TravelMate 310 | User Guide - Page 60
by the Standby Timeout to elapse without any system activity u Closing the display cover u Allowing the computer to enter Hibernation mode when battery is low, but u the Hibernation file is invalid or not present, or u Allowing the operating system power saving modes to invoke it 40 User's Guide - Acer TravelMate 310 | User Guide - Page 61
mode: u The buzzer beeps u The Standby indicator lights Warning: Unstored data is lost when you turn off the computer power in Standby mode (by holding the power switch for more than 4 seconds) or when the battery is drained. To leave Standby mode and return to normal mode: u Press any key u Move - Acer TravelMate 310 | User Guide - Page 62
F4 u Allowing the Hibernation Timeout to elapse without any system activity u Experiencing a battery low condition for about a minute. With the Battery Low Suspend parameter in Setup set to [ENABLED] u Allowing the operating system power saving modes to invoke it Note: If the computer beeps but does - Acer TravelMate 310 | User Guide - Page 63
. An increasing number of software applications support APM to take advantage of power saving features and allow greater system availability without degrading performance. For more information about APM under Windows 95 or Windows 98, refer to your Windows 95 or 98 user's manual. Note: If you enable - Acer TravelMate 310 | User Guide - Page 64
310-e.book Page 44 Tuesday, October 27, 1998 5:17 PM 44 User's Guide - Acer TravelMate 310 | User Guide - Page 65
with ease. When connecting peripherals, read the manual included with the peripheral for operating instructions. You can also add more memory or upgrade 51 Audio Devices 52 PC Cards 53 External PCMCIA CD-ROM (optional 54 USB Devices 55 Miscellaneous Options 56 Additional Power Packs 56 Battery - Acer TravelMate 310 | User Guide - Page 66
Monitor External Monitor To show graphical effects on a larger display, connect an external monitor to the CRT port. Read the monitor manual for additional instructions. Note: If an external monitor is not connected, closing the display cover puts the computer into standby mode. 46 User's Guide - Acer TravelMate 310 | User Guide - Page 67
310-e.book Page 47 Tuesday, October 27, 1998 5:17 PM External Keyboard External Keyboard This computer has a keyboard with full-sized keys and an embedded keypad. - Acer TravelMate 310 | User Guide - Page 68
310-e.book Page 48 Tuesday, October 27, 1998 5:17 PM External Keypad External Keypad You can also use a 17-key numeric keypad for numbersensitive data entry applications. To connect the keypad, plug in the keypad connector to the PS/2 port. 48 User's Guide - Acer TravelMate 310 | User Guide - Page 69
310-e.book Page 49 Tuesday, October 27, 1998 5:17 PM External Pointing Device External Pointing Device This computer accepts either a PS/2-compatible or serial mouse or similar pointing device. External PS/2 Mouse The built-in touchpad works alternately with an external PS/2 mouse which is hot- - Acer TravelMate 310 | User Guide - Page 70
310-e.book Page 50 Tuesday, October 27, 1998 5:17 PM External Pointing Device External Serial Mouse If you use a serial mouse, plug it into the serial port. To enable the serial mouse, use the Add New Hardware tool in the Windows Control Panel. 50 User's Guide - Acer TravelMate 310 | User Guide - Page 71
5:17 PM Printer Printer This computer supports both serial and parallel printers. For a serial printer, plug the printer cable into a serial port. For a parallel printer, plug the printer cable into the parallel port. See your printer manual for operating instructions. Note: If the printer does not - Acer TravelMate 310 | User Guide - Page 72
Devices Audio Devices Audio devices are easy to connect with the audio ports accessible from the right side of the computer. You can plug in an external microphone or audio line-in device to the microphone-in jack. Amplified speakers or headphones connect to the speaker-out jack . 52 User's Guide - Acer TravelMate 310 | User Guide - Page 73
310-e.book Page 53 Tuesday, October 27, 1998 5:17 PM PC Cards PC Cards The computer has two CardBus PC card slots that accommodate two type I/ - Acer TravelMate 310 | User Guide - Page 74
an external CD-ROM device using a PC Card. Microphone-in jack Audio cable AC adapter Line-out jack To connect an external CD-ROM drive: 1. Turn on your computer. 2. Plug the external CD-ROM's power adapter into an electrical outlet and turn the external CD-ROM on. 3. Insert the external CD-ROM - Acer TravelMate 310 | User Guide - Page 75
310-e.book Page 55 Tuesday, October 27, 1998 5:17 PM USB Devices If you want to listen to audio CDs from the external CDROM drive, we advise you to use amplified external speakers for better quality sound. For more information about the external CD-ROM, please refer to its user's manual. USB Devices - Acer TravelMate 310 | User Guide - Page 76
310-e.book Page 56 Tuesday, October 27, 1998 5:17 PM Miscellaneous Options Miscellaneous Options Additional Power Packs You can order spare batteries and AC adapters. Battery Pack It is good practice to have a spare battery around, especially when you travel. The Li-Ion batteries, coupled with power - Acer TravelMate 310 | User Guide - Page 77
310-e.book Page 57 Tuesday, October 27, 1998 5:17 PM Miscellaneous Options Connect the single connector end of the Y-bridge cable to the computer's PS/2 port - Acer TravelMate 310 | User Guide - Page 78
310-e.book Page 58 Tuesday, October 27, 1998 5:17 PM Miscellaneous Options File Transfer Cable Besides using the infrared port, you can also transfer the file transfer cable between the parallel ports of the two computers and use your file transfer utility to perform the transfer. 58 User's Guide - Acer TravelMate 310 | User Guide - Page 79
310-e.book Page 59 Tuesday, October 27, 1998 5:17 PM Key Component Upgrades Key Component Upgrades The computer delivers superior power and performance. However, some users lists the possible memory configurations: Important! This system can only support SDRAM memory type. Slot 1 0 MB 16 MB 32 MB - Acer TravelMate 310 | User Guide - Page 80
310-e.book Page 60 Tuesday, October 27, 1998 5:17 PM Key Component Upgrades Hard Disk Upgrade You can upgrade your hard disk with a higher . The computer uses a 9.5mm 2.5-inch Enhanced-IDE hard disk. Note: Contact your authorized dealer if you decide to perform a hard disk upgrade. 60 User's Guide - Acer TravelMate 310 | User Guide - Page 81
310-e.book Page 61 Tuesday, October 27, 1998 5:17 PM 4 Moving with your Computer This chapter gives you tips and hints on things to consider when - Acer TravelMate 310 | User Guide - Page 82
310-e.book Page 62 Tuesday, October 27, 1998 5:17 PM Disconnecting from the Desktop Disconnecting from the Desktop Follow these steps to disconnect your computer from external accessories: 1. Save your work in progress. 2. Shut down the operating system. 3. Turn off the computer. 4. Disconnect the - Acer TravelMate 310 | User Guide - Page 83
310-e.book Page 63 Tuesday, October 27, 1998 5:17 PM Moving Around Moving you go within the building. To bring the computer out of standby mode, open the display. What To Bring to Short Meetings A fully charged battery runs the computer for 2-3 hours under most circumstances. If your meeting is - Acer TravelMate 310 | User Guide - Page 84
cover of the computer. Pressure against the top cover can damage the screen What To Bring with You Unless you already have some items at home, bring the following items with you: u AC adapter and power cord u The printed user's manual u Media bay modules (external floppy and CD-ROM drive) Special - Acer TravelMate 310 | User Guide - Page 85
310-e.book Page 65 Tuesday, October 27, 1998 5:17 PM Taking the Computer Home u Changes in temperature and humidity can cause condensation. Allow the computer to return to room temperature, and inspect the screen for condensation before turning Office If you frequently work on your computer at home - Acer TravelMate 310 | User Guide - Page 86
turn on your computer when bringing it into the gate area. What To Bring with You Bring the following items with you: u AC adapter u Spare, fully-charged battery packs u Media bay modules (external floppy and CD-ROM drive) u Additional printer driver to hand-held metal detectors. 66 User's Guide - Acer TravelMate 310 | User Guide - Page 87
310 Power cords that are appropriate to the country to which you are traveling u Media bay modules u Spare, fully-charged battery packs u Additional printer driver files AC voltage and the AC adapter power cord specifications are compatible. If not, purchase a power cord that is compatible with the - Acer TravelMate 310 | User Guide - Page 88
310-e.book Page 68 Tuesday, October 27, 1998 5:17 PM 68 User's Guide - Acer TravelMate 310 | User Guide - Page 89
utilities bundled with your computer. Contents System Software 70 PhDISK 71 Notebook Manager 72 Information Viewer 73 Boot Sequence 74 Password 75 Setting the Supervisor Password 76 Setting the User Password 77 Power Management 78 Display Device 79 Setup Utility 81 Navigating the Setup - Acer TravelMate 310 | User Guide - Page 90
310-e.book Page 70 Tuesday, October 27, 1998 5:17 PM System Software System Software The computer comes preloaded with the following software: u Windows 95 or later operating system u System utilities, drivers and and utility, make use of the online help provided by the software. 70 User's Guide - Acer TravelMate 310 | User Guide - Page 91
310-e.book Page 71 Tuesday, October 27, 1998 5:17 PM PhDISK PhDISK The PhDISK utility allows your computer to enter hibernation mode. Before entering hibernation mode, your computer saves all necessary information into a file or partition created by PhDISK, then shuts off power to all system - Acer TravelMate 310 | User Guide - Page 92
Power Management and Display Device screen, these changes take effect immediately. Notebook Manager consists of five sections: u Information Viewer u Boot Sequence u Password u Power Management u Display Device To select a section, click on the tab of the section you want to view. 72 User's Guide - Acer TravelMate 310 | User Guide - Page 93
310-e.book Page 73 Tuesday, October 27, 1998 5:17 PM Notebook Manager Information Viewer Information Viewer summarizes and lists information about the specifications and settings of the different components of your computer. Note: Items in this table may differ slightly from the ones onscreen. - Acer TravelMate 310 | User Guide - Page 94
310-e.book Page 74 Tuesday, October 27, 1998 5:17 PM Notebook and external The current version of the computer's BIOS is shown above the Device-Configuration table. Boot follow when your computer boots up. The Boot Sequence screen displays the bootable devices in your computer and the order - Acer TravelMate 310 | User Guide - Page 95
310-e.book Page 75 Tuesday, October 27, 1998 5:17 PM Notebook to sensitive parameters in the Notebook Manager and BIOS Utility. It also prevents unauthorized access to your computer at system startup and at resume from standby/hibernation mode. u User Password. The user - Acer TravelMate 310 | User Guide - Page 96
310-e.book Page 76 Tuesday, October 27, 1998 5:17 PM Notebook Manager Setting the Supervisor Password Note: Before you can set the User Password, you need to set the Supervisor Password. To set the Supervisor follow the same steps used to set a password but leave both fields blank. 76 User's Guide - Acer TravelMate 310 | User Guide - Page 97
310-e.book Page 77 Tuesday, October 27, 1998 5:17 PM Notebook Manager Setting the User Password To set the User Password, follow these steps: 1. Click on the Change User Password button. 2. Click on the Enable User a-z, 0-9) which you want to be your User Password. 4. Click in the Confirm Password - Acer TravelMate 310 | User Guide - Page 98
310-e.book Page 78 Tuesday, October 27, 1998 5:17 PM Notebook Manager Power Management Power Management is used to set various settings related to power management. This includes the following power-saving-related features: u Enable Heuristic Power Management. Select to enable heuristic power - Acer TravelMate 310 | User Guide - Page 99
310-e.book Page 79 Tuesday, October 27, 1998 5:17 PM Notebook Manager u Enable system resume timer. Select to allow related to display device(s), such as the display brightness/contrast levels. The items in this screen include: u Boot Display Device. Sets the default display device on boot-up. u - Acer TravelMate 310 | User Guide - Page 100
310-e.book Page 80 Tuesday, October 27, 1998 5:17 PM Notebook Manager u Brightness for LCD Panel/Contrast for LCD Panel. Click and drag to set the LCD screen brightness and contrast levels. Note: TFT active-matrix LCDs have the item, and use the cursor keys to set the desired level. 80 User's Guide - Acer TravelMate 310 | User Guide - Page 101
Setup. Please also refer to Chapter 6, Troubleshooting when a problem arises. To activate the Setup Utility, press F2 during POST (while the Travelmate logo is being displayed). Navigating the Setup Utility There are five menu options: Main, Advanced, Security, Power Saving and Exit. To navigate the - Acer TravelMate 310 | User Guide - Page 102
310-e.book Page 82 Tuesday, October 27, 1998 5:17 PM Setup Utility Main The Main screen contains parameters involving basic computer settings and hardware information. The following table describes the parameters in this screen Enter to access the Boot Device Priority submenu. 82 User's Guide - Acer TravelMate 310 | User Guide - Page 103
Shows the version number of the BIOS. Format: Vx Rx (version and release numbers) Note: The BIOS versions are important information about your computer. If you experience computer problems and need to contact technical support, this data helps our service personnel know more about your computer - Acer TravelMate 310 | User Guide - Page 104
to access this submenu. The following table describes the parameters in this screen. Settings in boldface are the default and suggested parameter settings. Parameter Description Type Sets the hard disk type. Options: Auto, User or None Cylinders Shows the number of cylinders of the hard disk - Acer TravelMate 310 | User Guide - Page 105
310-e.book Page 85 Tuesday, October 27, 1998 5:17 PM Setup Utility type to [Auto] for hassle-free and correct hard disk detection. The computer's BIOS automatically sets the parameters in this screen to their optimal values. Boot Device Priority Submenu The Boot Device Priority submenu allows you - Acer TravelMate 310 | User Guide - Page 106
310-e.book Page 86 Tuesday, October 27, 1998 5:17 PM Setup Utility Advanced The Advanced screen contains parameters that are related to computer hardware. Caution: The parameters in this screen are for advanced users only. You do not need to change the values in this screen or IRQ11 86 User's Guide - Acer TravelMate 310 | User Guide - Page 107
310-e.book Page 87 Tuesday, October 27, 1998 5:17 PM Setup Utility Parameter Parallel Port Operation mode Base I/O Address Interrupt ECP DMA Speaker Boot Display Device - Acer TravelMate 310 | User Guide - Page 108
310-e.book Page 88 Tuesday, October 27, 1998 5:17 PM Setup Utility Security The Security screen contains parameters that help safeguard and protect your computer from unauthorized use. The following table describes the parameters in this screen . Options: Disabled or Enabled 88 User's Guide - Acer TravelMate 310 | User Guide - Page 109
310-e.book Page 89 Tuesday, October 27, 1998 5:17 PM Setup Utility Parameter Description User Password is When set, this enabled, you need to enter this password to continue operation. Before setting the user password, you need to set the Supervisor Password. Options: Disabled or Enabled Set - Acer TravelMate 310 | User Guide - Page 110
310-e.book Page 90 Tuesday, October 27, 1998 5:17 PM Setup Utility The password box appears: 2. Type a password. The password may consist of up to seven characters (A-Z, a-z, 0-9). Important: Be very careful when typing your password because the characters do not appear on the screen or User) and - Acer TravelMate 310 | User Guide - Page 111
310-e.book Page 91 Tuesday, October 27, 1998 5:17 PM Setup Utility 5. Press Save Change & Exit to save the password and exit the Setup Utility. Power Saving The Power Saving screen contains parameters that are related to power-saving and power management. The following table describes the - Acer TravelMate 310 | User Guide - Page 112
the screen will go blank. Options: Enabled or Disabled Enables or disables the suspend function during a battery-low condition. When the computer is running very low on battery power, ) Enables or disables warning beeps during a battery-low condition. Options: Enabled or Disabled 92 User's Guide - Acer TravelMate 310 | User Guide - Page 113
310-e.book Page 93 Tuesday, October 27, 1998 5:17 PM Setup Utility Exit When you select the Exit menu or press Esc from any screen, the Exit options screen displays. The following table describes the parameters in this screen. Parameter Description Exit Saving Changes Saves any changes made, - Acer TravelMate 310 | User Guide - Page 114
310-e.book Page 94 Tuesday, October 27, 1998 5:17 PM Setup Utility Note: If you make any parameter changes, select Exit Saving Changes or Save Changes to store your changes. 94 User's Guide - Acer TravelMate 310 | User Guide - Page 115
310-e.book Page 95 Tuesday, October 27, 1998 5:17 PM 6 Troubleshooting This chapter instructs you on how to deal with common system problems. Read it before calling a technician if a problem occurs. Solutions to more serious problems require opening up the computer. Do not attempt to open the - Acer TravelMate 310 | User Guide - Page 116
the floppy drive and press Ctrl-AltDel to restart the system. This will diagnose your system and make necessary fixes. Nothing appears on the screen. The computer's power management system automatically blanks the screen to save power. Press any key to turn the display back on. 96 User's Guide - Acer TravelMate 310 | User Guide - Page 117
310-e.book Page 97 Tuesday, October 27, 1998 5:17 PM Frequently-Asked Questions If pressing a key does not turn set to 800x600. 640x480 resolution is not full-screen on the computer or on an external monitor. No audio from the computer. u The volume may be turns off. Chapter 6 Troubleshooting 97 - Acer TravelMate 310 | User Guide - Page 118
Utility. Go to the Advanced screen and verify that the serial port is enabled and has no conflicts with other serial devices (IrDA). See "Advanced" on page 86 for details. The printer does not work. u Make sure that the printer is connected to a power outlet and it is turned on. u Make sure the - Acer TravelMate 310 | User Guide - Page 119
310-e.book Page 99 Tuesday, October 27, 1998 5:17 PM Frequently-Asked Questions 1. Open infrared port does not work. Check the following: screen and verify that the infrared port is enabled. u Make sure both devices are IrDA-compliant. u For Windows 98 users: Windows 98 have a built-in FIR driver - Acer TravelMate 310 | User Guide - Page 120
310-e.book Page 100 Tuesday, October 27, 1998 5:17 PM Error Messages Error service center. I/O Parity Error Contact your dealer or an authorized service center. Insert system diskette and press key to reboot Insert a system disk in drive A, then press Enter. 100 User's Guide - Acer TravelMate 310 | User Guide - Page 121
Contact your dealer or an authorized service center. RAM BIOS Bad Contact your dealer or an authorized service center. RAM Parity Error Contact your dealer or an authorized service center. Real-Time Clock Error Press F2 (during POST) to reconfigure the computer. Chapter 6 Troubleshooting 101 - Acer TravelMate 310 | User Guide - Page 122
or an authorized service center. If you still encounter problems after going through the corrective measures, please contact your dealer or an authorized service center for assistance. Some problems may be solved using the BIOS Setup Utility. See "Setup Utility" on page 81. 102 User's Guide - Acer TravelMate 310 | User Guide - Page 123
310-e.book Page 103 Tuesday, October 27, 1998 5:17 PM A Specifications This appendix lists the general specifications type) u 64-bit dual memory banks u 256KB Flash ROM BIOS Data Storage u One 2.5-inch, 9.5mm hard disk Display and Audio u 16-bit stereo audio (PnP ISA) u 3-dimensional sound u One - Acer TravelMate 310 | User Guide - Page 124
310-e.book Page 104 Tuesday, October 27, 1998 5:17 PM Specifications u Sound Blaster Pro- and Windows Sound Systemcompatible u Separate audio ports for line-out and microphone-in devices mm (9.29 x 6.89 x 1.42 in) Temperature u Operating: 10°C ~ 35°C u Non-operating: -20°C ~ +60°C 104 User's Guide - Acer TravelMate 310 | User Guide - Page 125
310-e.book Page 105 Tuesday, October 27, 1998 5:17 PM Specifications Humidity (non-condensing) u Operating: 20% ~ 80% RH u Non-operating: 20% ~ 80% RH System u Windows 95 or higher operating system Battery Pack u 16.2-WattHour Lithium-Ion battery pack u Smart battery management technology u 2~3-hour - Acer TravelMate 310 | User Guide - Page 126
310-e.book Page 106 Tuesday, October 27, 1998 5:17 PM 106 User's Guide - Acer TravelMate 310 | User Guide - Page 127
73 microphone 6 moving around 63 on indicator 6 power management 39 security 28 setting up a home office 65 taking home 64 traveling internationally 67 traveling on local trips 66 troubleshooting 95 turning on xv connections AC adapter xv audio 52 computer xiv file transfer cable 58 floppy drive - Acer TravelMate 310 | User Guide - Page 128
82 display auto-dim feature 39 hot keys 12 opening and closing 4 performance 4 power management 4, 39 setting boot device in Notebook Manager 79 setting in Notebook Manager 79 simultaneous 4 switching device in Notebook Manager 79 troubleshooting 96, 97 E error messages 100 External 49 F FAQ. See - Acer TravelMate 310 | User Guide - Page 129
19 right 22 power managing in Notebook Manager 78 managing in Setup Utility 91 turning on xv power management advanced 43 peripheral standby modes 40 power management modes display standby mode 39 hard disk standby 40 hibernation mode 41 standby modes 40 printer connecting 51 troubleshooting 98 109 - Acer TravelMate 310 | User Guide - Page 130
menu 93 Hard Disk 0 submenu 84 Main menu 82 navigating 81 Power Saving menu 91 Security menu 88 software bundled 70 speakers hot keys 12 T time setting in Setup Utility 82 U utility BIOS Setup 81-94 Notebook Manager 72-80 PhDISK 71 W warranty International Traveler's Warranty 110 User's Guide
-
 1
1 -
 2
2 -
 3
3 -
 4
4 -
 5
5 -
 6
6 -
 7
7 -
8
-
9
-
10
-
11
-
12
-
13
-
14
-
15
-
16
-
17
-
18
-
19
-
20
-
21
-
22
-
23
-
24
-
25
-
26
-
27
-
28
-
29
-
30
-
31
-
32
-
33
-
34
-
35
-
36
-
37
-
38
-
39
-
40
-
41
-
42
-
43
-
44
-
45
-
46
-
47
-
48
-
49
-
50
-
51
-
52
-
53
-
54
-
55
-
56
-
57
-
58
-
59
-
60
-
61
-
62
-
63
-
64
-
65
-
66
-
67
-
68
-
69
-
70
-
71
-
72
-
73
-
74
-
75
-
76
-
77
-
78
-
79
-
80
-
81
-
82
-
83
-
84
-
85
-
86
-
87
-
88
-
89
-
90
-
91
-
92
-
93
-
94
-
95
-
96
-
97
-
98
-
99
-
100
-
101
-
102
-
103
-
104
-
105
-
106
-
107
-
108
-
109
-
110
-
111
-
112
-
113
-
114
-
115
-
116
-
117
-
118
-
119
-
120
-
121
-
122
-
123
-
124
-
125
-
126
-
127
-
128
-
129
-
130
 |
 |

Copyright © 1998 Acer Incorporated
All Rights Reserved — Printed in Taiwan
Changes may be made periodically to the information in this
publication.
Such changes will be incorporated in new editions of
this manual.
Record the serial number, purchase date, and model number in the
space provided below.
The serial number and model number are
recorded on the label affixed to the case.
All correspondence
concerning your unit should include the serial number, model
number, and date of purchase.
No part of this publication may be reproduced, stored in a retrieval
system, or transmitted, in any form or by any means, electronic,
mechanical, photocopy, recording, or otherwise, without the prior
written permission of Acer Incorporated.
TravelMate Notebook Computer
Model___________Serial No.____________Purchase Date_______________
TravelMate is a trademark and a product of Acer Inc., developed with Texas
Instruments Inc. All other trademarks and registered trademarks are the
property of their respective companies. Microsoft, MS-DOS, and Windows are
registered trademarks of Microsoft Corporation.
TravelMate 310 Series Notebook Computer User’s Guide
Part No. 49.42B01.011
Original Issue: June 1998
310-e.book
Page i
Tuesday, October 27, 1998
5:17 PM